Skip to content
  • There are no suggestions because the search field is empty.

How to Create Custom Fields

Take control of the details you track by creating custom fields for anything that doesn't fit Sortly's default fields, such as a serial number, supplier, or expiration date, on your items, your folders, or both. This article walks you through plan limits, the types of custom fields, how to create a custom field on web and mobile, and how to edit or delete one.

Custom field limits by plan

To see how many custom fields each plan includes, visit the Sortly pricing page.


Types of custom fields

You can create up to 12 types of custom fields:

Field type
Details
Small Text Box
Letters and numbers, up to 190 characters, such as a Customer ID or product SKU.
Large Text Box
Letters and numbers, up to 4000 characters, such as status updates, instructions, or notes. The content in this field is not searchable in the app.
Round Number
A number without decimals, such as a quantity or count.
Decimal Number
A number with decimal points, such as a price or a measurement like volume, area, or length.
Checkbox
A status you can select or leave empty, such as damaged, repaired, ordered, or sold.
Dropdown
A list with up to 250 options to choose from.
Date
A date, such as a sold date, expiration date, or purchase date. You can also add date-based reminder alerts to this field. Read Date-based alerts to learn how. Alerts are available on Ultra, Premium, and Enterprise plans.
Scanner
Adds an extra barcode to an item. You can scan 1D and 2D barcodes and QR codes.
Web Link
A link to a website, up to 300 characters.
Phone Number
A phone number. On web and mobile, you can select it to place a call.
Email
An email address for the item.
File Attachment
Attach Word, Excel, or PDF files to your items or folders, up to 3 files. This field is available on Ultra, Premium, and Enterprise plans.

Create a custom field

Your custom field then appears on all items, all folders, or both, depending on what you selected when you created it.

On web

Working from a computer? Create the field in the web app, under Custom Fields in Settings.
1
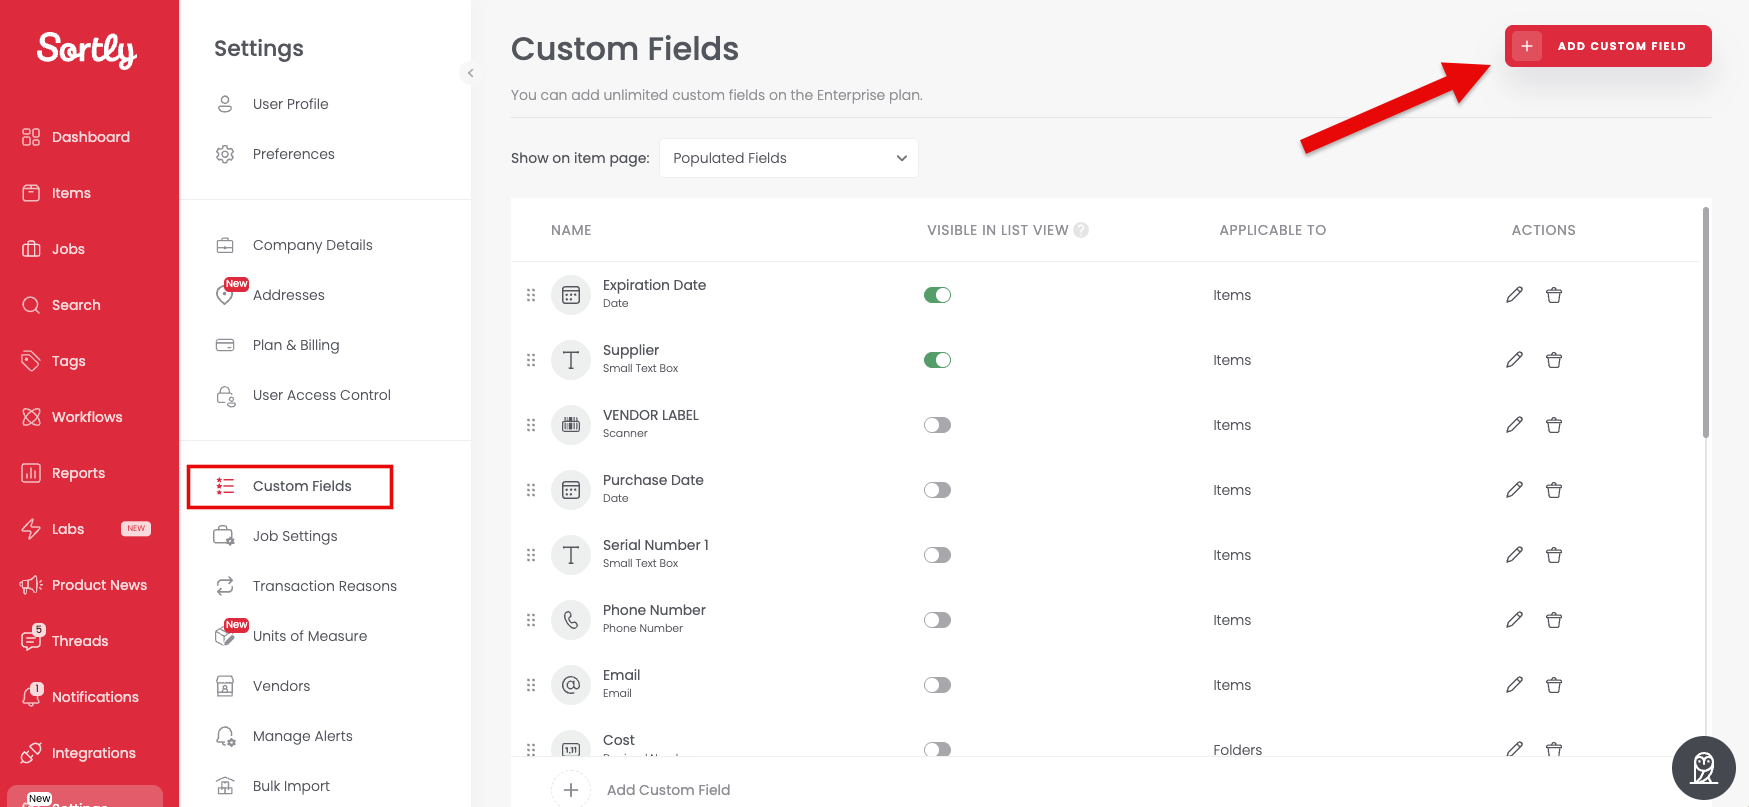
In the left menu, select Settings, then select Custom Fields.
Custom Fields settings page with the Custom Fields menu item and the Add Custom Field button marked
2
At the top right, select Add Custom Field.
3
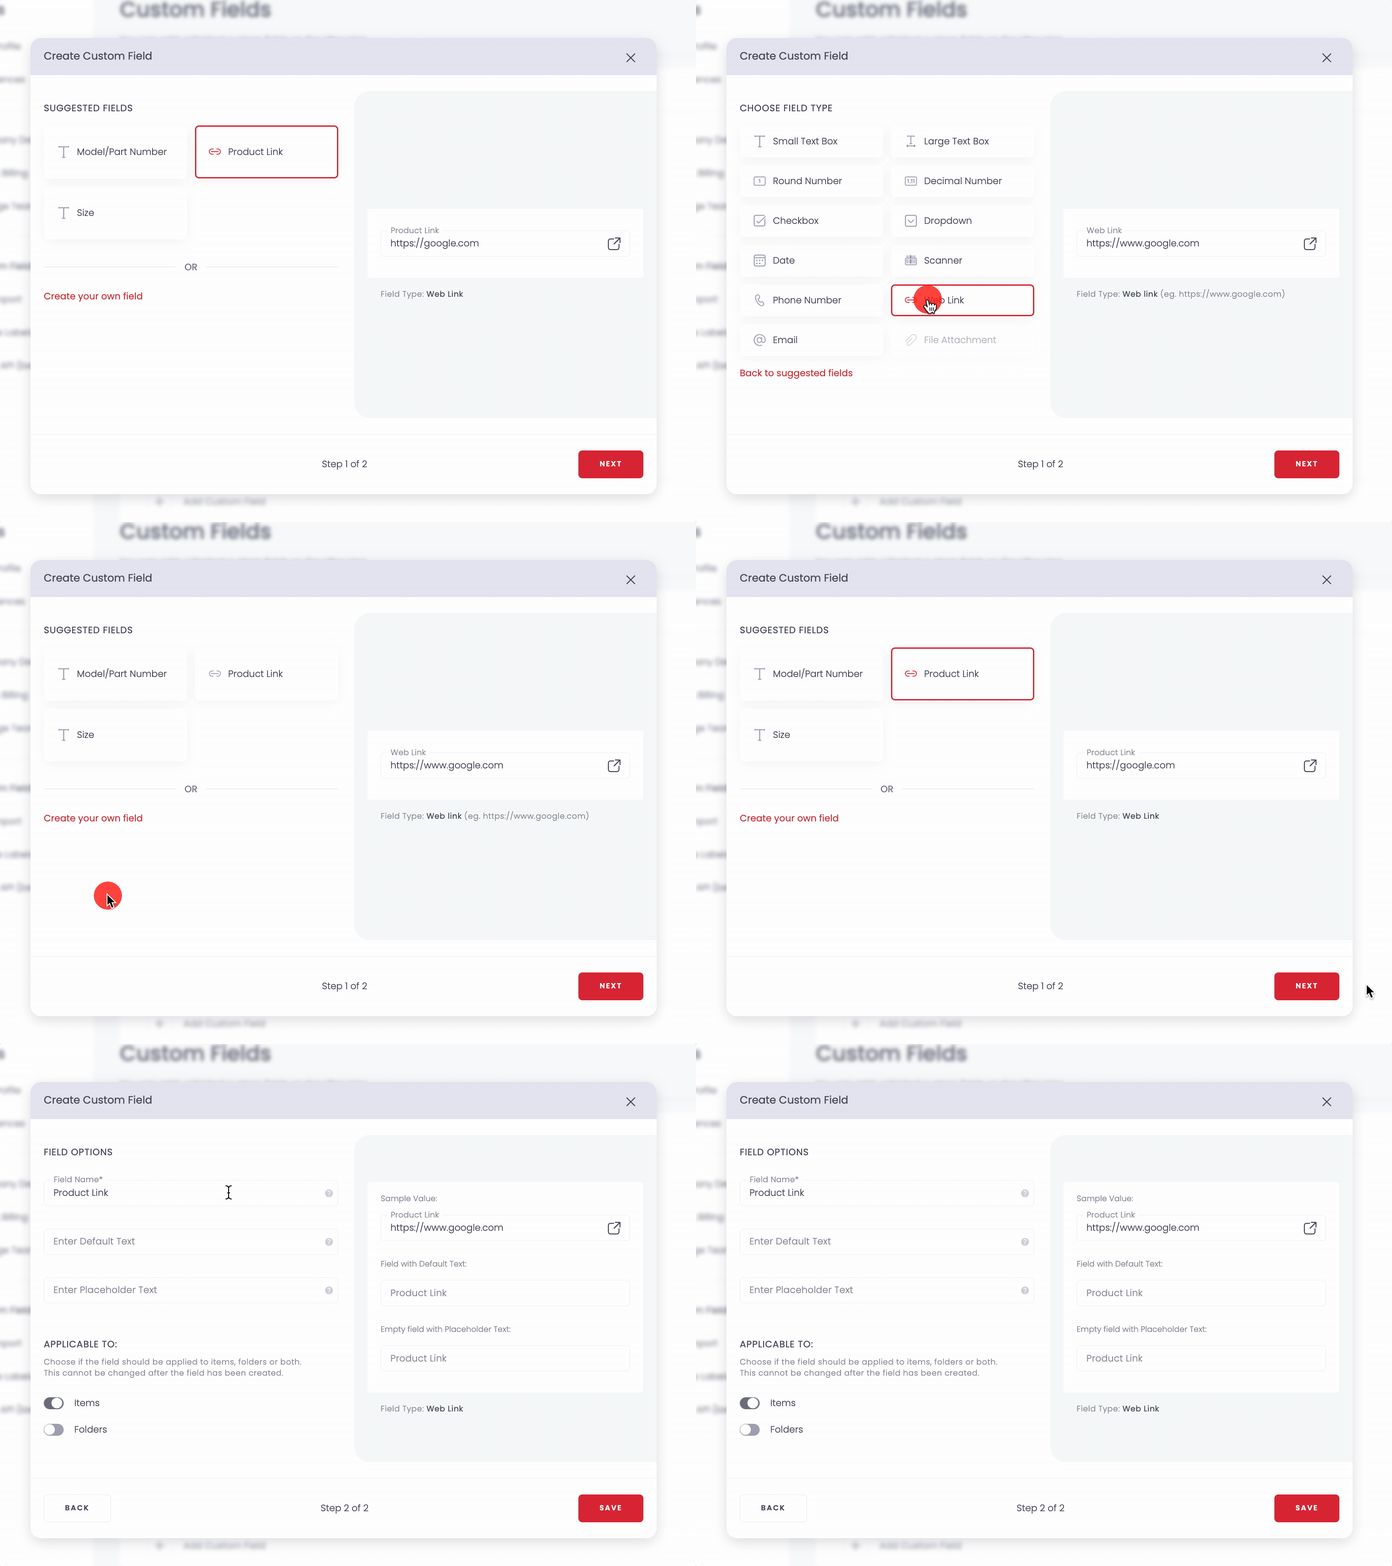
Under Suggested Fields, select a suggested field, or select Create your own field and choose a field type.
Choosing a suggested field or a custom field type in the Create Custom Field window
4
Select Next.
5
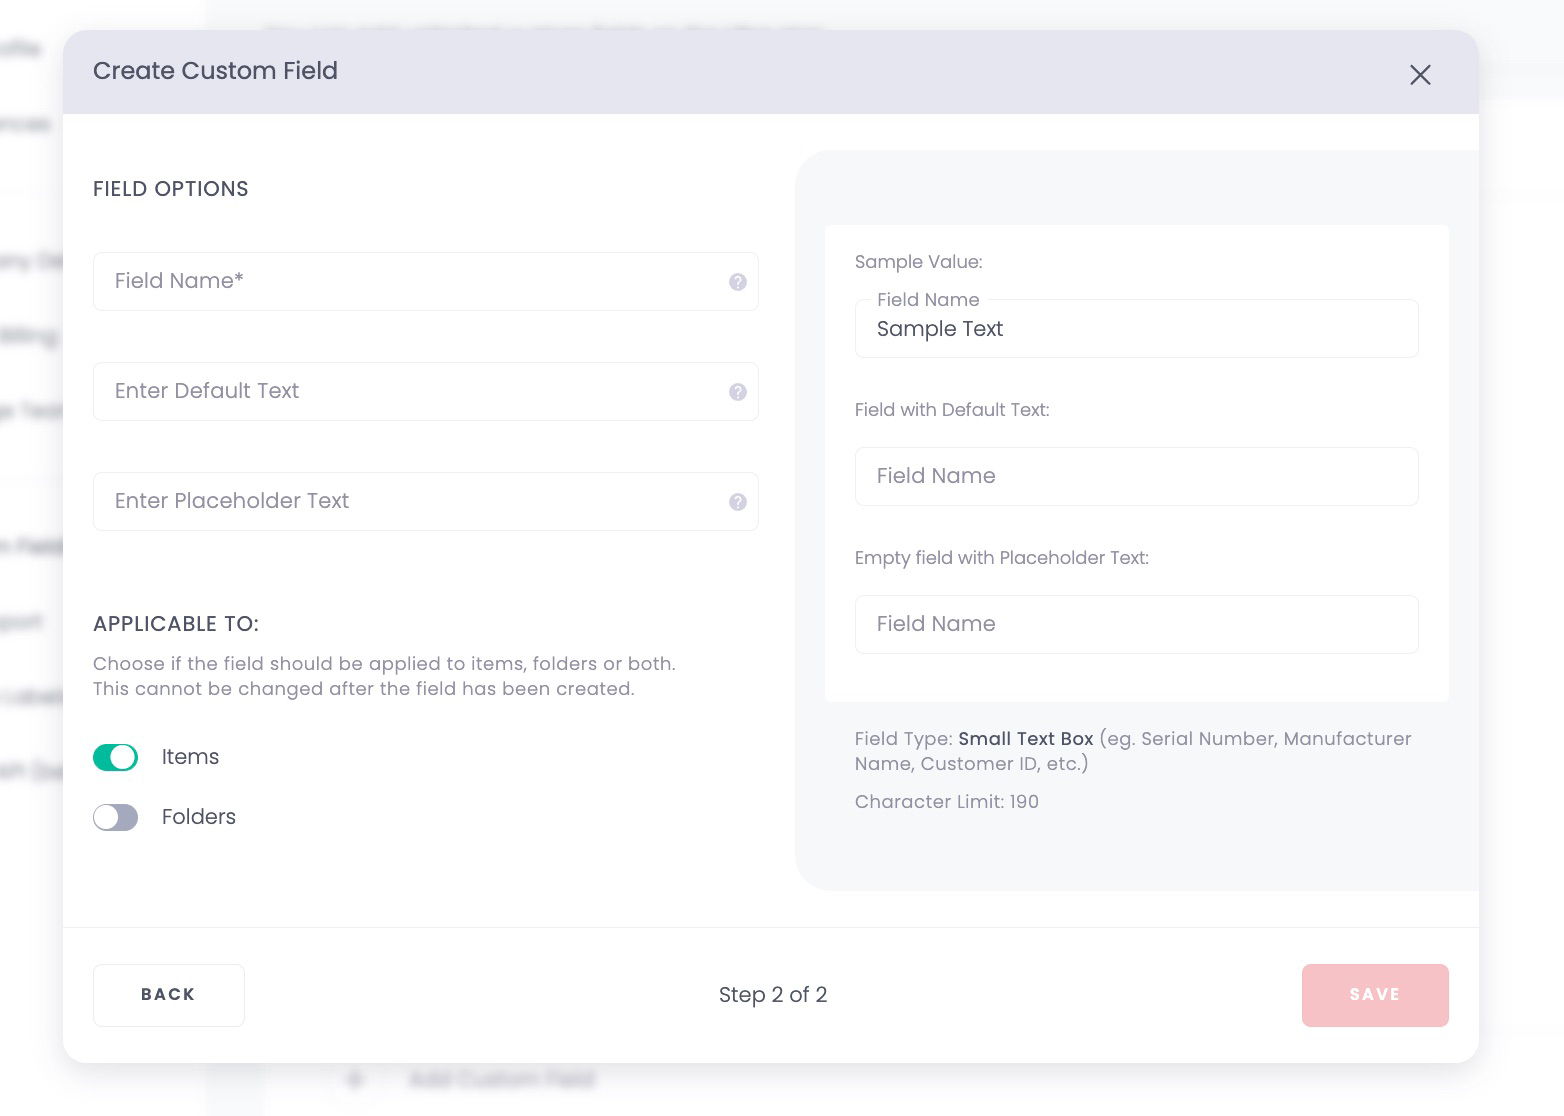
Enter a name in Field Name.
Field Options step of the Create Custom Field window
6
Optional: in Enter Default Text, enter the text that appears in this field on every item or folder. Leave it blank if you don't want any text to appear.
7
Optional: in Enter Placeholder Text, enter a hint that shows while the field is empty, to tell people what to enter.
8
Under Applicable To, select Items, Folders, or both. You can't change this after you create the field.
9
Select Save.

On mobile

Prefer to set it up from your phone? Create the field in the mobile app.
1
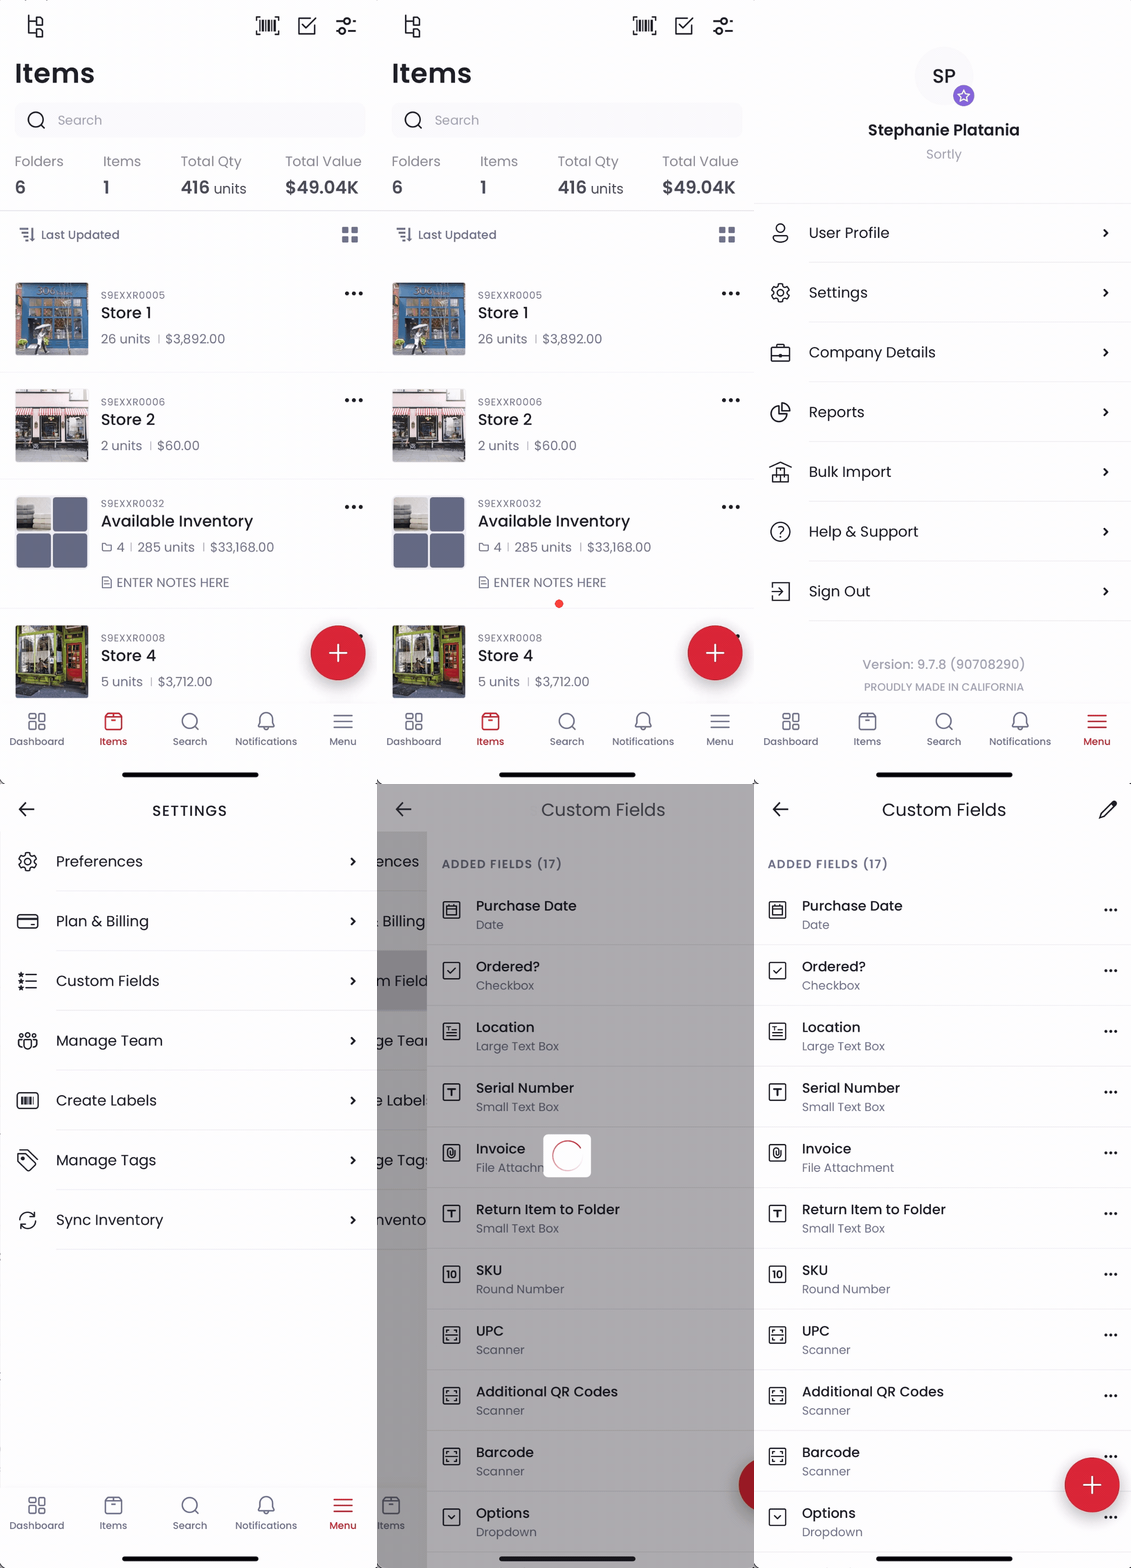
Tap Menu, then Settings, then Custom Fields.
Opening Custom Fields from Menu and Settings in the mobile app
2
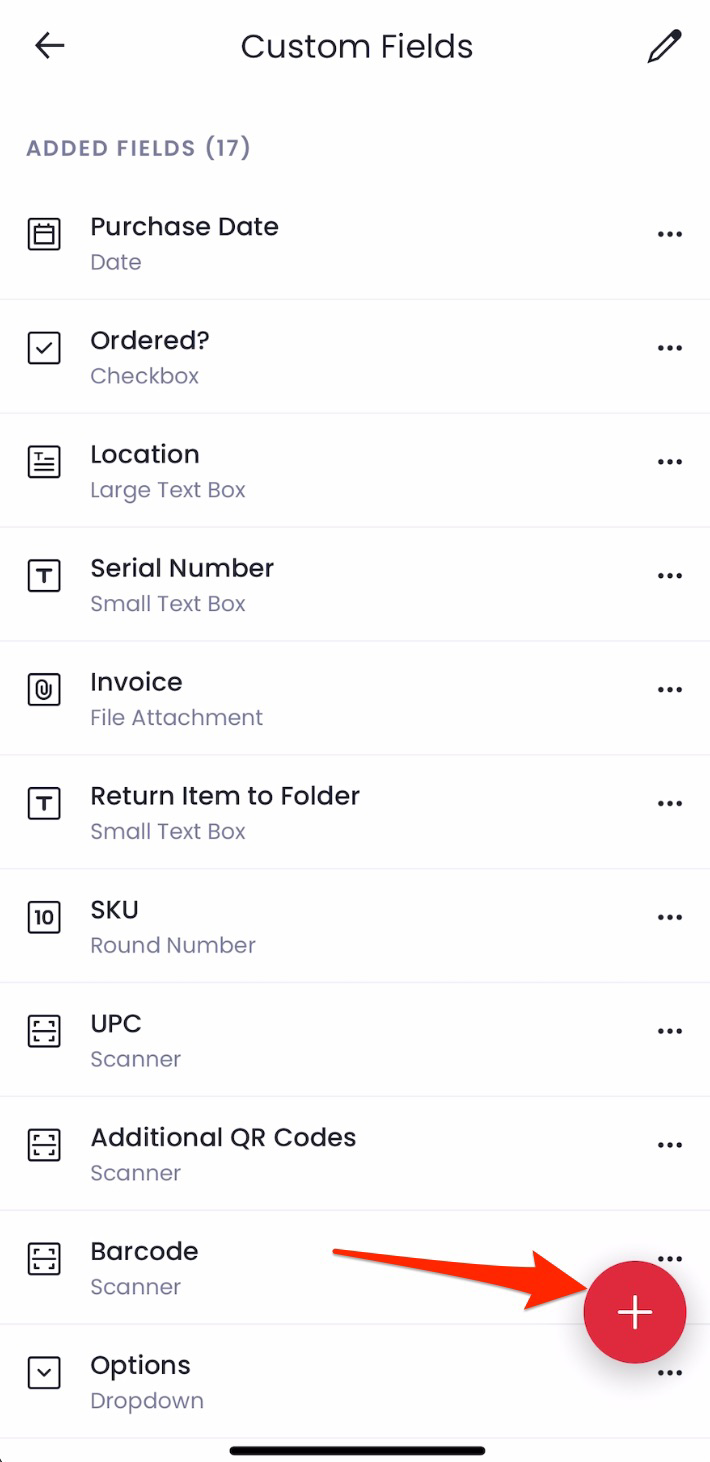
Tap the plus icon at the bottom right.
Custom Fields screen with the plus icon marked
3
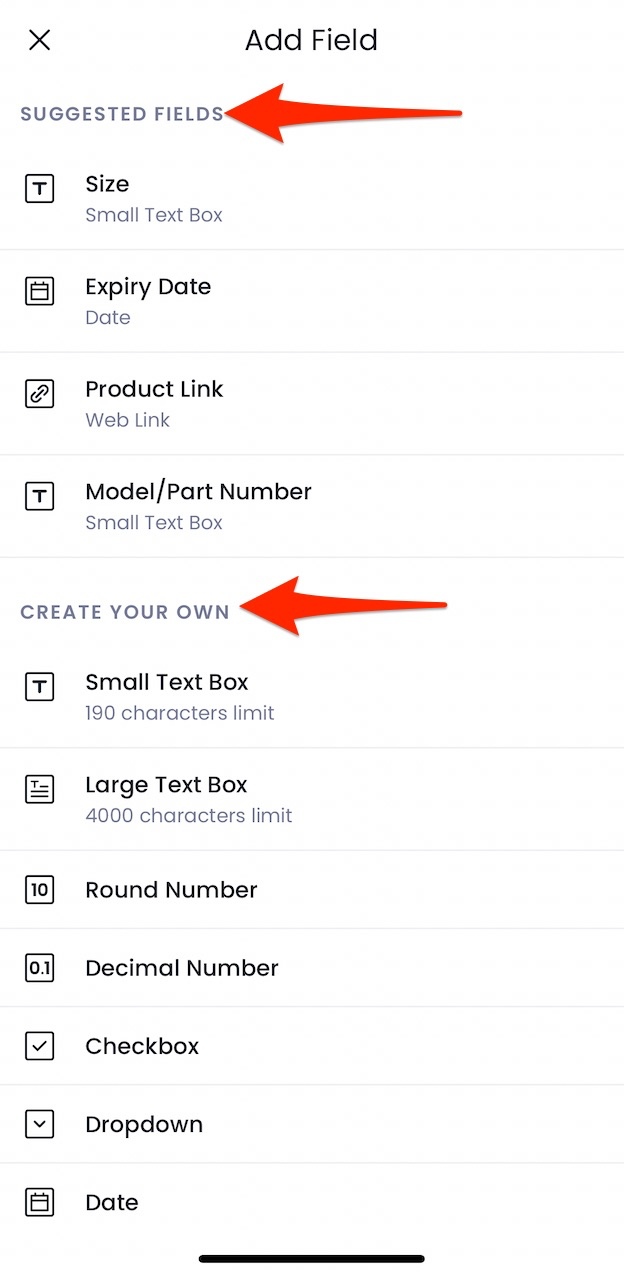
On the Add Field screen, select a field under Suggested Fields, or choose a field type under Create Your Own.
Add Field screen with Suggested Fields and Create Your Own marked
4
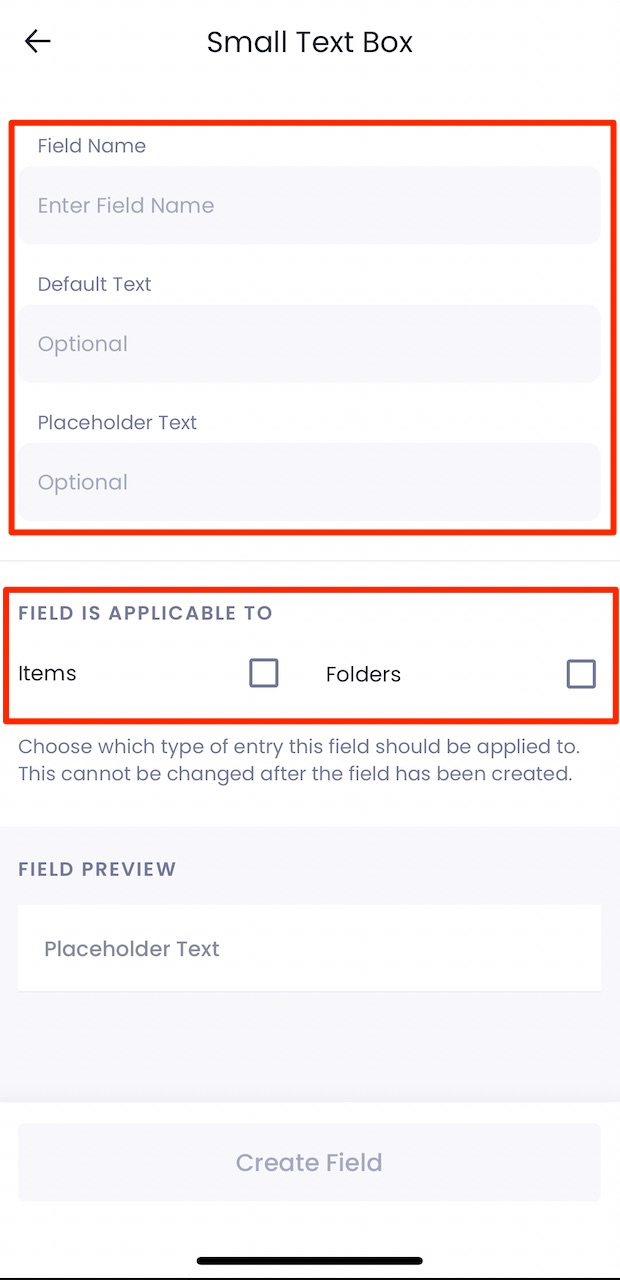
Enter a name in Field Name.
5
Optional: in Default Text, enter the text that appears in this field on every item or folder. Leave it blank if you don't want any text to appear.
6
Optional: in Placeholder Text, enter a hint that shows while the field is empty, to tell people what to enter.
7
Under Field is applicable to, select Items, Folders, or both. You can't change this after you create the field.
Field name, default text, placeholder text, and applicable to options on mobile
8
Tap Create Field.

Edit or delete a custom field

On web

Need to update a field with new information or placeholder text? Change it from the Custom Fields page.
1
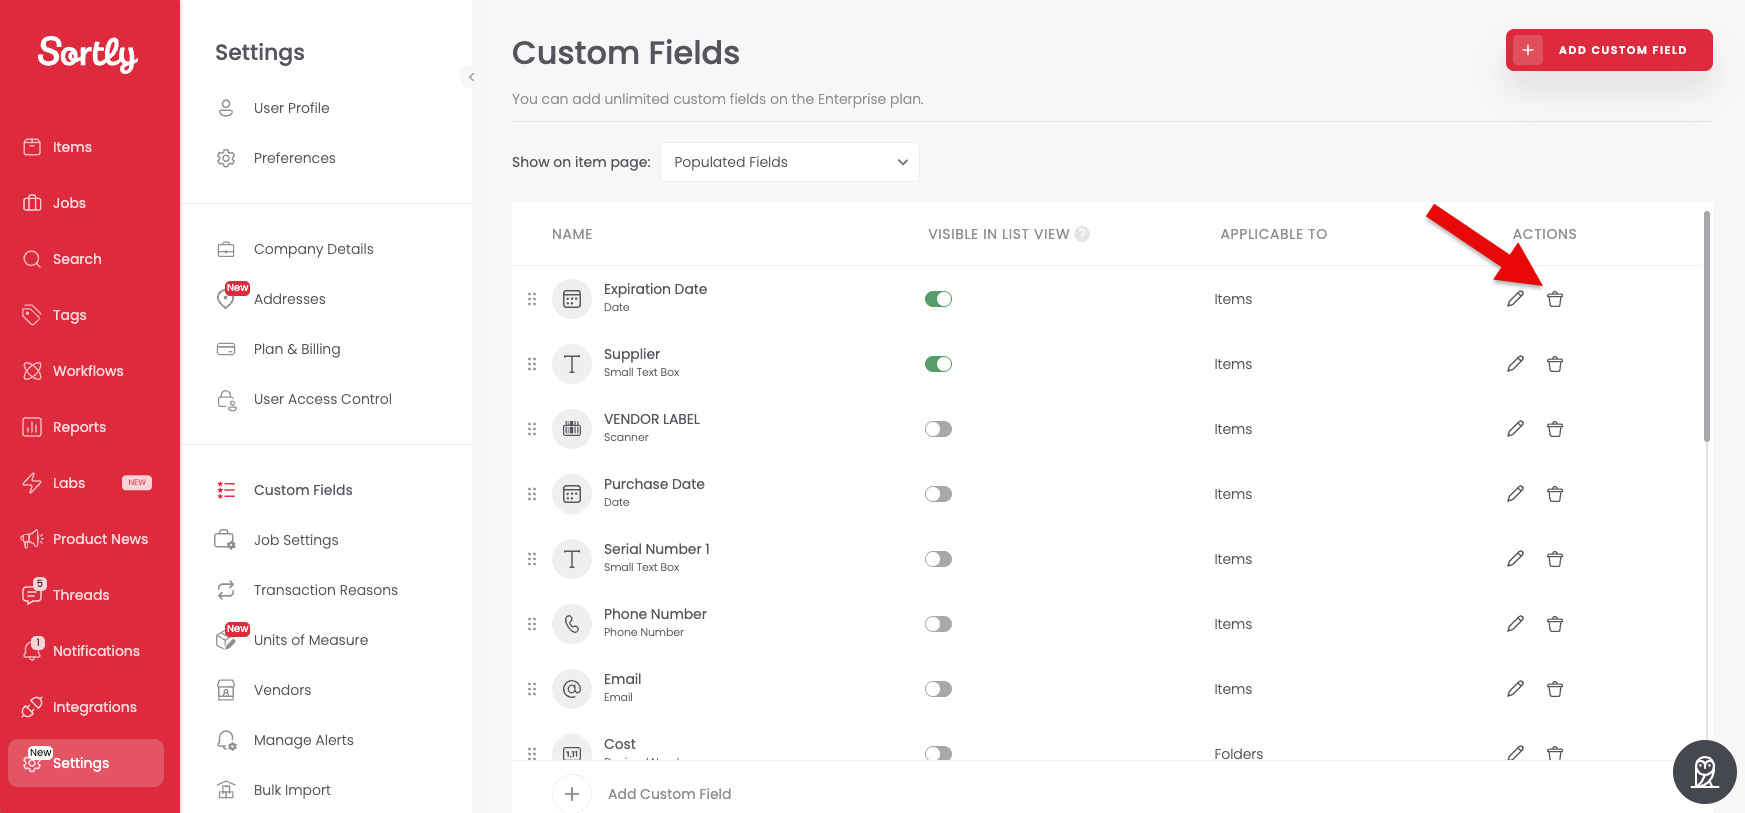
Go to Settings > Custom Fields and hover over the custom field you want to change.
2
In the Actions column, select the pencil icon to edit or the trash can icon to delete.
Pencil and trash can icons in the Actions column on the Custom Fields page

When you edit a field, you can only change the field name, default text, and placeholder text.
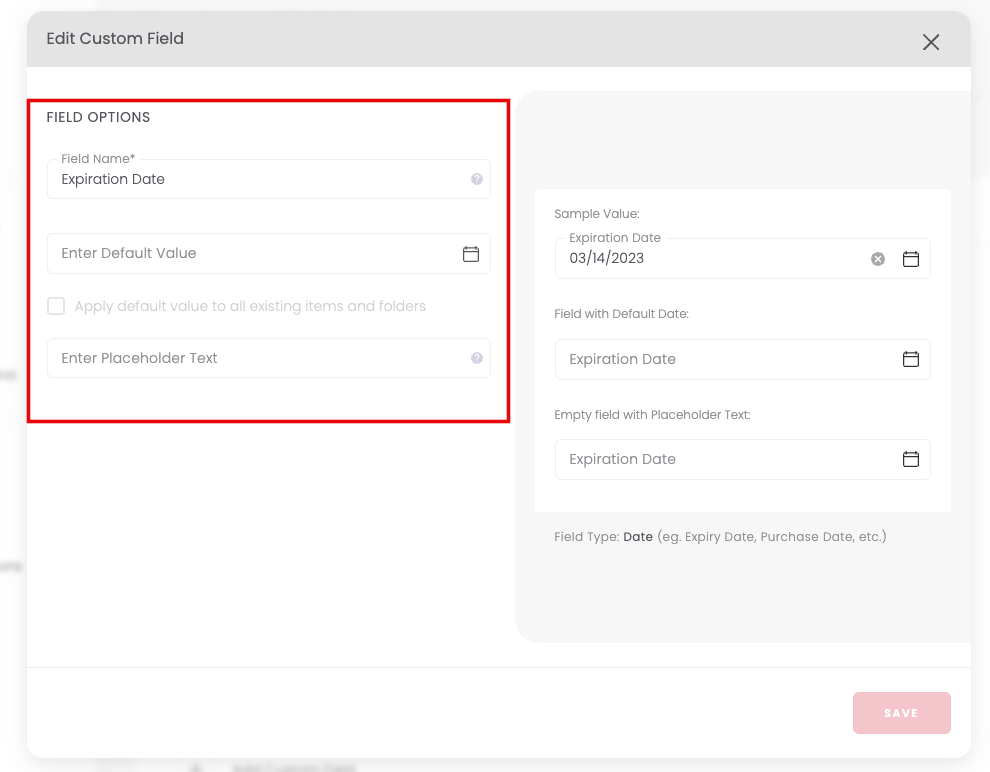
Editable details in the Edit Custom Field window

To choose which custom fields show in the item list, select the toggle in the Visible in List View column. Sortly shows custom fields as the first three details on the right of each item. If an item has notes, it shows only the first two custom fields.
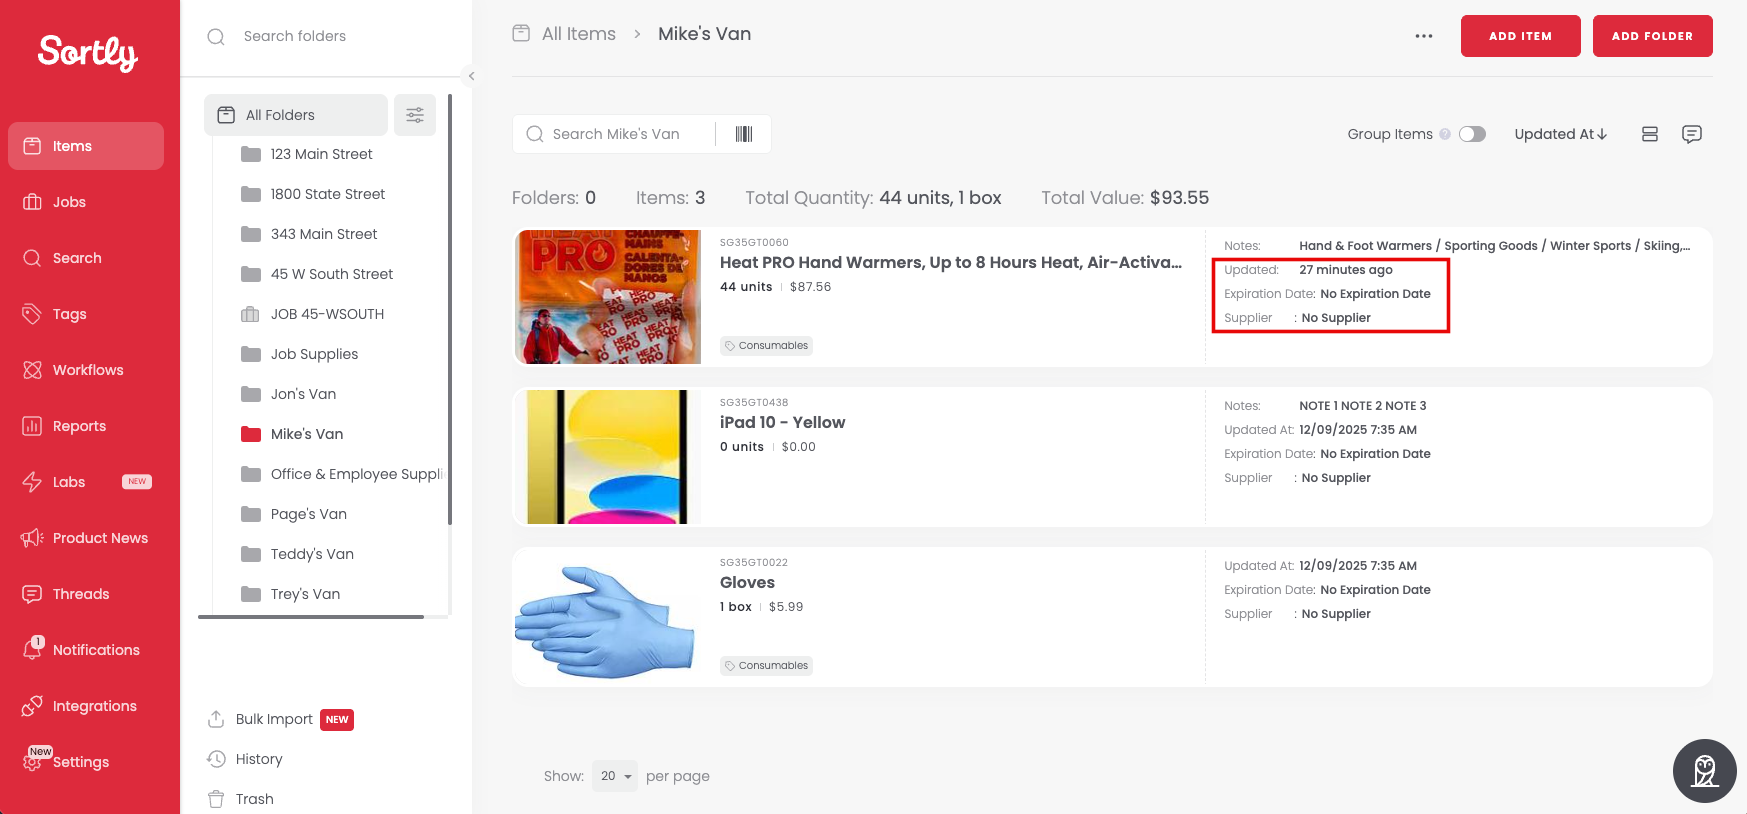
Custom fields shown on the right of each item in the item list

On mobile

Need to update a field with new information or placeholder text? Change it from Custom Fields in Settings.
1
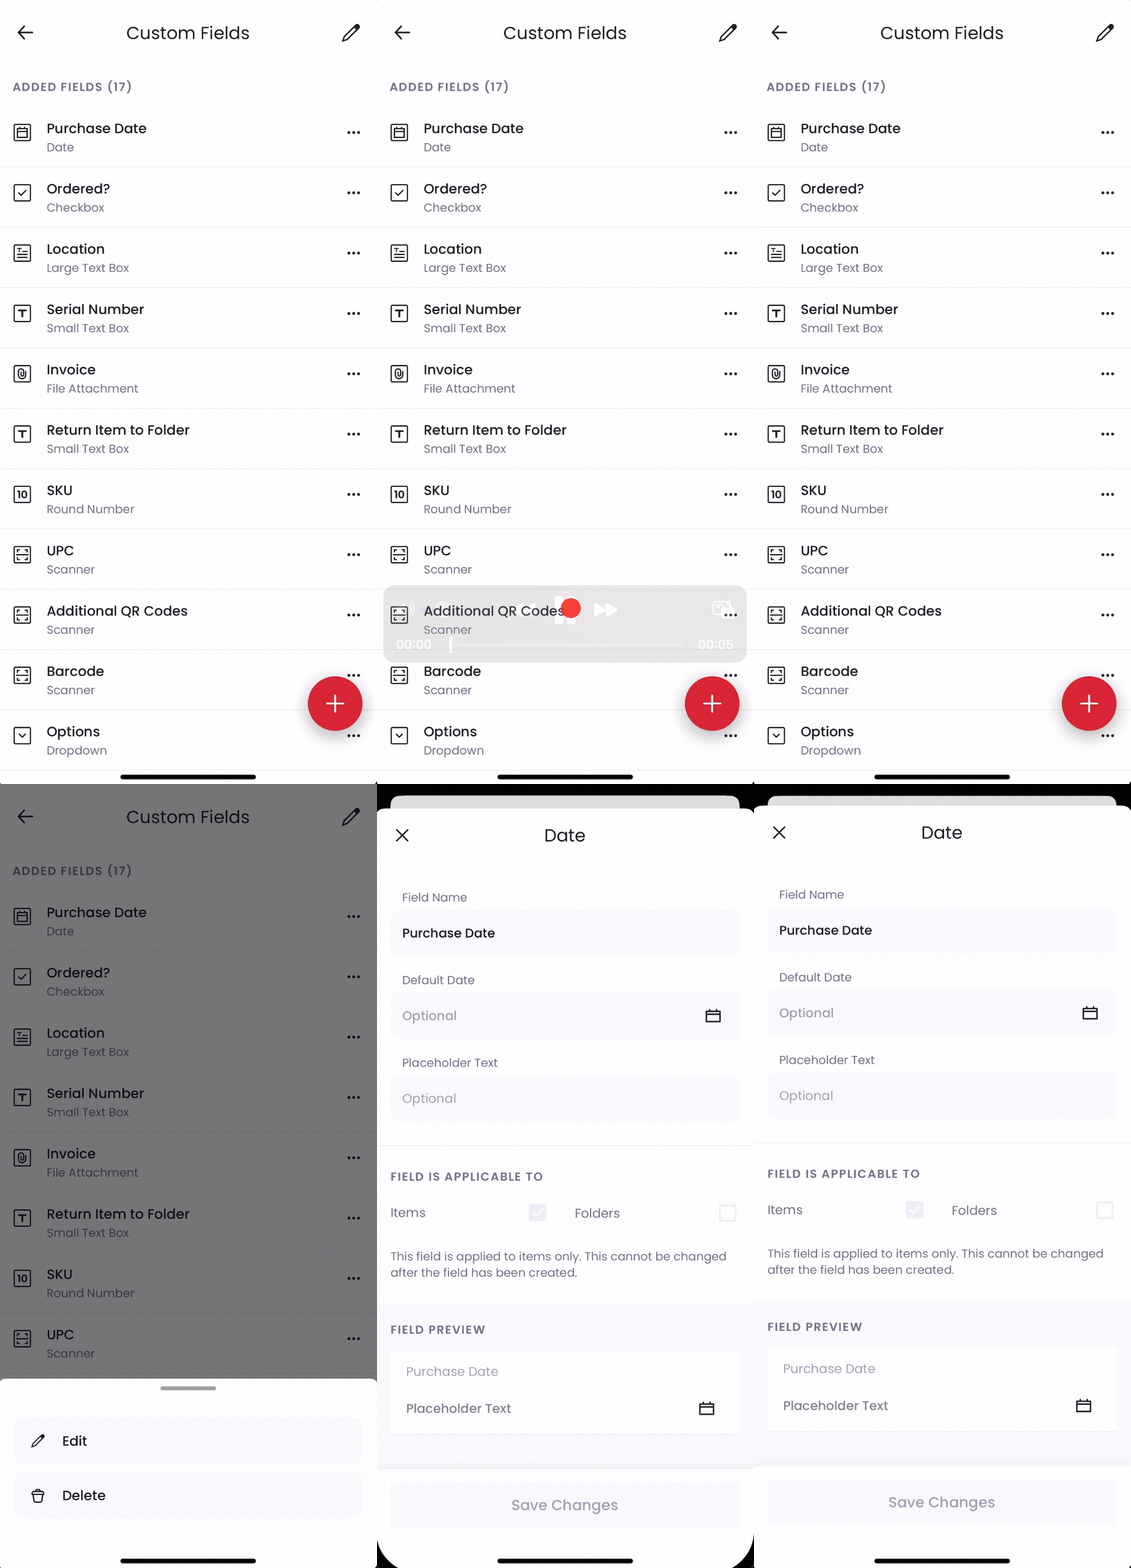
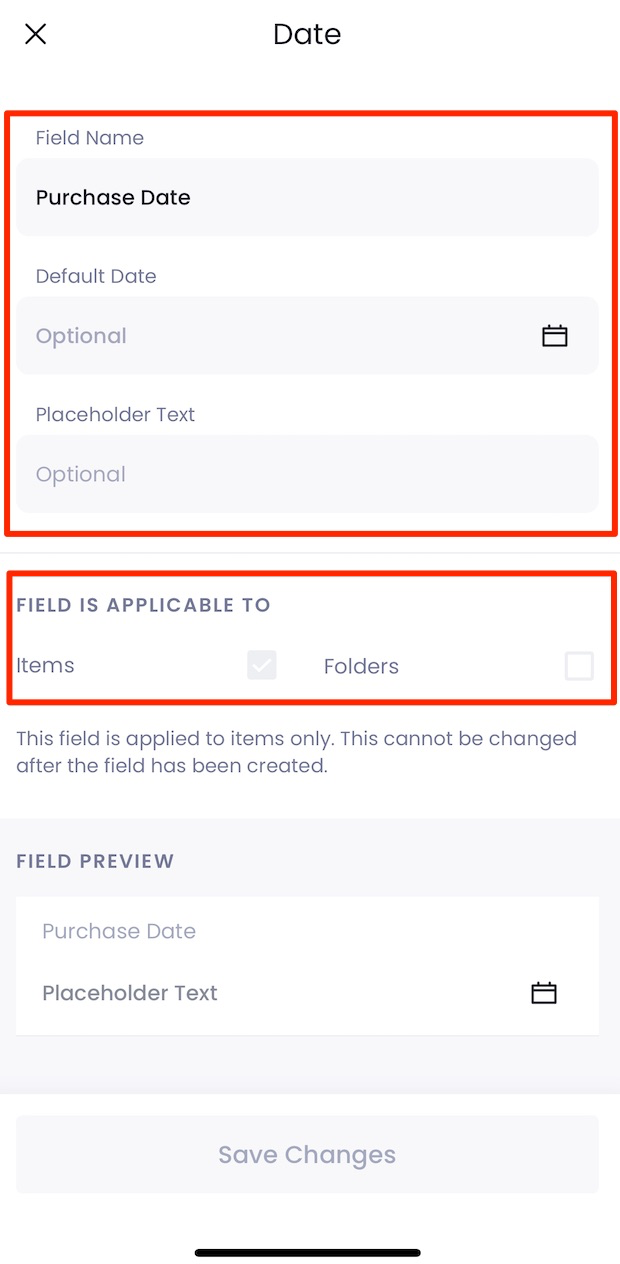
Go to Menu > Settings > Custom Fields, tap the three dots next to the field you want to edit, and tap Edit.
Opening the Edit option for a custom field on mobile
2
Update the details you want to change. You can only change the field name, default text, and placeholder text.
Editable details of a custom field on mobile

To reorder your custom fields, tap the pencil icon at the top right, then drag and drop the fields into the order you want.
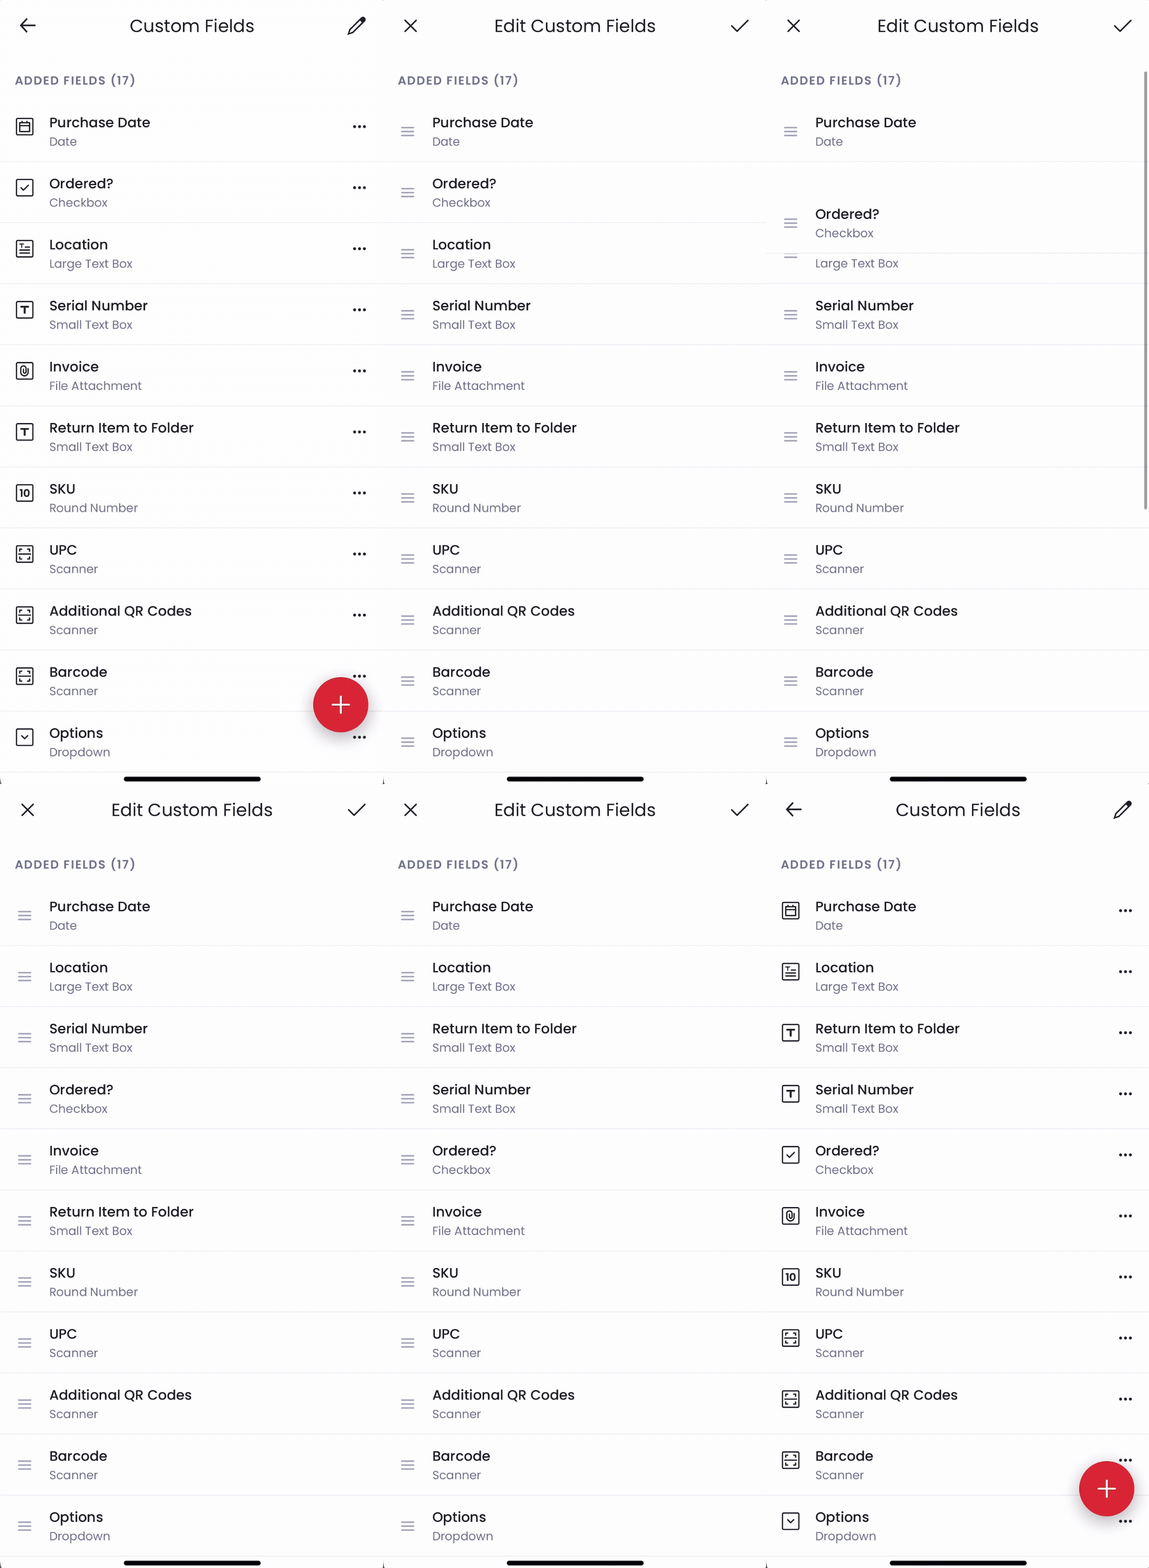
Dragging custom fields into a new order on mobile

To delete a custom field:

1
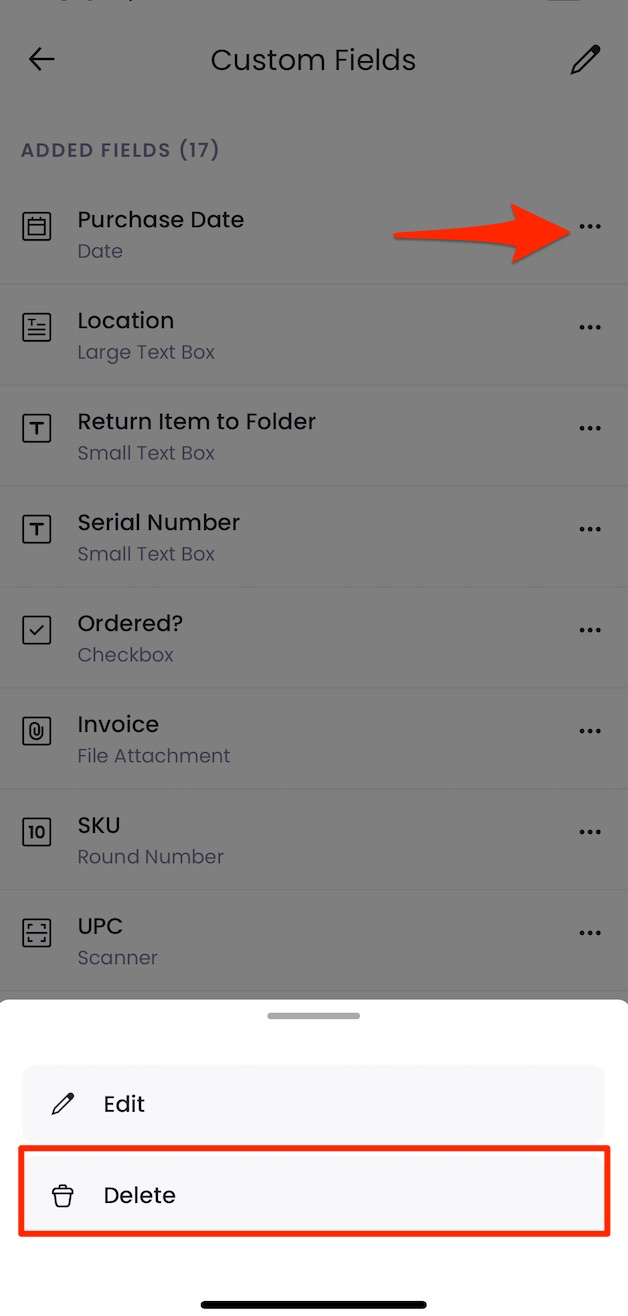
Tap the three dots next to the field, then tap Delete.
Delete option for a custom field on mobile

Frequently Asked Questions

Can I edit the type of custom field?
You can't change the type of a custom field, or change whether it applies to items, folders, or both, after you create it. If you need to add a custom field to items or folders later, create a new custom field and select both items and folders at that time.
I deleted a custom field. How can I get it back?
At this time, once a custom field is deleted, it can't be recovered.
Are there limits on custom fields?

Each custom field type has its own limits and options.

  • Small Text Box fields allow up to 190 characters for the value, default value, field name, and placeholder text.
  • Large Text Box fields hold up to 4,000 characters, but the field name and placeholder text are still capped at 190 characters.
  • Round Number fields support values up to 2,147,483,647.
  • Decimal Number fields allow values up to 68,719,476,735.99999, with a 190-character limit for the field name and placeholder text, including units.
  • Checkbox and Date fields each have a 190-character limit for the field name and placeholder text.
  • Web Link fields support up to 300 characters for the value.
  • Phone Number and Email fields are limited to 190 characters for all entries.
  • Dropdown and Scanner fields also have a limit of 190 characters for all text entries.
  • File Attachment fields have a 190-character limit for the field name and text.