
Item variants let you group related versions of the same item, like different sizes or colors, under one parent item, so you don't end up with a separate entry for each one.
In this article
Adding Item Variants
Follow the steps below to set up variants within your new items. Keep in mind that once these variants have been created, new variants cannot be retroactively added to the same item.
To begin, go to the Items tab, click Add New at the top right of the page, then select Add Item.
-
1Click Add Item
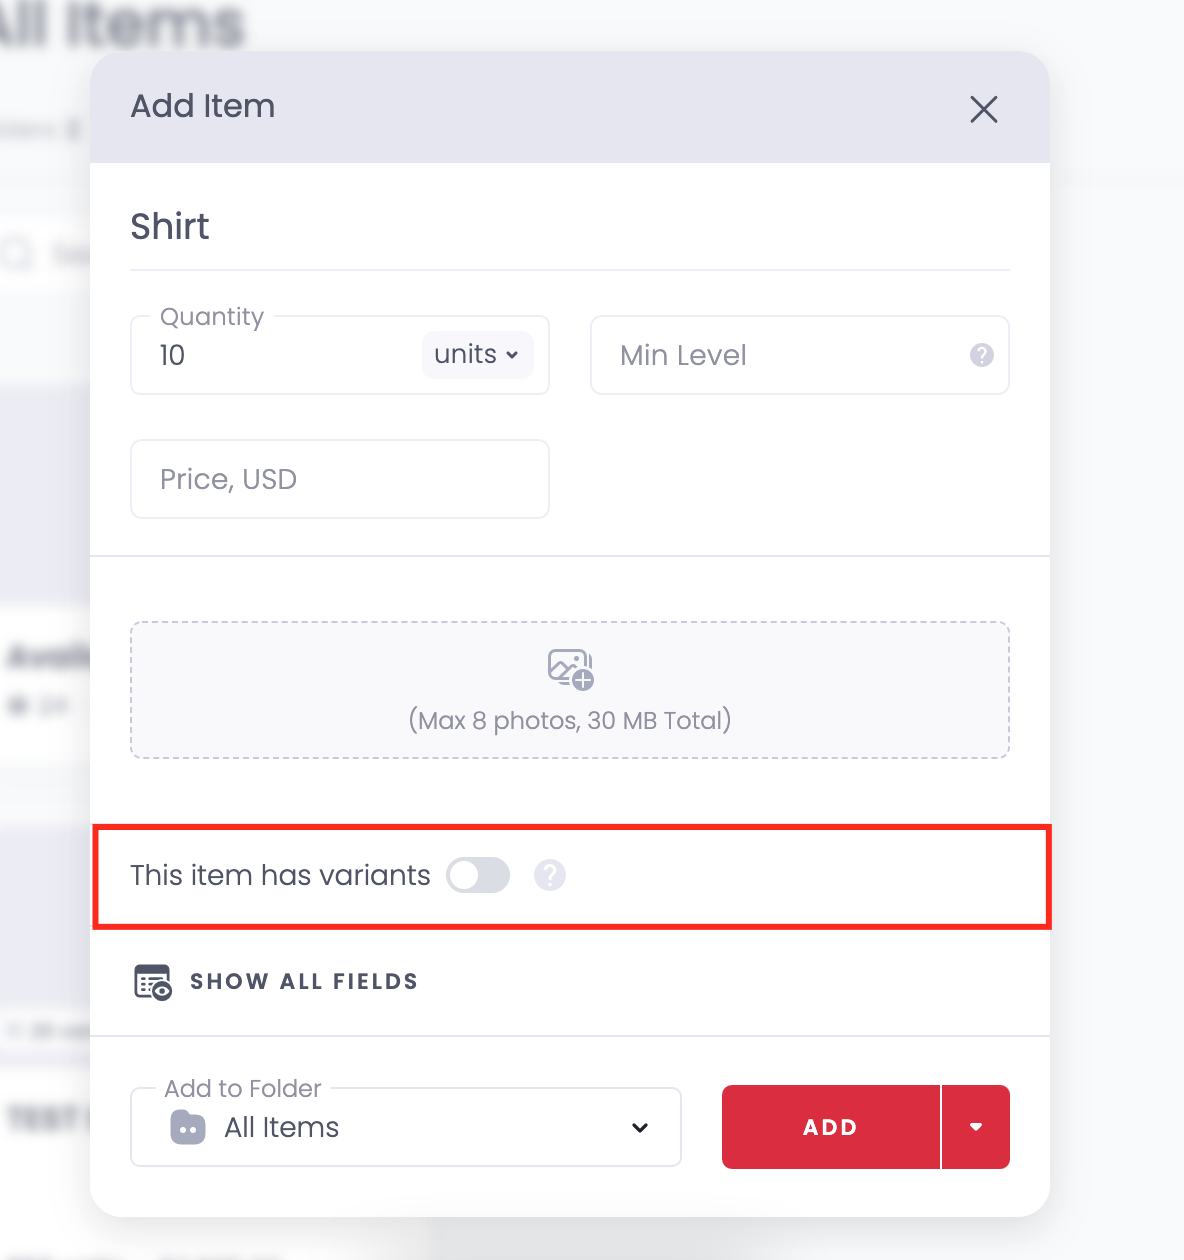
This opens a pop-up showing all the available fields and options. In this example, we'll use a T-shirt to break down how item variants work in Sortly.
-
2Add a name and quantity
All other fields are optional, but you'll see an option to toggle on This item has variants.
-
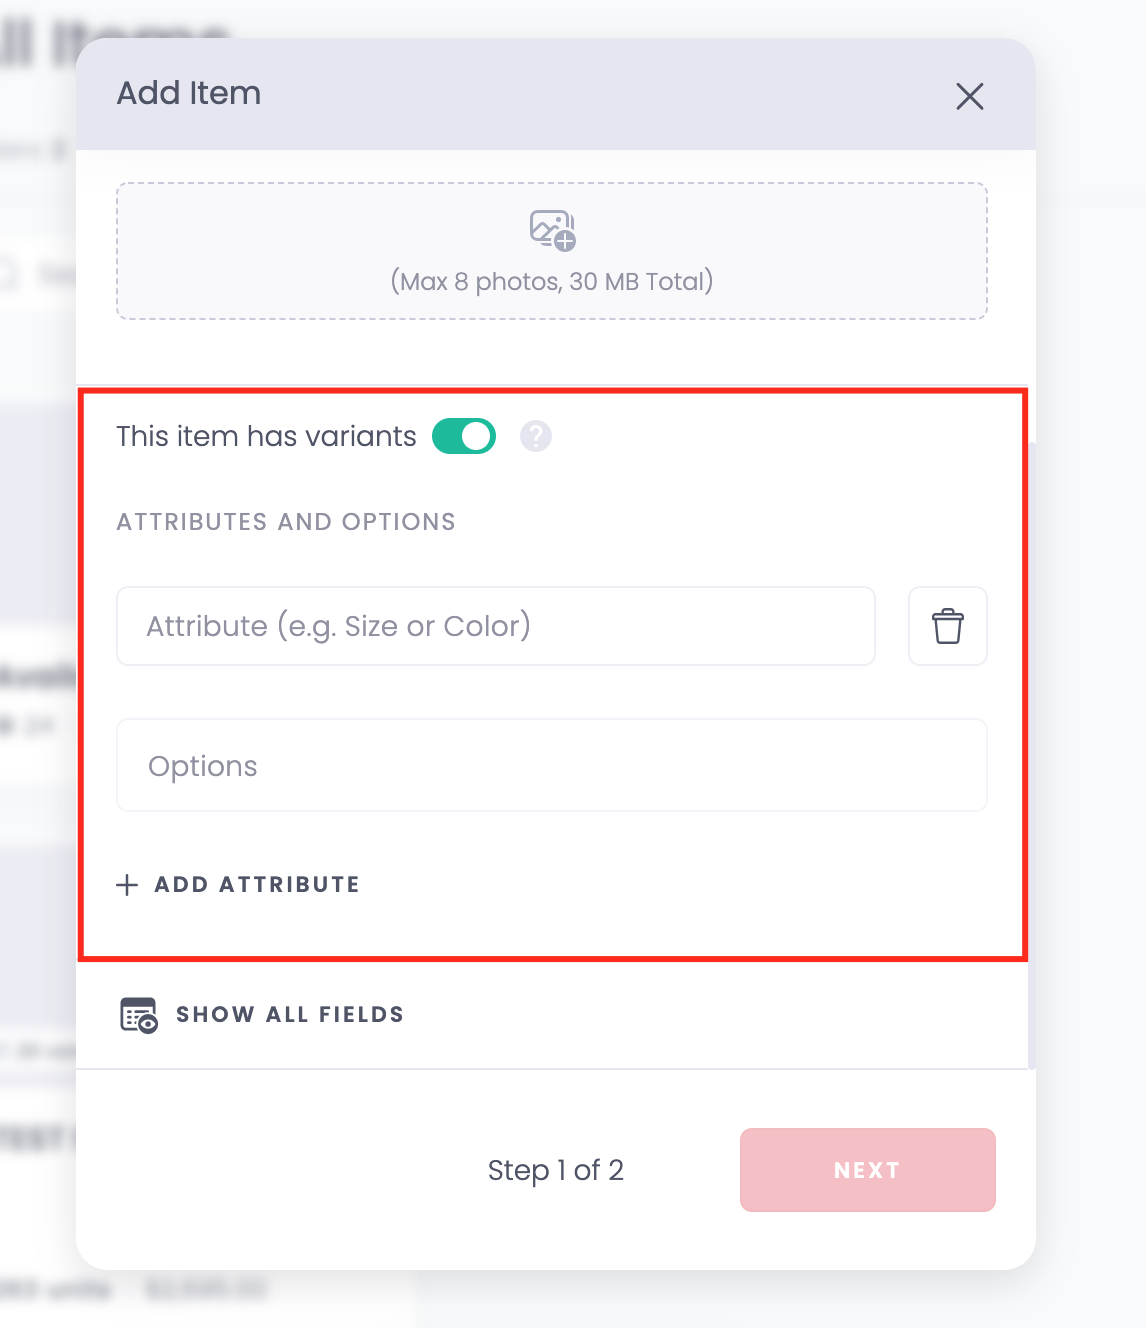
3Turn variants on
If your item has variants, toggle this setting on. This enables the following options:
-
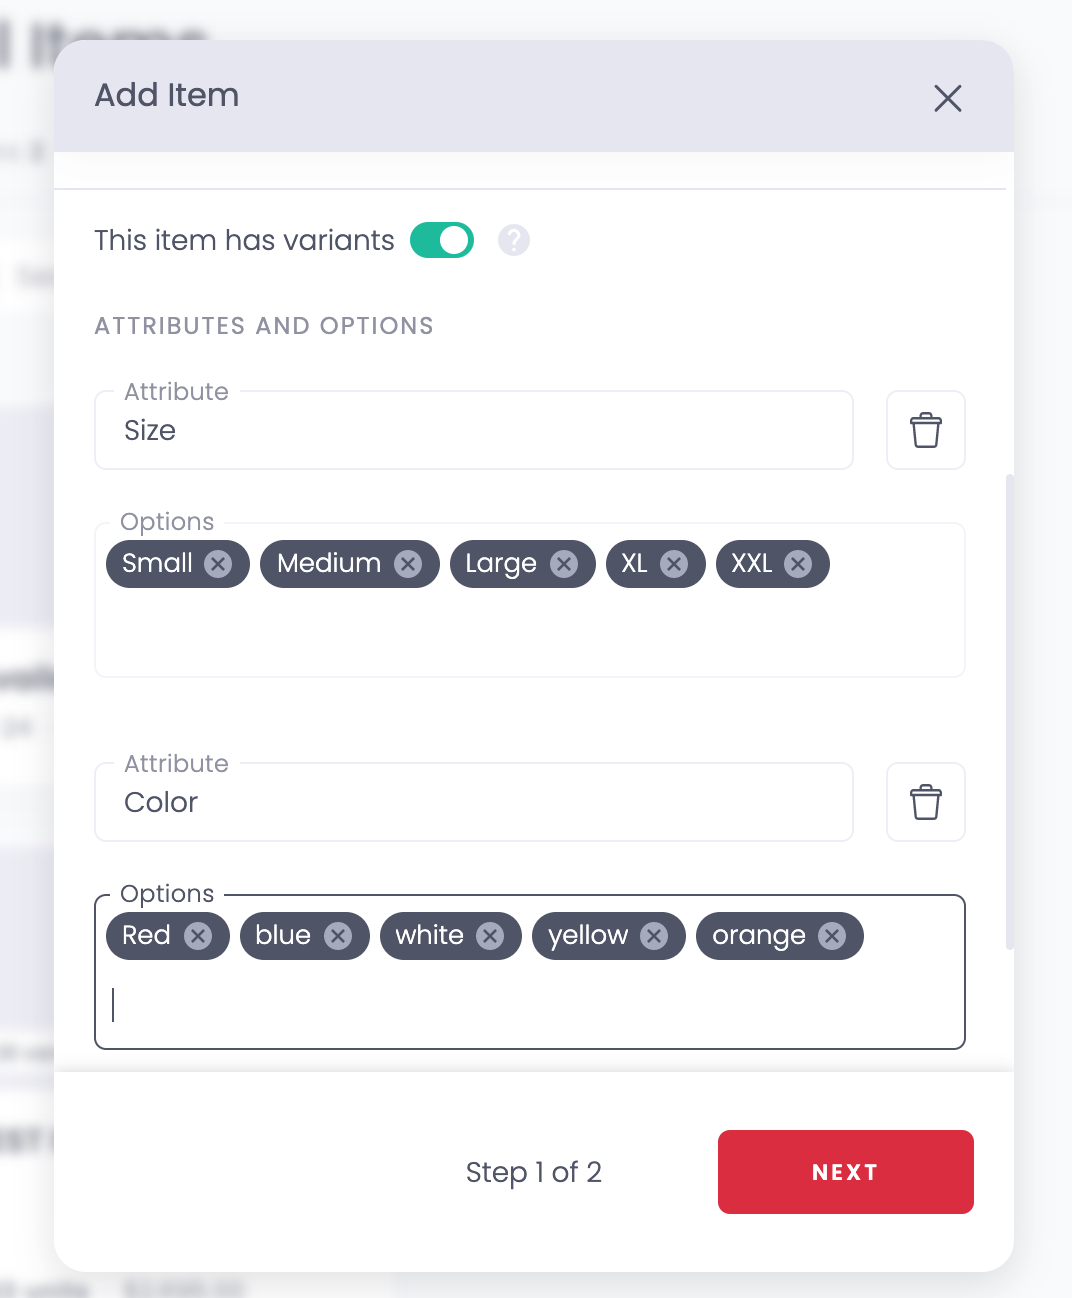
4Add Attributes and Options
Add the specific attributes and options for the item, these could be variants such as Size, Color, Material, or Style:
-
5Click Next
Once you've added all the variants, move on to the next step.
-
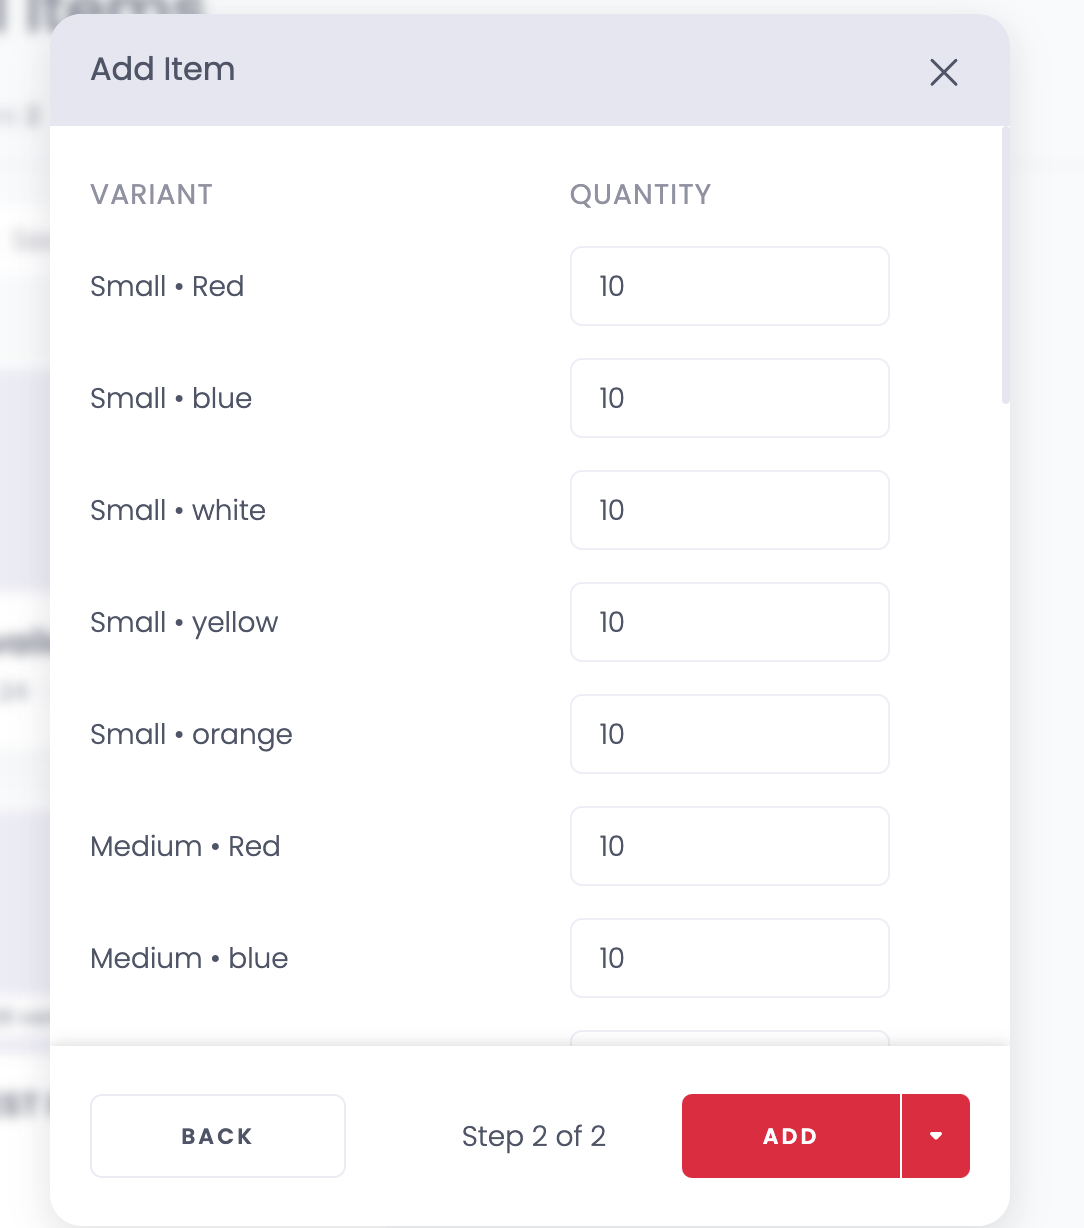
6Add quantities
Sortly puts together all the possible combinations of the attributes you included. Add the quantities for each variant:
-
7Click Add
Once the variant quantities match your physical inventory, click Add. You've now created your first item with variants in Sortly.
Once created, the item shows a high-level indicator that it has variants:
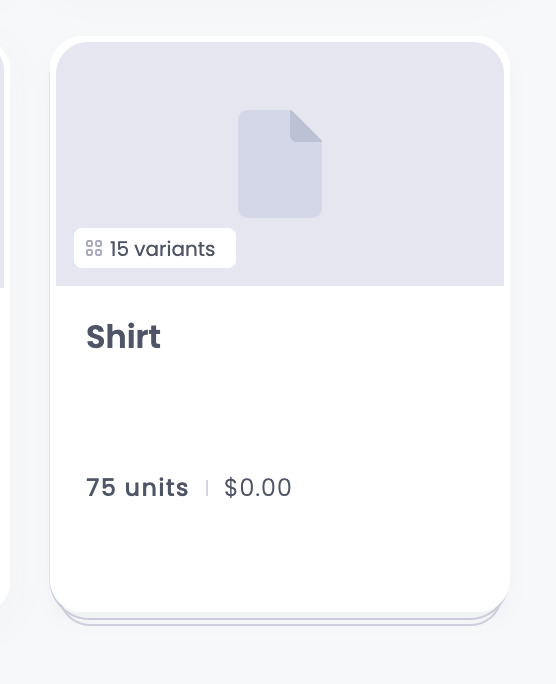
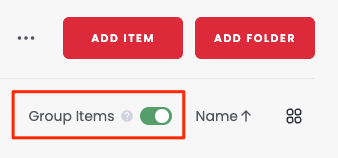
Note: the screenshot above has the items grouped. On the web app, you can group items via the toggle:
On the mobile app, choose the three-dot menu from the Items screen, select Filter > List View, then Group Items:
When you click an item with variants, you'll see the following content within the item:
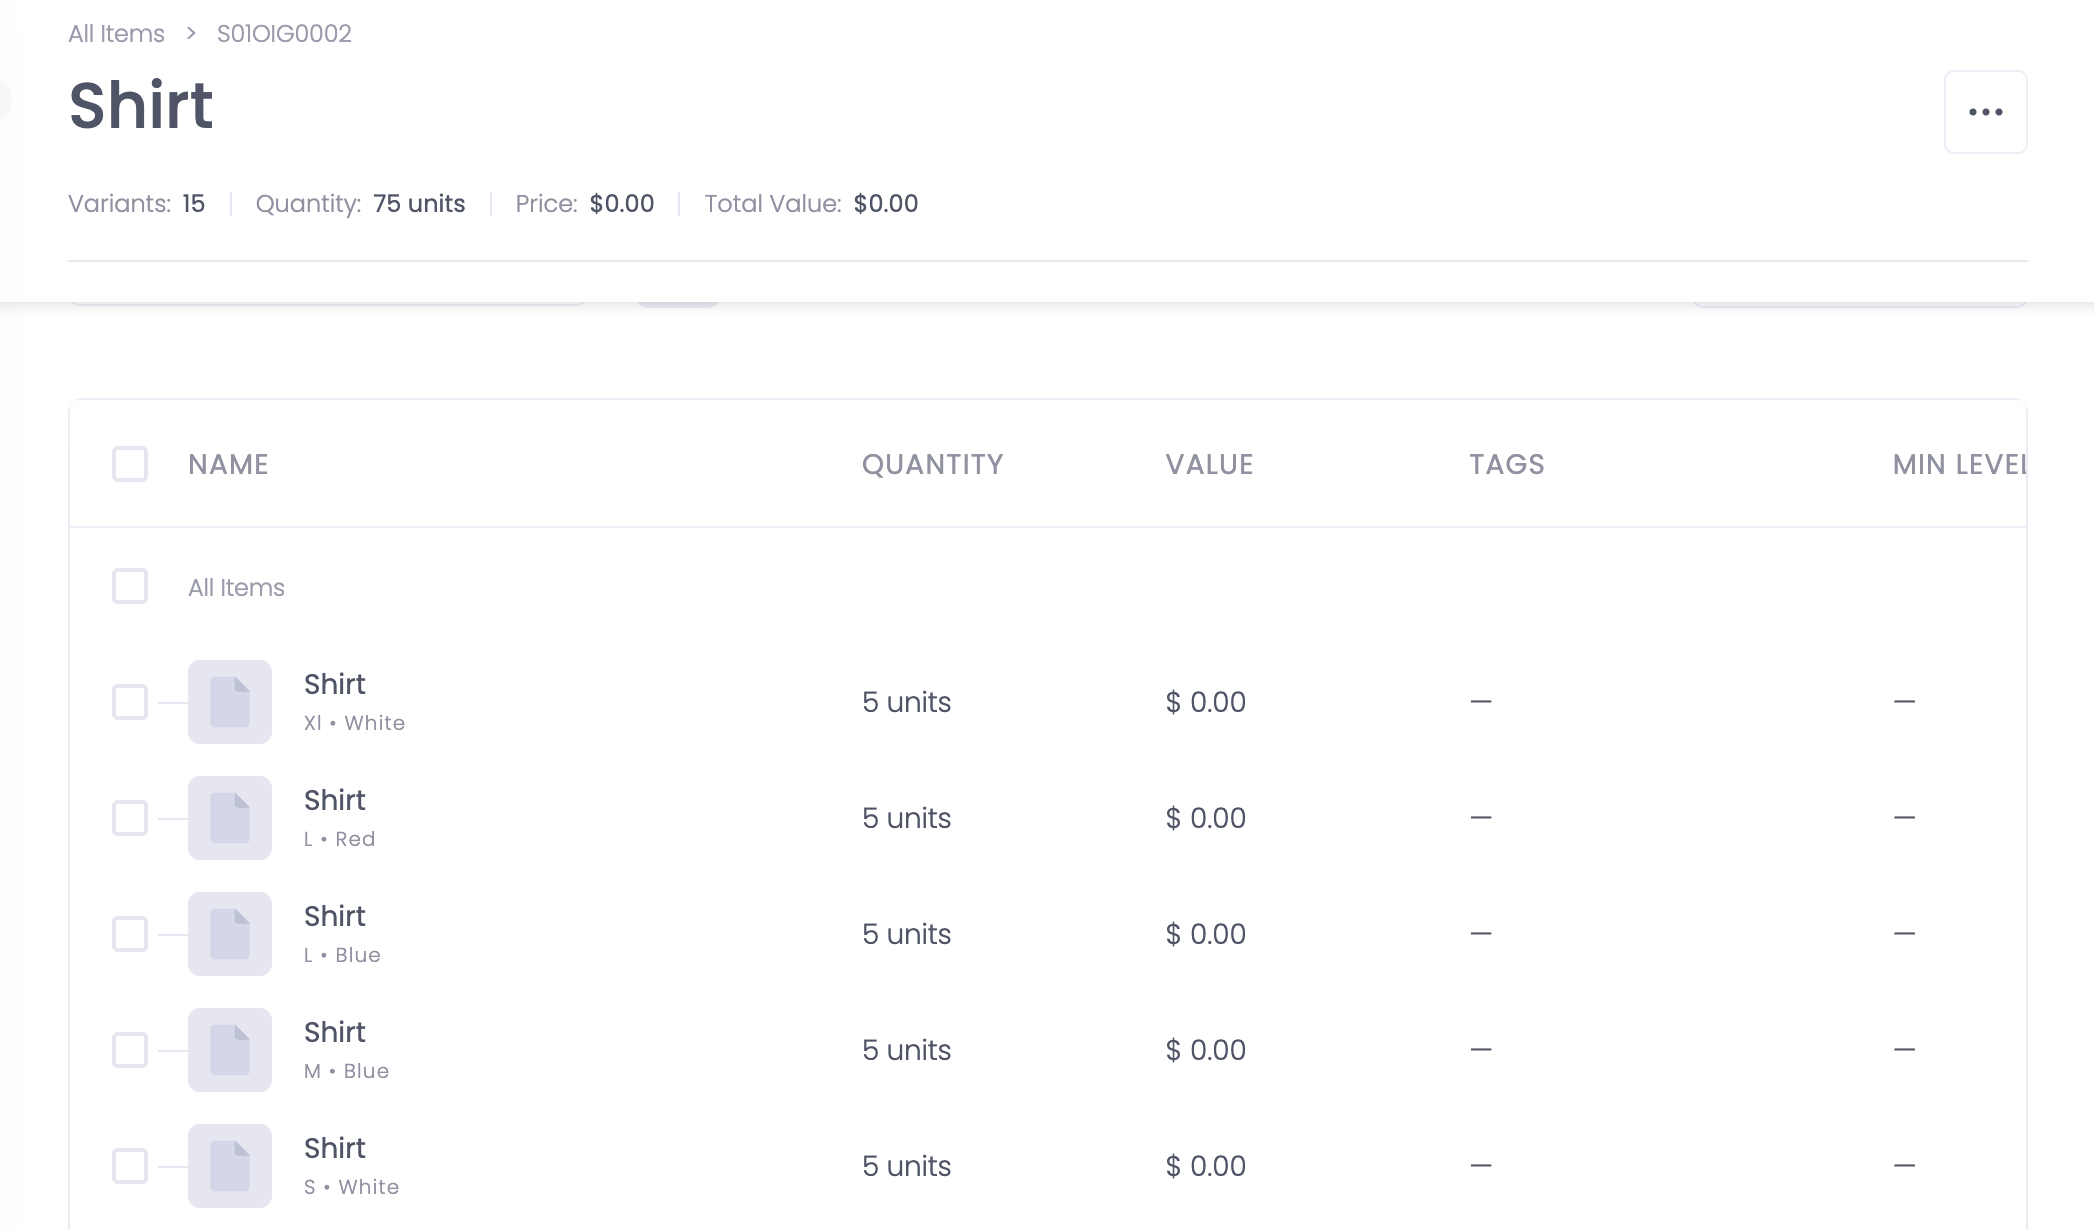
Each of these items (Size & Color) is treated as an individual entry, which you can then add additional content to, like tags, pricing, value, min level, and more.
Creating QR Labels or Barcodes for Item Variants
The top-level item has a unique Sortly ID, but each variant created under it has its own Sortly ID (SID). This makes it possible to generate unique QR labels or barcodes for each item variant.
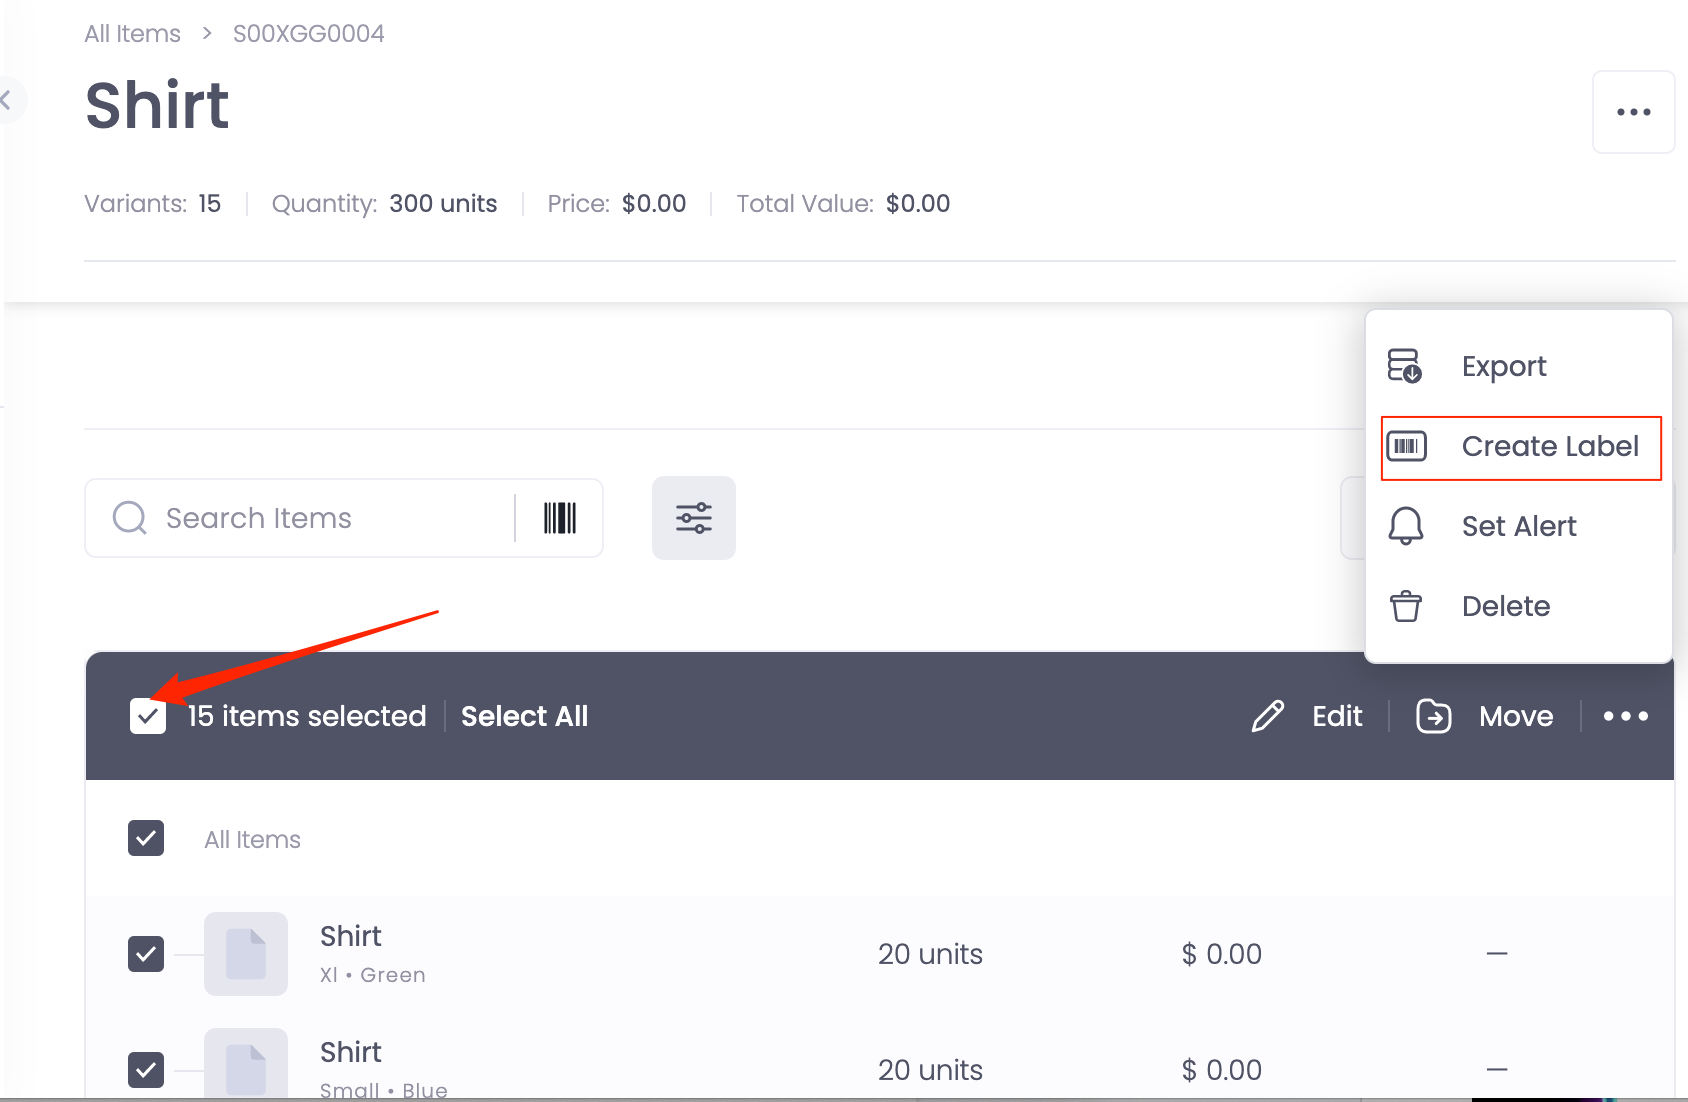
The easiest way to create unique QR labels or barcodes for all your item variants is to bulk-select all the variants and choose Create Label from the bulk edit options:
Creating a Label for the Entire Item Group
In addition to generating labels for individual variants, you can also create a QR code or barcode for the entire item group. This allows you to scan one code and view all of the item's variants together.
-
1Turn on Group Items
Make sure the Group Items toggle is turned on.
-
2Navigate to the item group
Go to the item group you want to label.
-
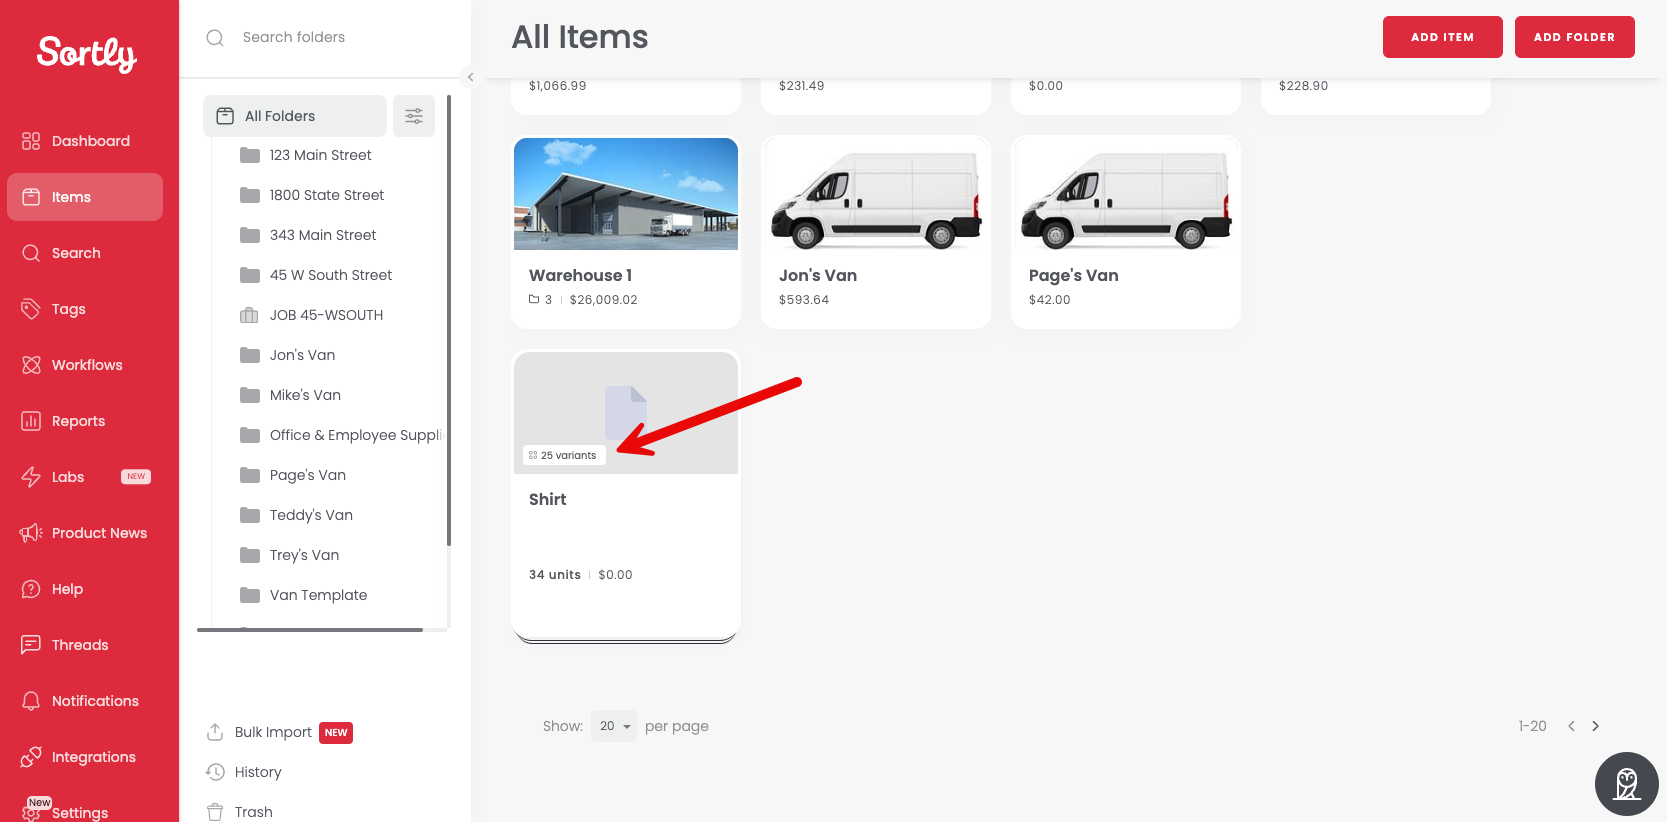
3Click the item group tile
-
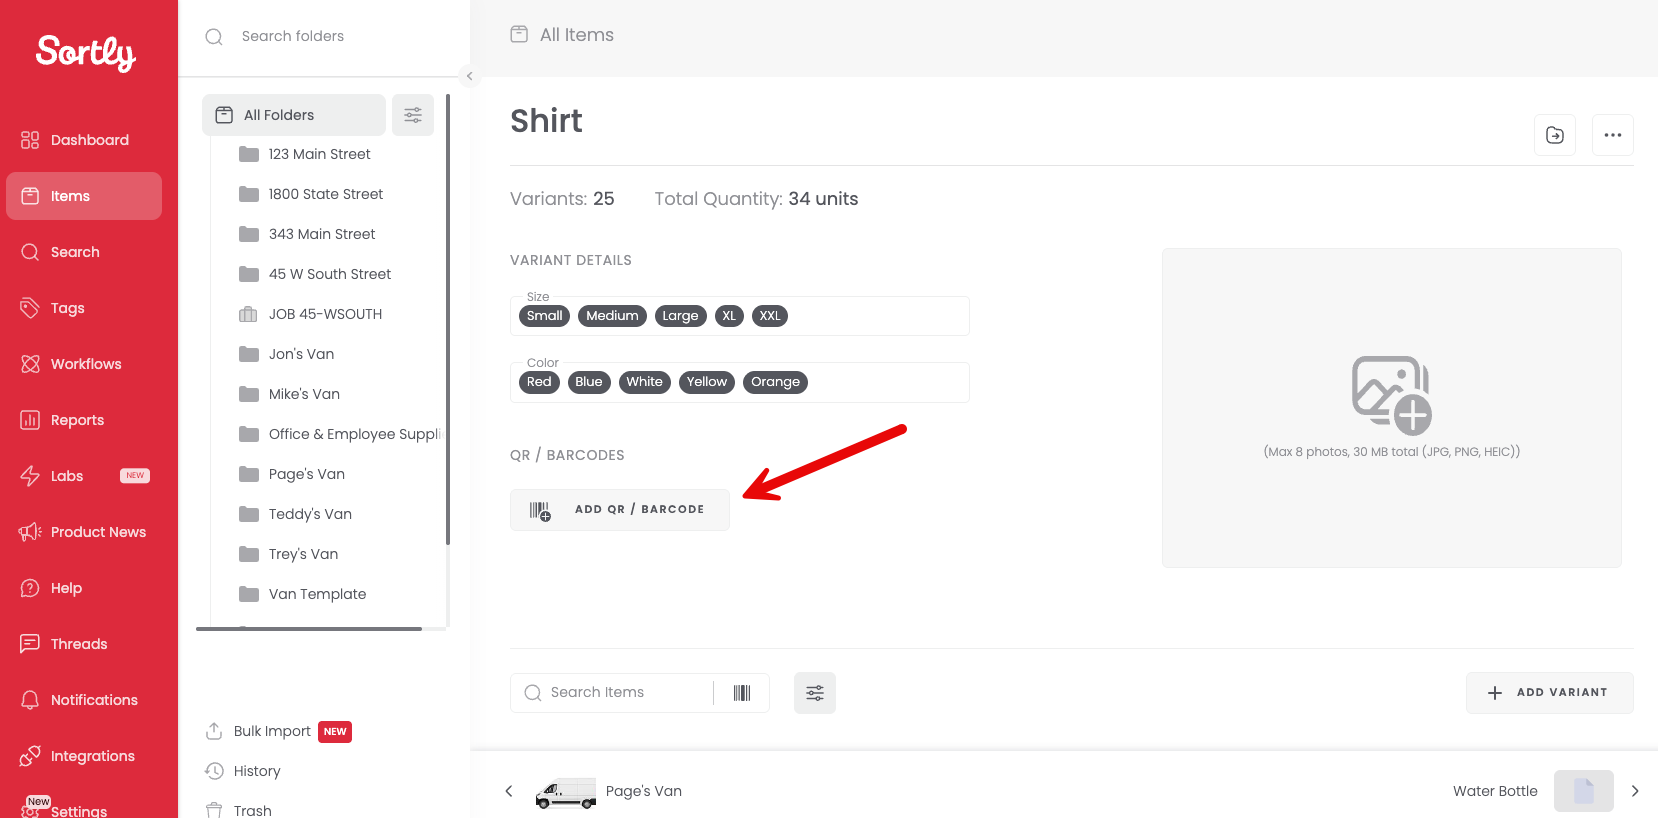
4Select Add QR/Barcode
-
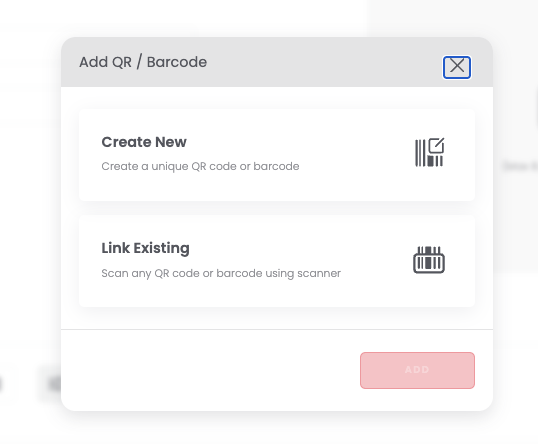
5Choose how to add the code
Create New, generate a unique QR code or barcode, or Link Existing, link an already existing QR code or barcode by scanning it:
-
6Follow the on-screen steps
Complete the process to finish creating the label.
Once the label is created, scanning it will open the entire item group, where you can view all associated variants in one place.