When wrapping up a project, returning tools or equipment to their original folders can feel like a hassle, especially if you’re dealing with multiple items and folders. With the Return to Origin feature, you can send items back to their original folders with one click, without the guesswork. It’s a simple way to save time, avoid misplaced items, and always know exactly where your inventory is.
In this article
How to Enable the Return to Origin Feature
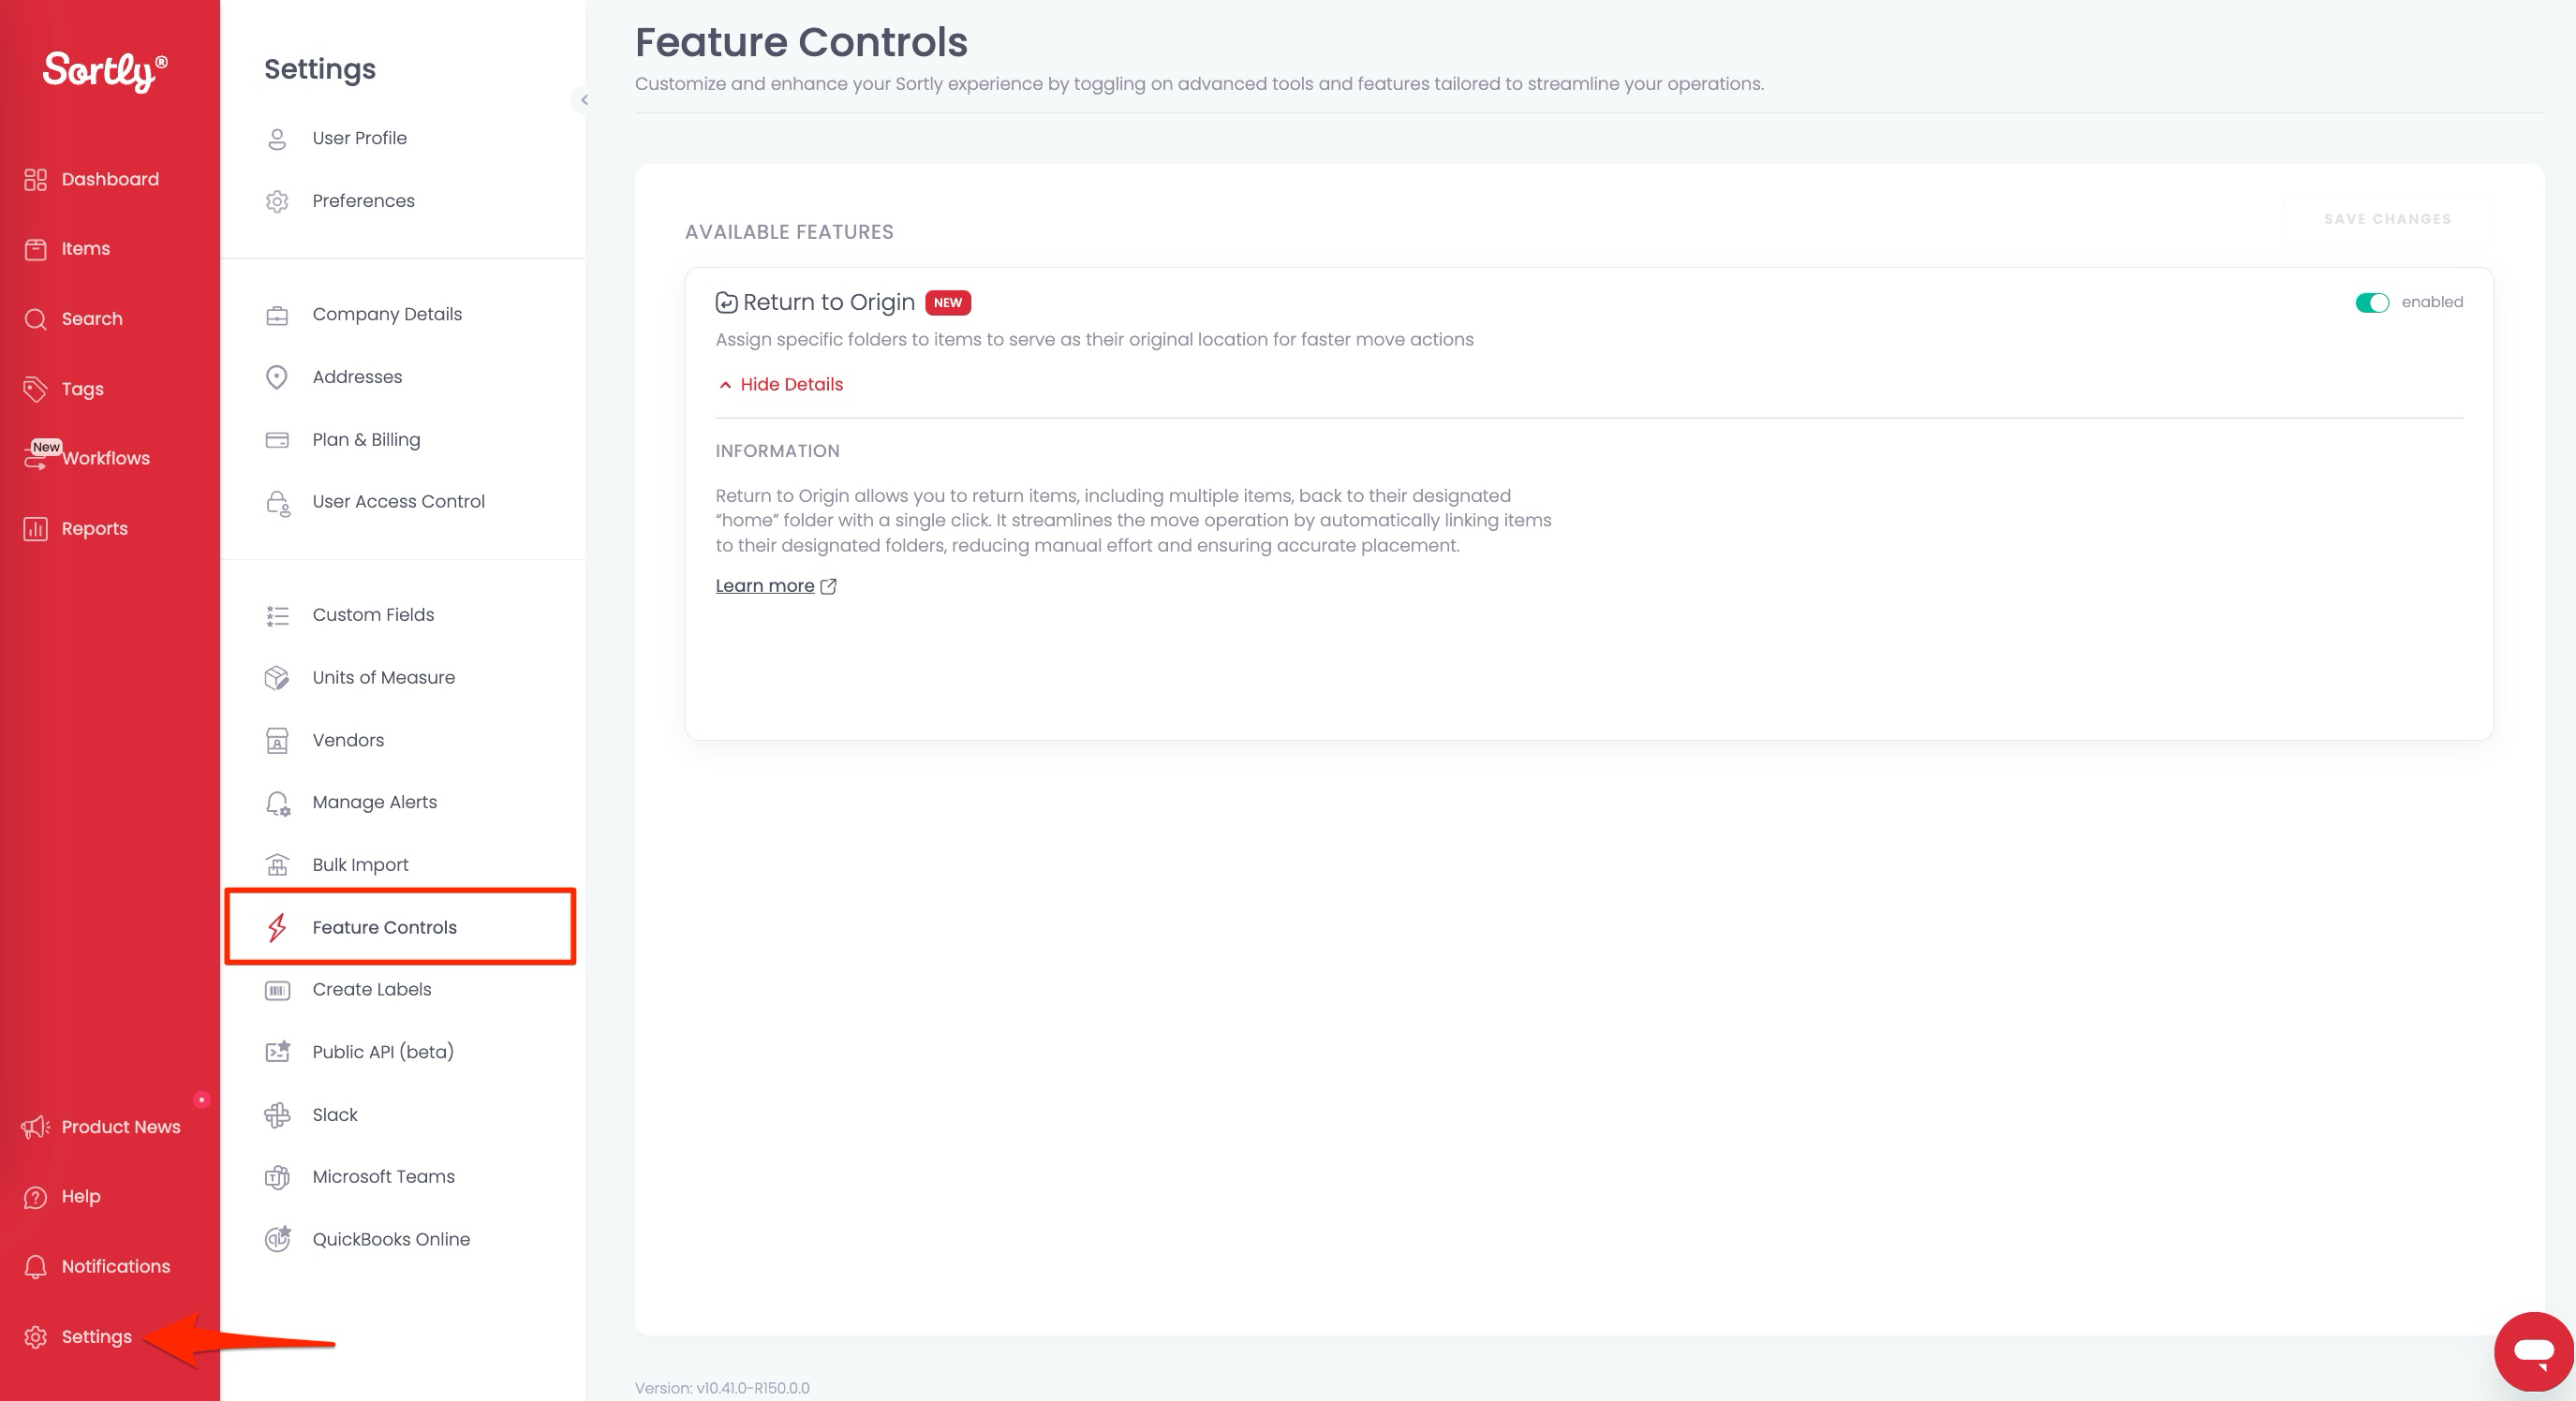
To start using Return to Origin, turn it on in your settings. Go to the Feature Control page in the Settings panel and toggle it on. Return to Origin must be enabled on web before it can be used on mobile.
Adding an item
1Click Add Item and fill out the details of the item.
2At the bottom, select the folder you want as the origin folder and click Set Origin.
3Click Add Item.
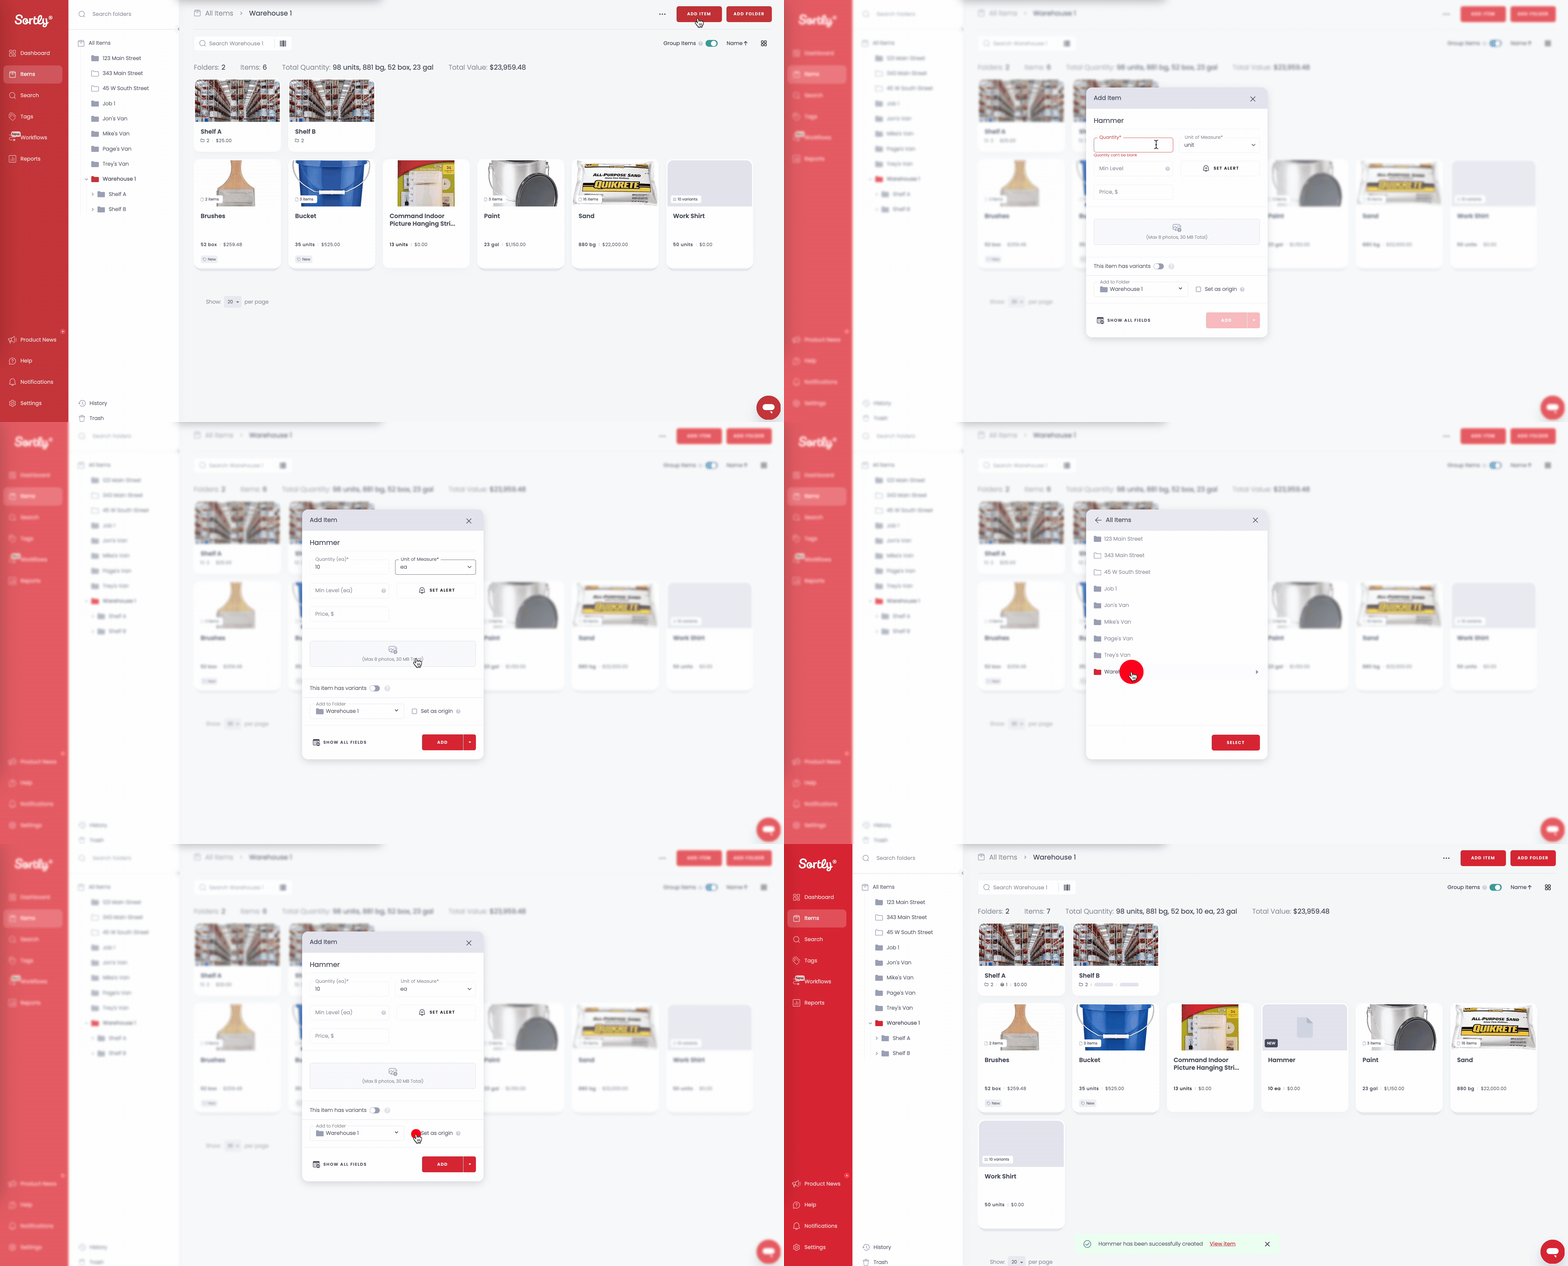
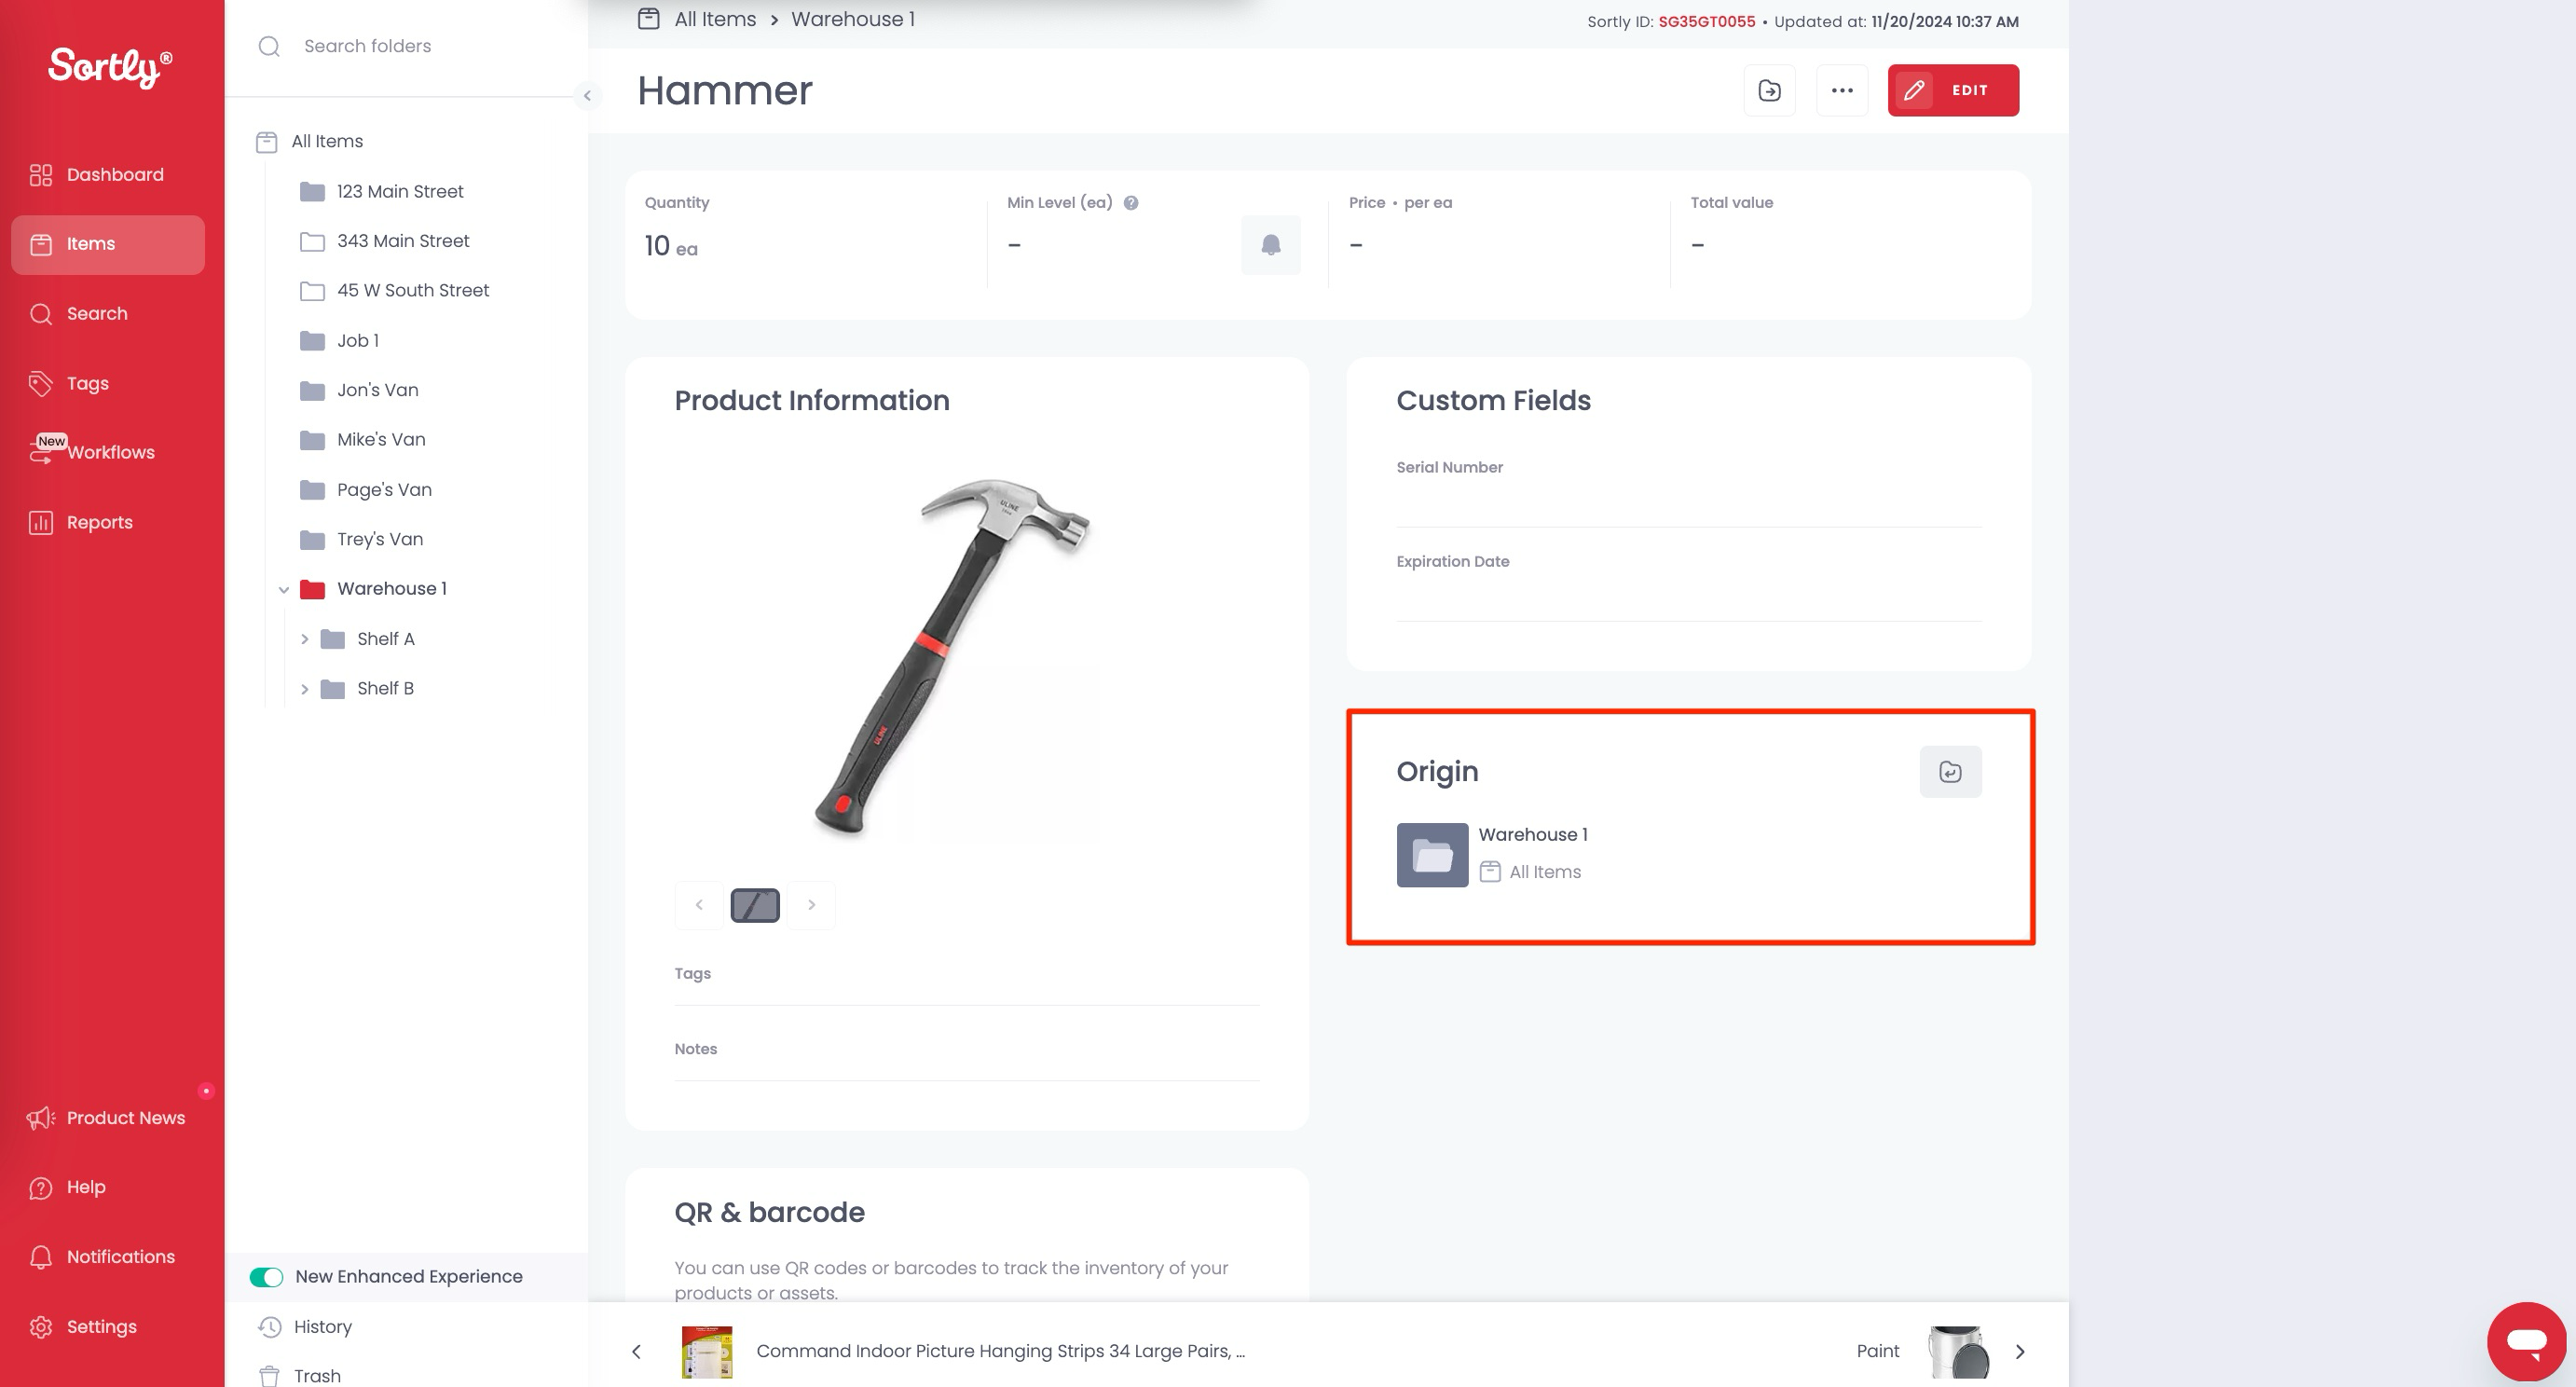
4Click into the item to see the origin folder.
Editing the origin for a single item
1Click Edit at the top right.
2Click Edit next to the origin.
3Choose a new origin folder and click Confirm.
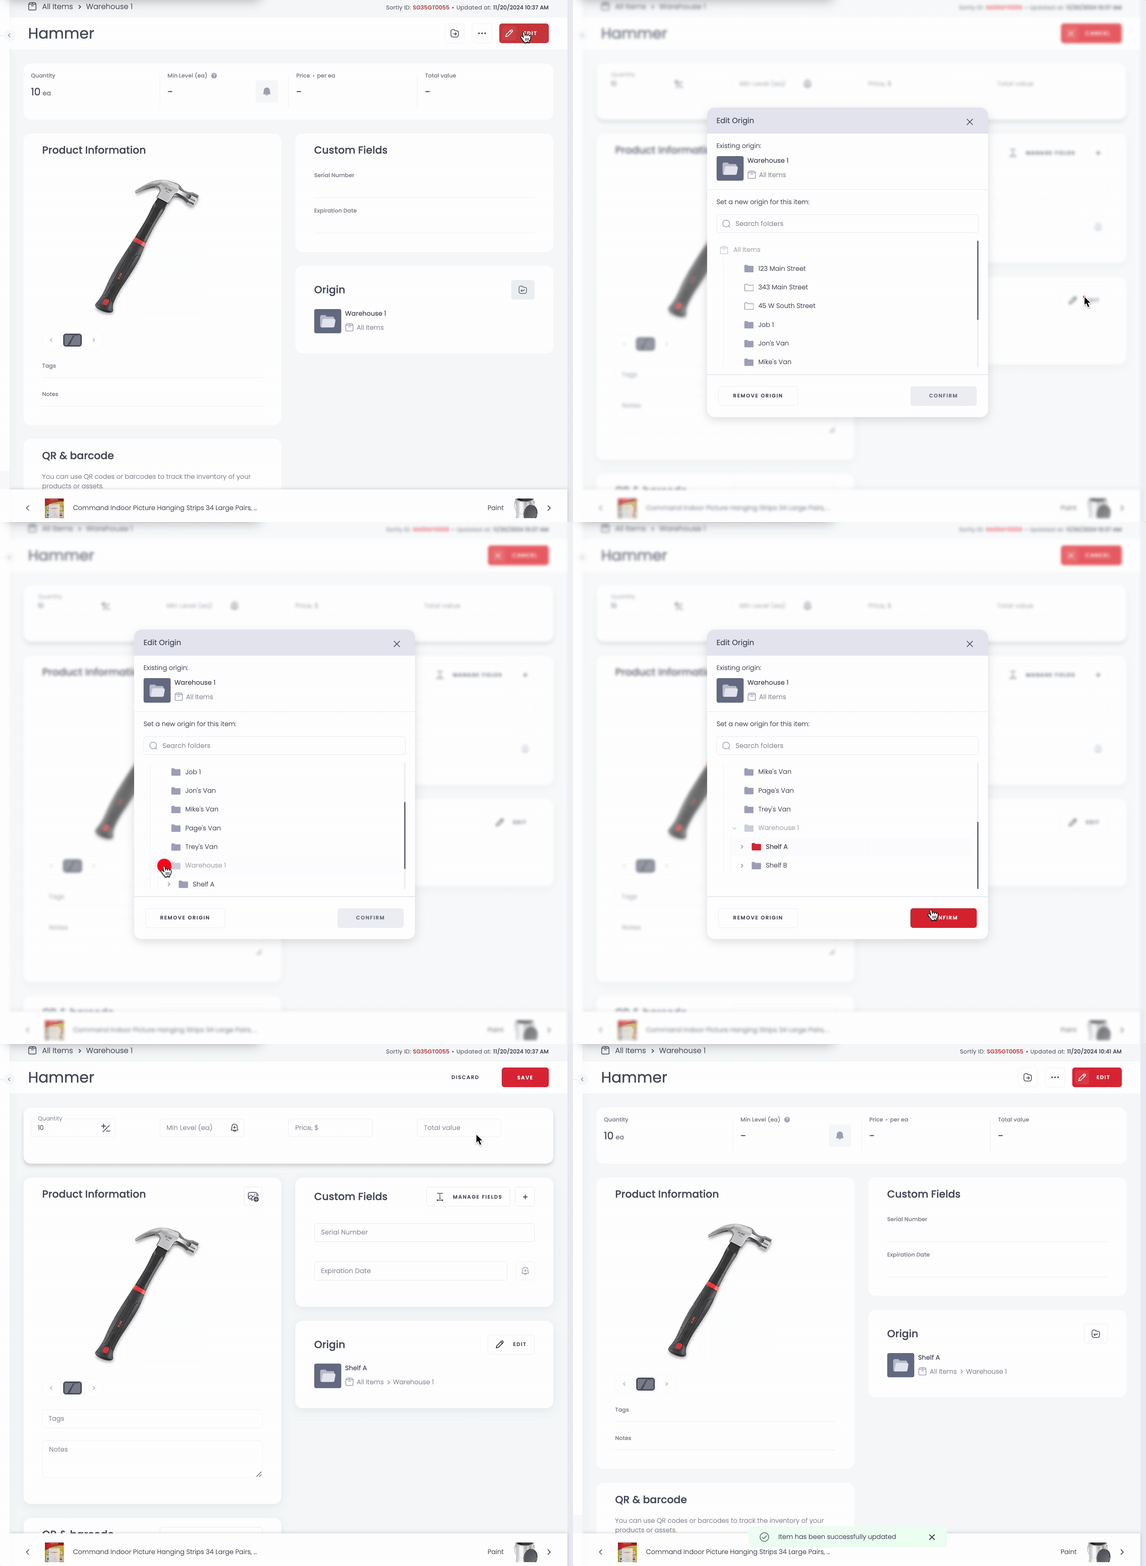
Editing the origin for multiple items
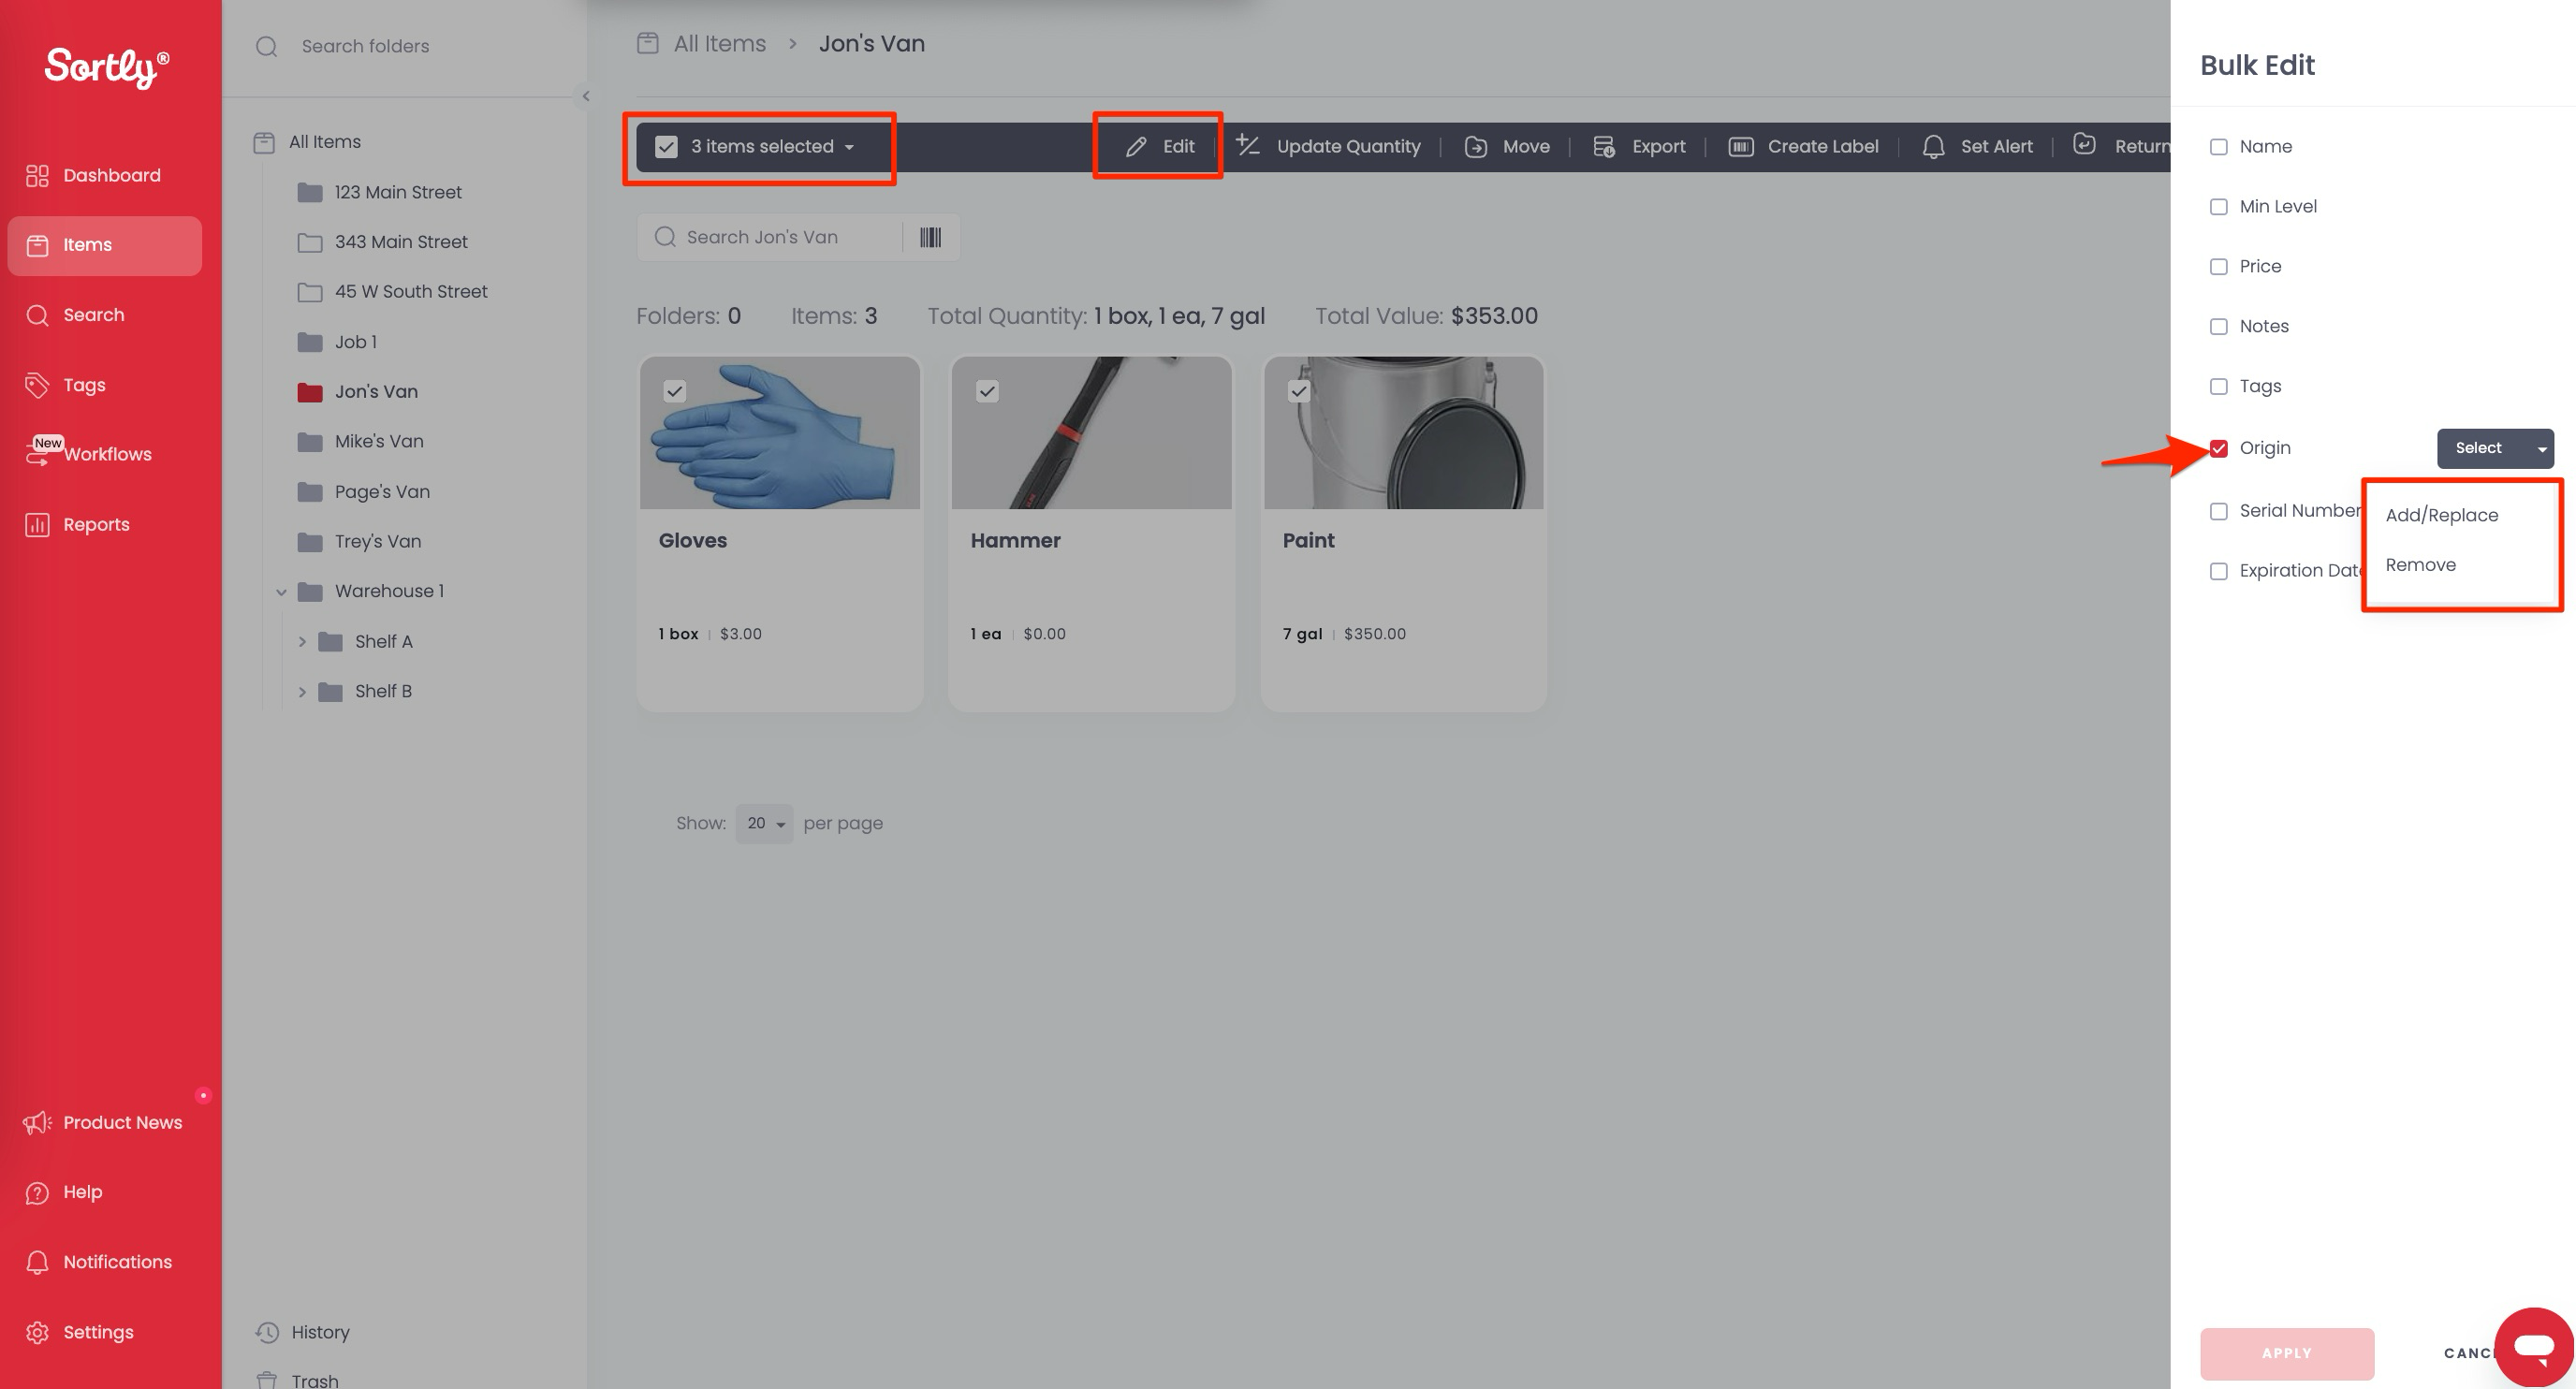
1Select multiple items.
2From the bulk edit bar, choose Edit.
3Choose Add/Replace for the origin.
4Choose the origin folder for these items and click Apply.
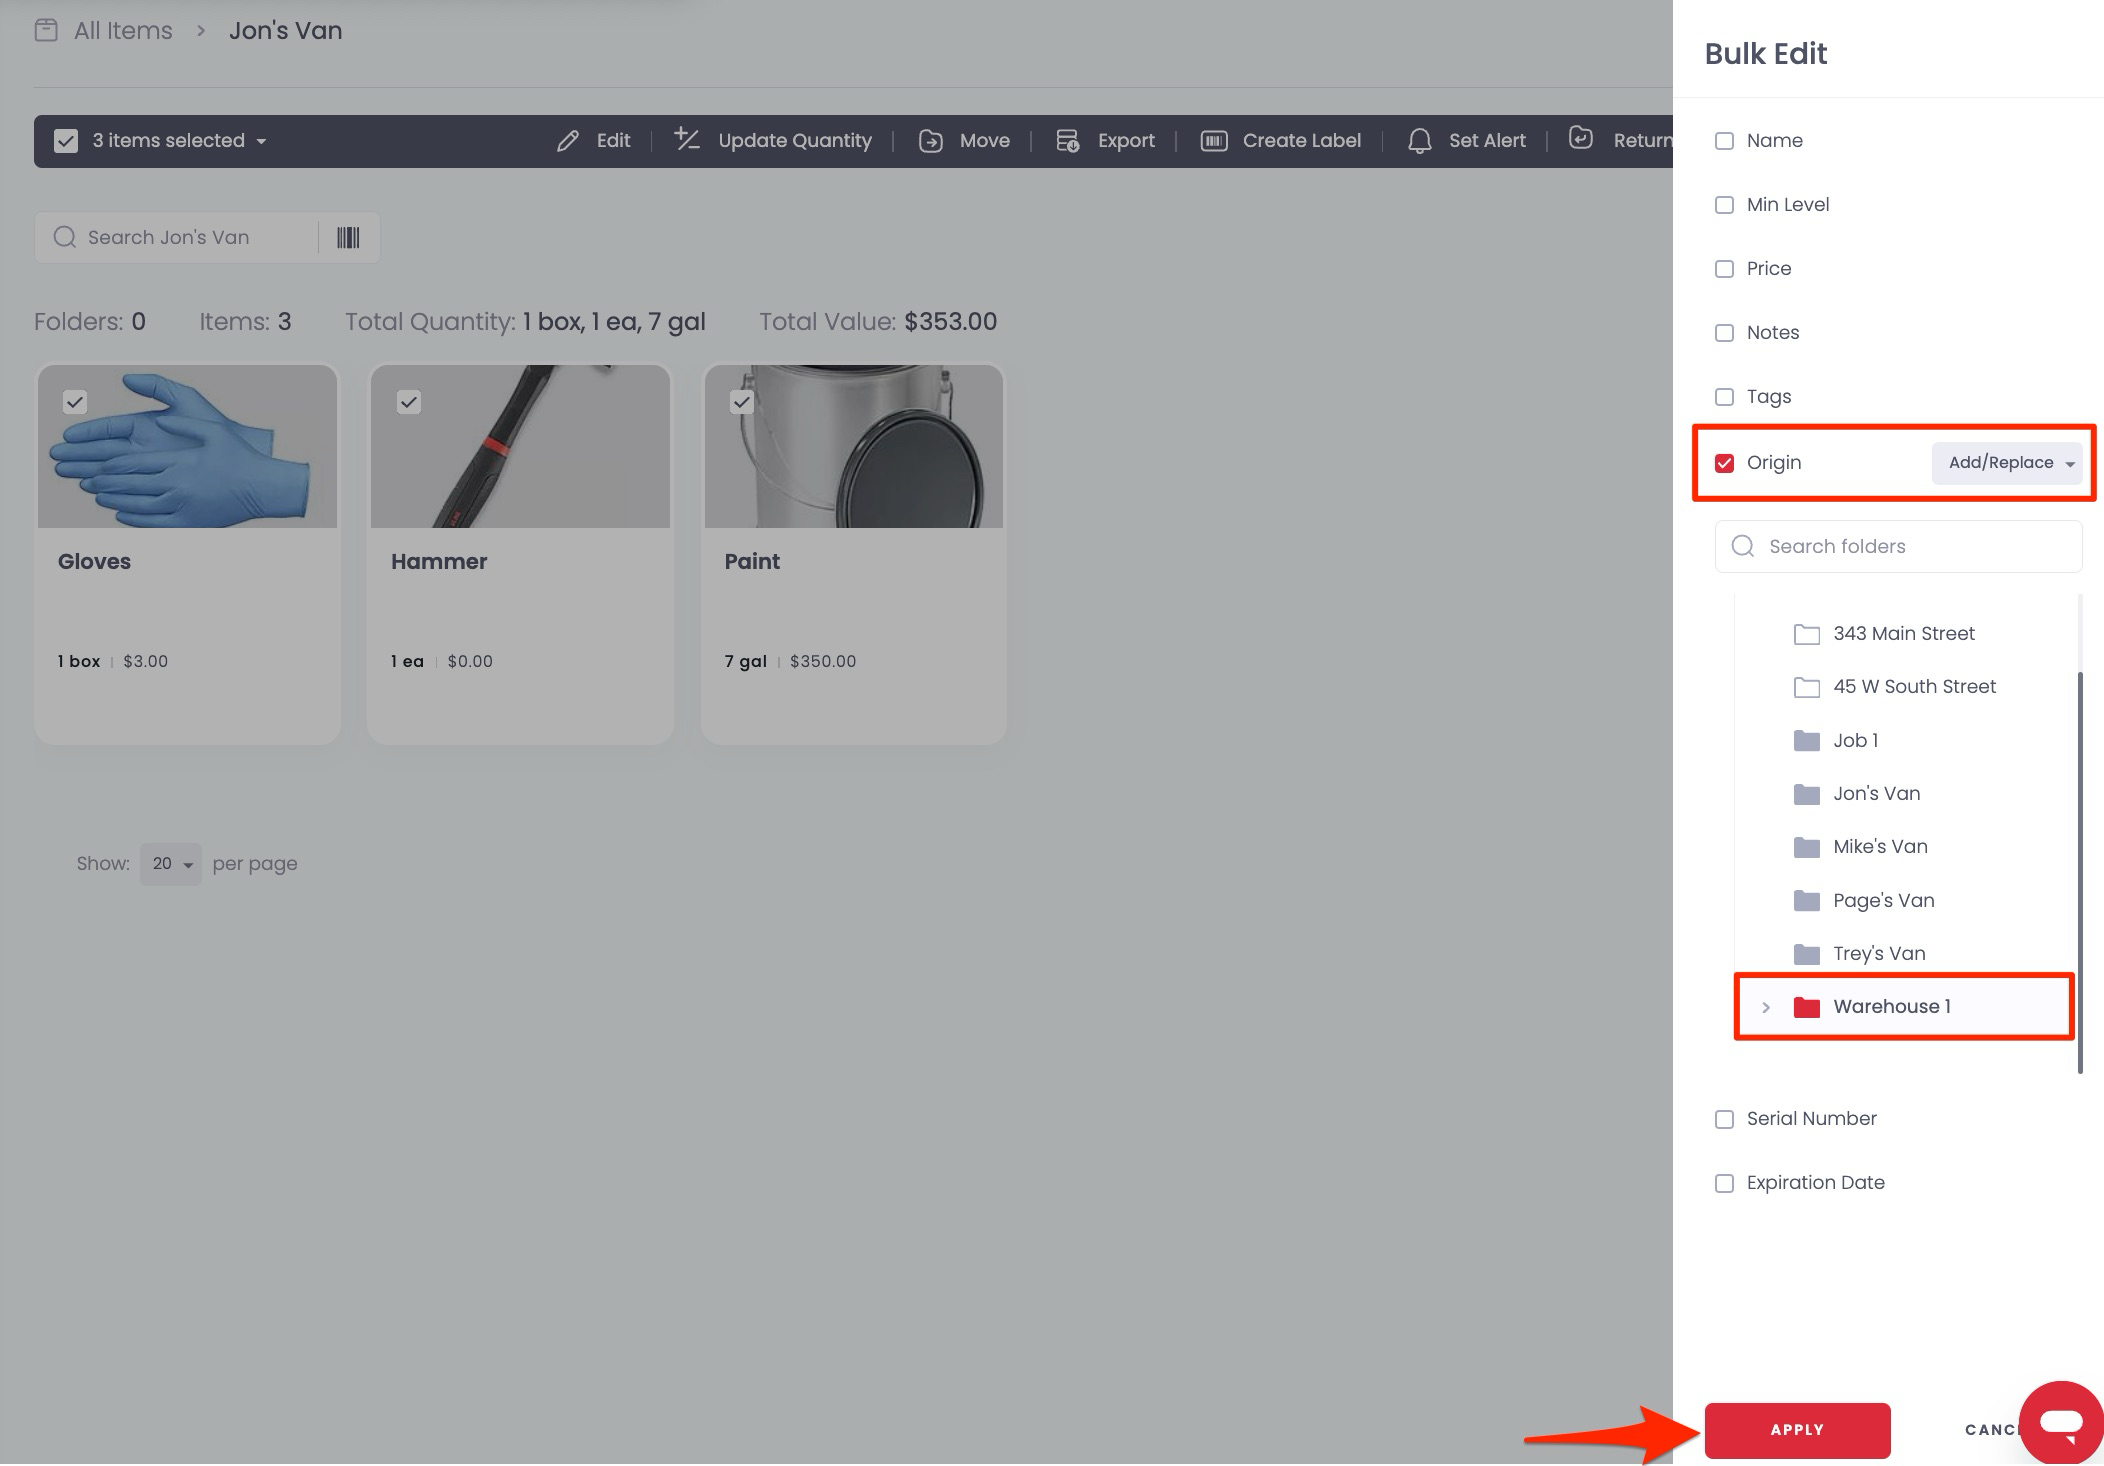
5These items now have Warehouse 1 as the origin folder.
Returning a single item
Once the feature is on, you can send an item back to its original folder by clicking the three dots next to it and selecting Return to Origin.
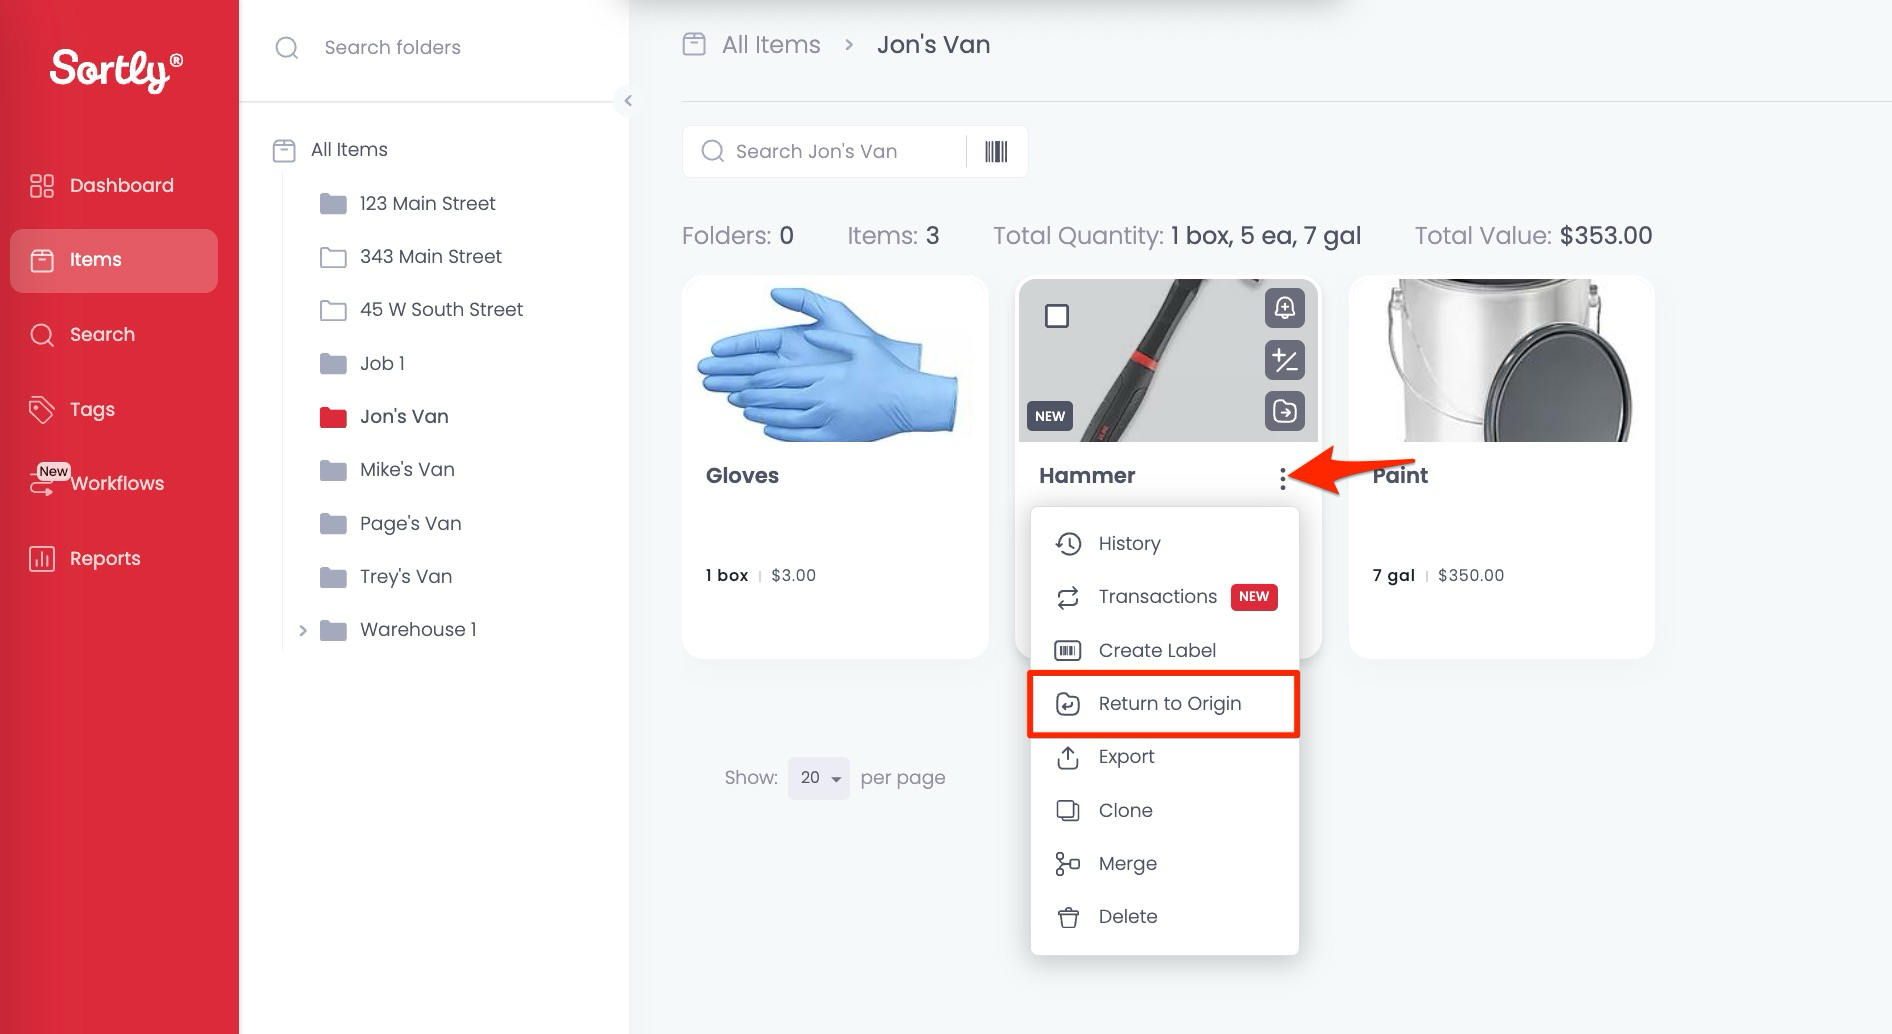
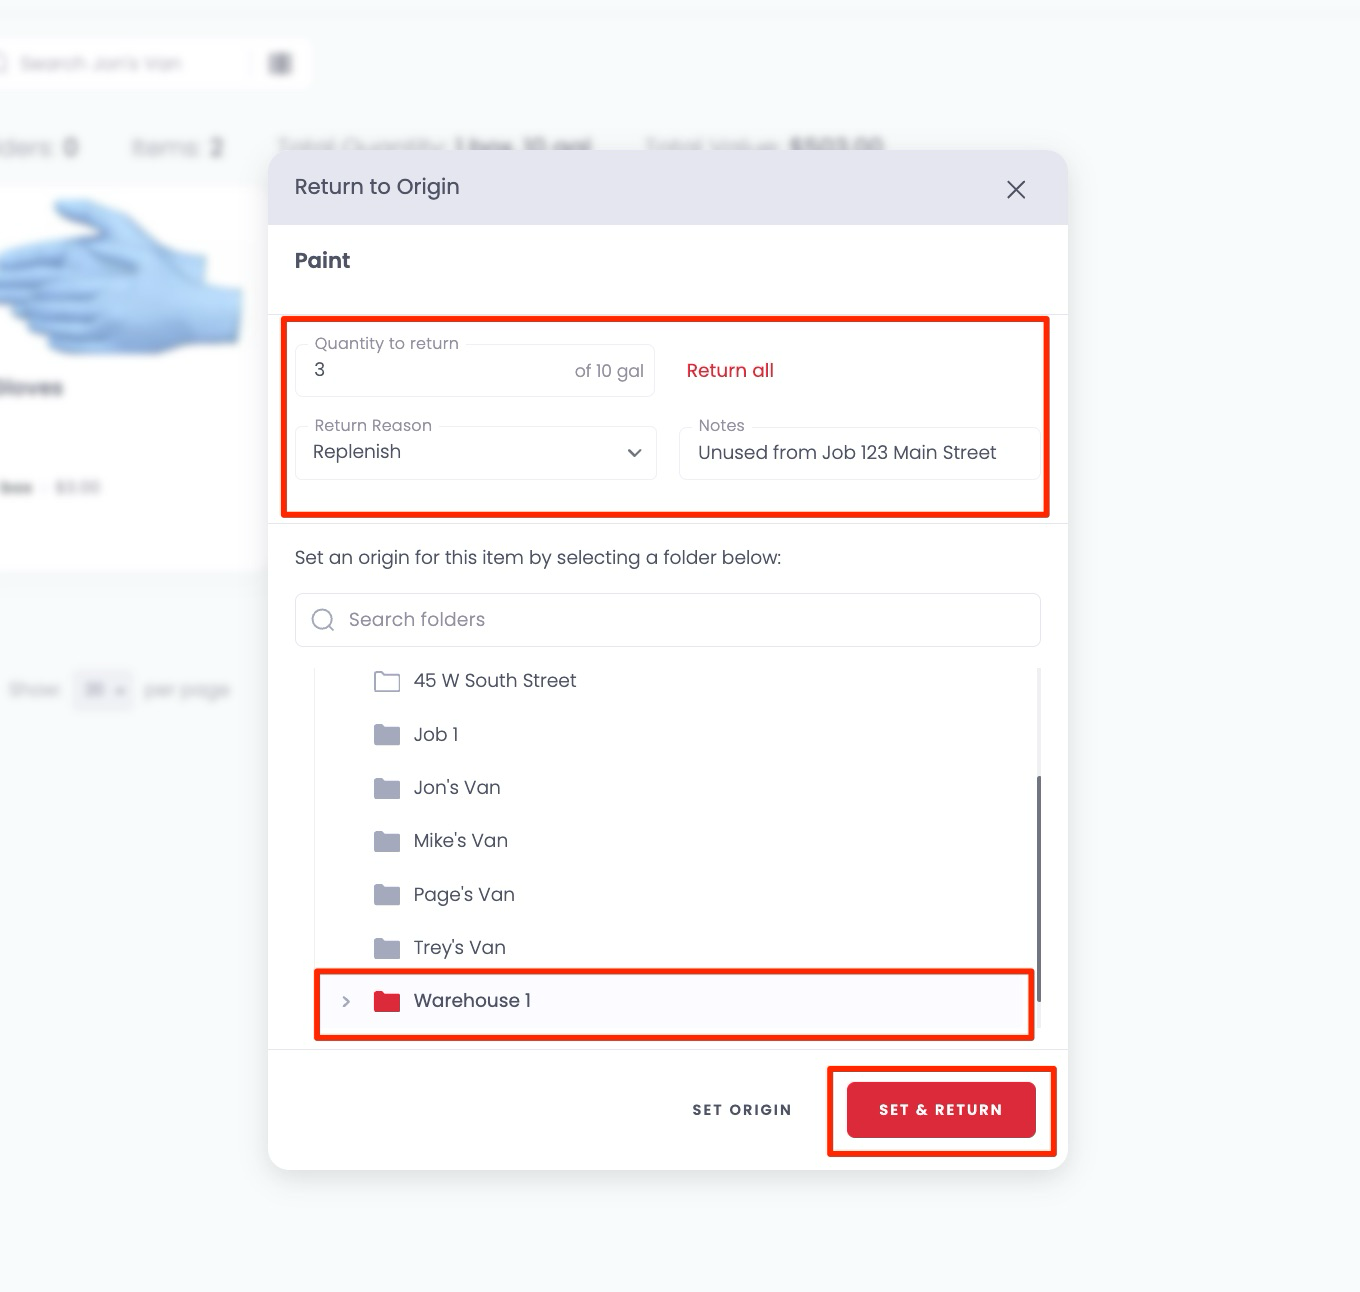
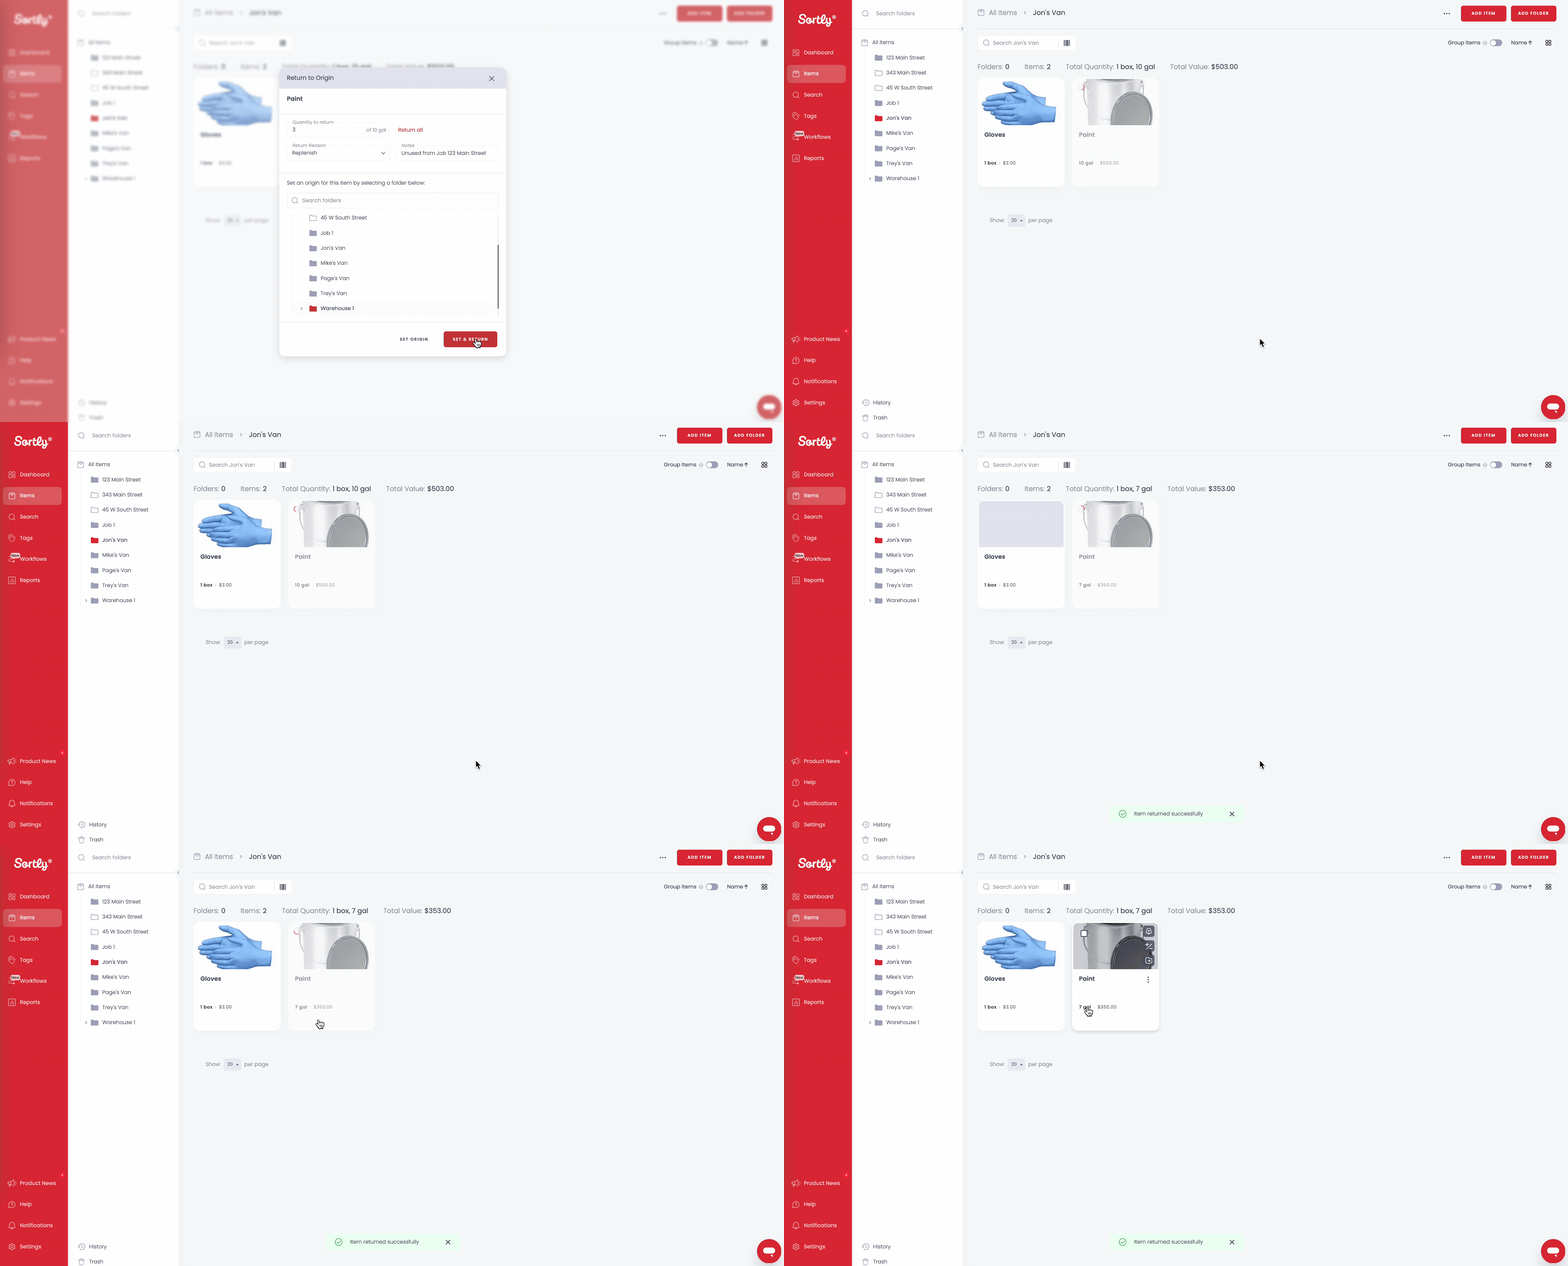
If an origin folder has not been selected:
1Specify the quantity of items to return.
2Provide a reason for the return.
3Select the origin folder where the item should be returned.
4Click Set & Return to complete the process.
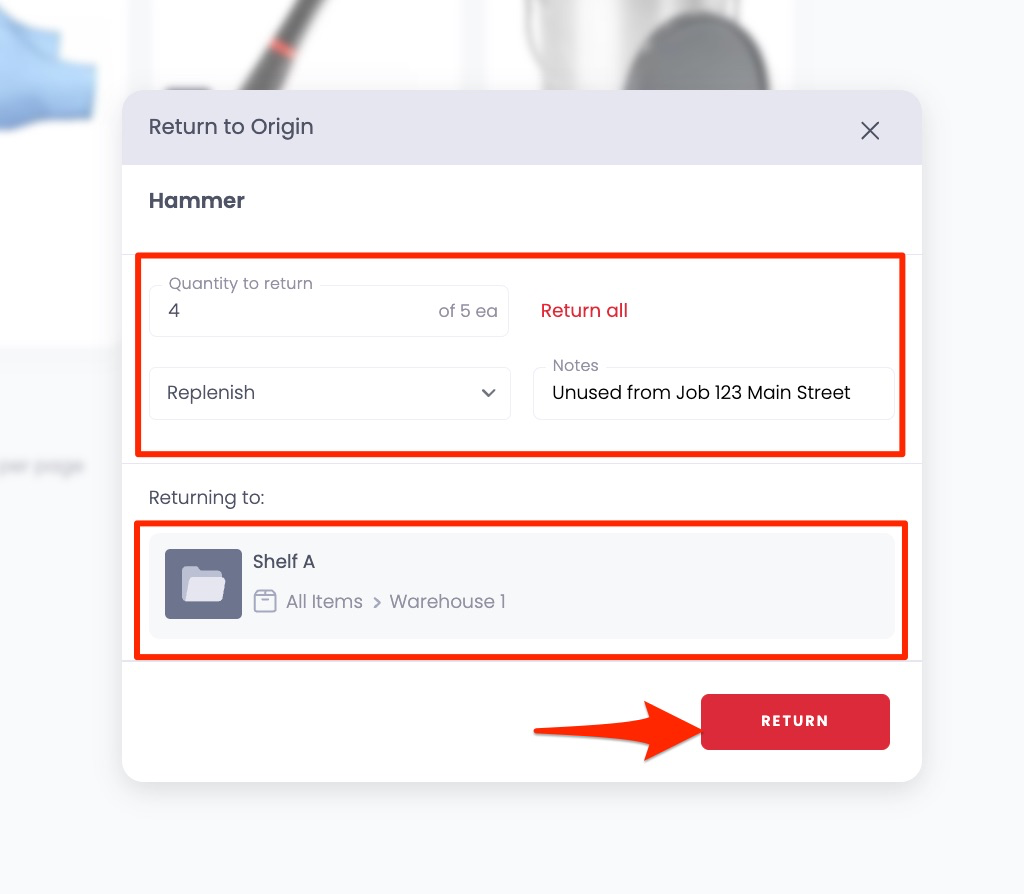
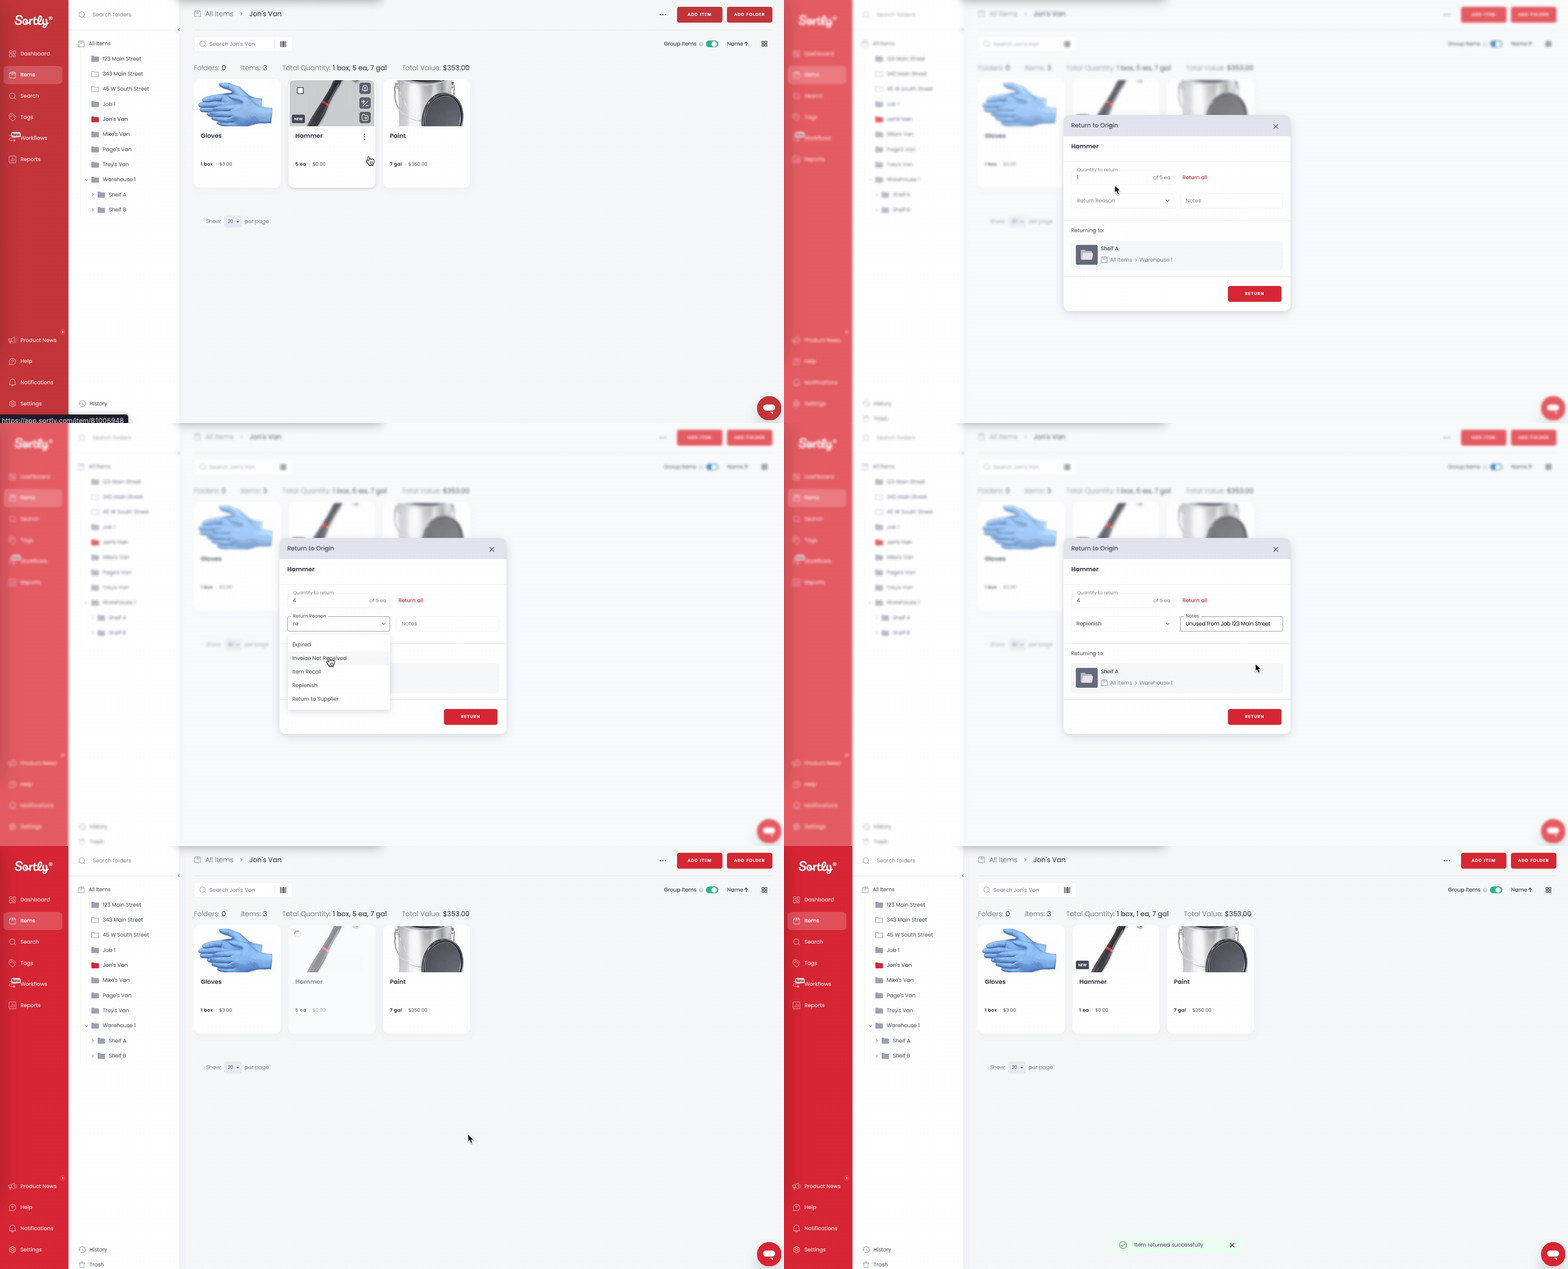
If an origin folder has been selected:
1Specify the quantity of items to return.
2Provide a reason for the return.
3View the breadcrumb trail to confirm the destination folder.
4Click Return to finalize.
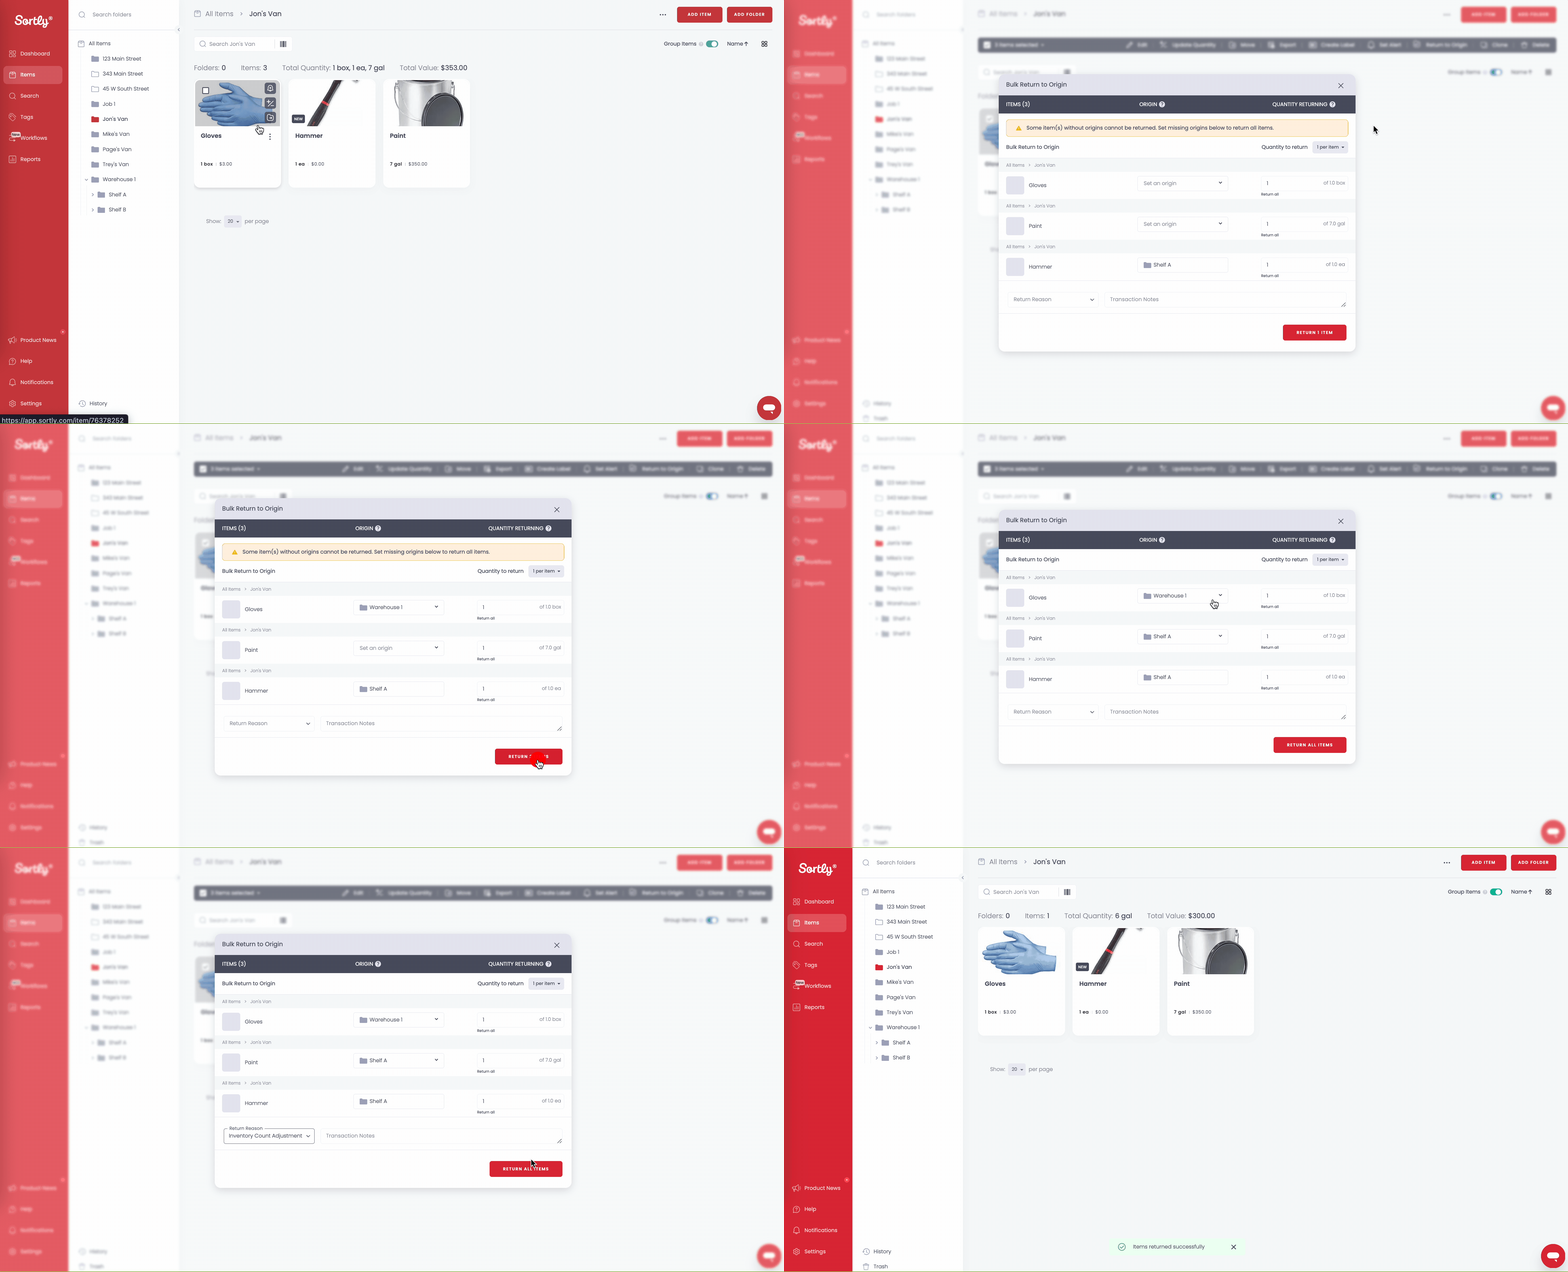
Returning multiple items in bulk
To return multiple items at once, follow these steps:
1Go to the folder containing the items you’d like to return.
2Select the items you wish to return.
3Click the three dots and choose Return to Origin.
4In the window that appears, you can:
- View each selected item.
- Set the origin folder for items that do not have one pre-selected.
- Specify the quantity of each item to return.
- Add a reason for the return (optional).
- Include transaction notes (optional).
5Click Return to complete the bulk return.