---
title: Invoices
description: Sortly’s Invoicing feature is designed to streamline your billing process and simplify invoice generation.
---
[Skip to content](https://help.sortly.com/invoices#main-content)

Open main navigation
Close main navigation
Looking for answers? Start here.
- There are no suggestions because the search field is empty.
1. [Sortly Help Center](https://help.sortly.com/?hsLang=en)
2. [Workflows](https://help.sortly.com/workflows?hsLang=en)
3. [Workflows](https://help.sortly.com/workflows?hsLang=en#workflows)
# Invoices
Sortly’s Invoicing feature is designed to streamline your billing process and simplify invoice generation. With our user-friendly interface, you can effortlessly create invoices using your existing inventory data.
After generating an invoice, you can easily monitor its payment status, make updates as needed, and seamlessly send it to QuickBooks Online with just a click.
Premium
Enterprise
In this article
1. [Invoicing Tab Overview](https://help.sortly.com/invoices#h_01HMC56V3NNTT4G878YAGJNKJZ)
2. [Creating an Invoice](https://help.sortly.com/invoices#h_01HMC4HVKFEWP54YTYTEDB7JJ7)
3. [Connect to QuickBooks Online](https://help.sortly.com/invoices#h_01HMC56V3NK81GJMYW1CA1ZC32)
4. [Send Invoice to QBO](https://help.sortly.com/invoices#h_01HMF73T889PZJ6C3NSPRC43GW)
5. [FAQ](https://help.sortly.com/invoices#h_01JPFQGC1BZSJX2DNA7ZGAFVCJ)
### Invoicing Tab Overview
The Invoicing section of your Sortly account will show the following:
- A list of your current invoices with Invoice Number, Status, Customer, Date Created, and Last Updated
- Search Bar to easily search by Invoice Number

### Creating an Invoice
1. 1Navigate to the Workflows \> Invoices and click on **New Invoice**.

2. 2When creating an Invoice, you can add the Invoice Number, Status, Customer Information, Issue and Due Date

3. 3Fill out all necessary fields and then add items from your inventory to the **Item Description** section and click **Save**

4. 4If using a handheld scanner, you can click **Enable Scanning Mode** to scan an item and add it to the invoice

5. 5Once saved, you have the option to change the **Invoice Status** to indicate if the invoice is in a Draft, Open, Overdue, or Paid status.

6. 6Return to the main page of the Invoicing tab to see a list of your invoices

#### Add Multiple Items to an Invoice at Once
You can add many items to an Invoice from the Invoice creation page using **Bulk Add Items.**
**Using Bulk Add Items**
1. 1Instead of Searching, click **Bulk Add Items**

2. 2Choose your items and click **Add to the Invoice**

### Connect to QuickBooks Online
Once you've created the invoice, you can connect to QuickBooks Online to send your invoices to your existing QBO account.
1. 1Click on an invoice, then the three dots, and select**Manage**

2. 2Follow the onscreen prompts to **connect your existing QBO account**.
### Send Invoice to QBO
1. 1Click on the**Invoice**, then the three dots, and click **Send to QuickBooks Online**
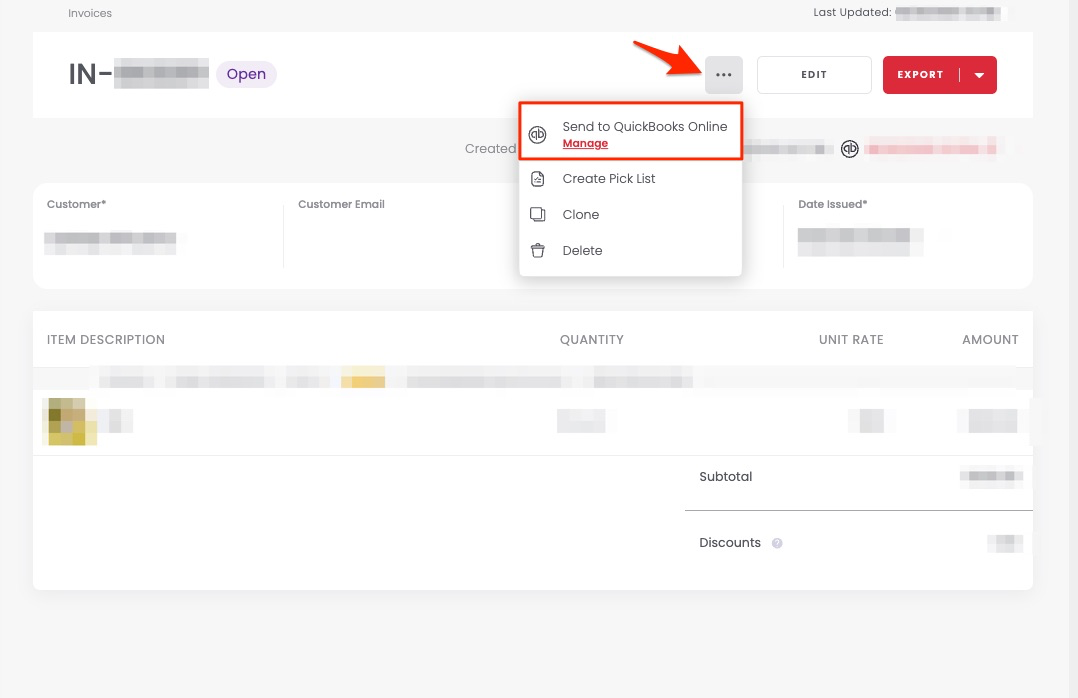
2. 2Fill out the fields to match the information in your QuickBooks Online account, and then click **Send to QBO**

3. 3A successful notification will appear, letting you know the Invoice has been sent

4. 4Navigate to your QBO account by clicking on the link at the top of the invoice
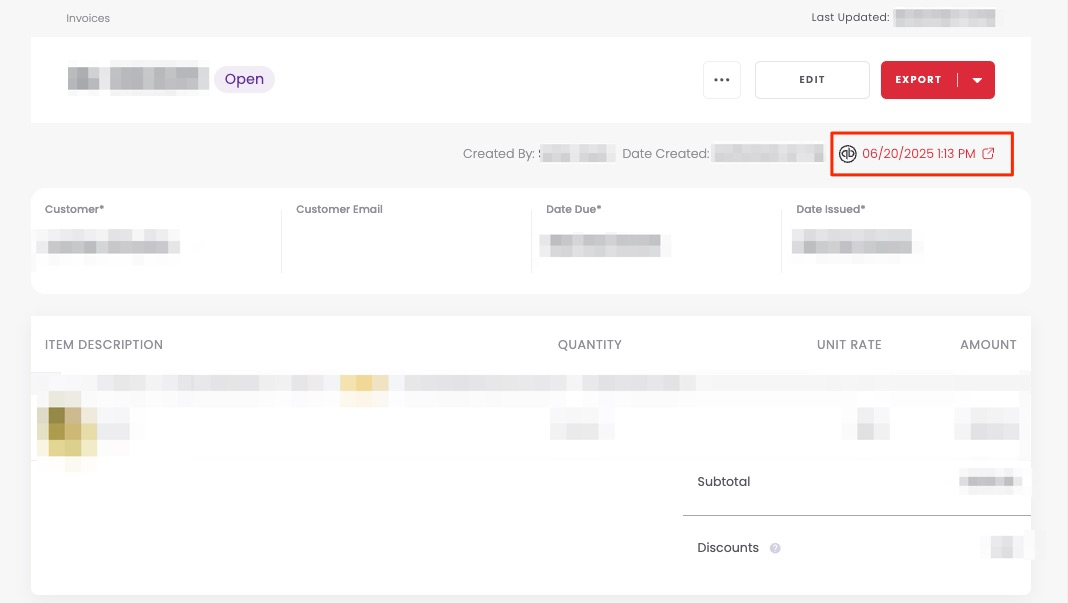
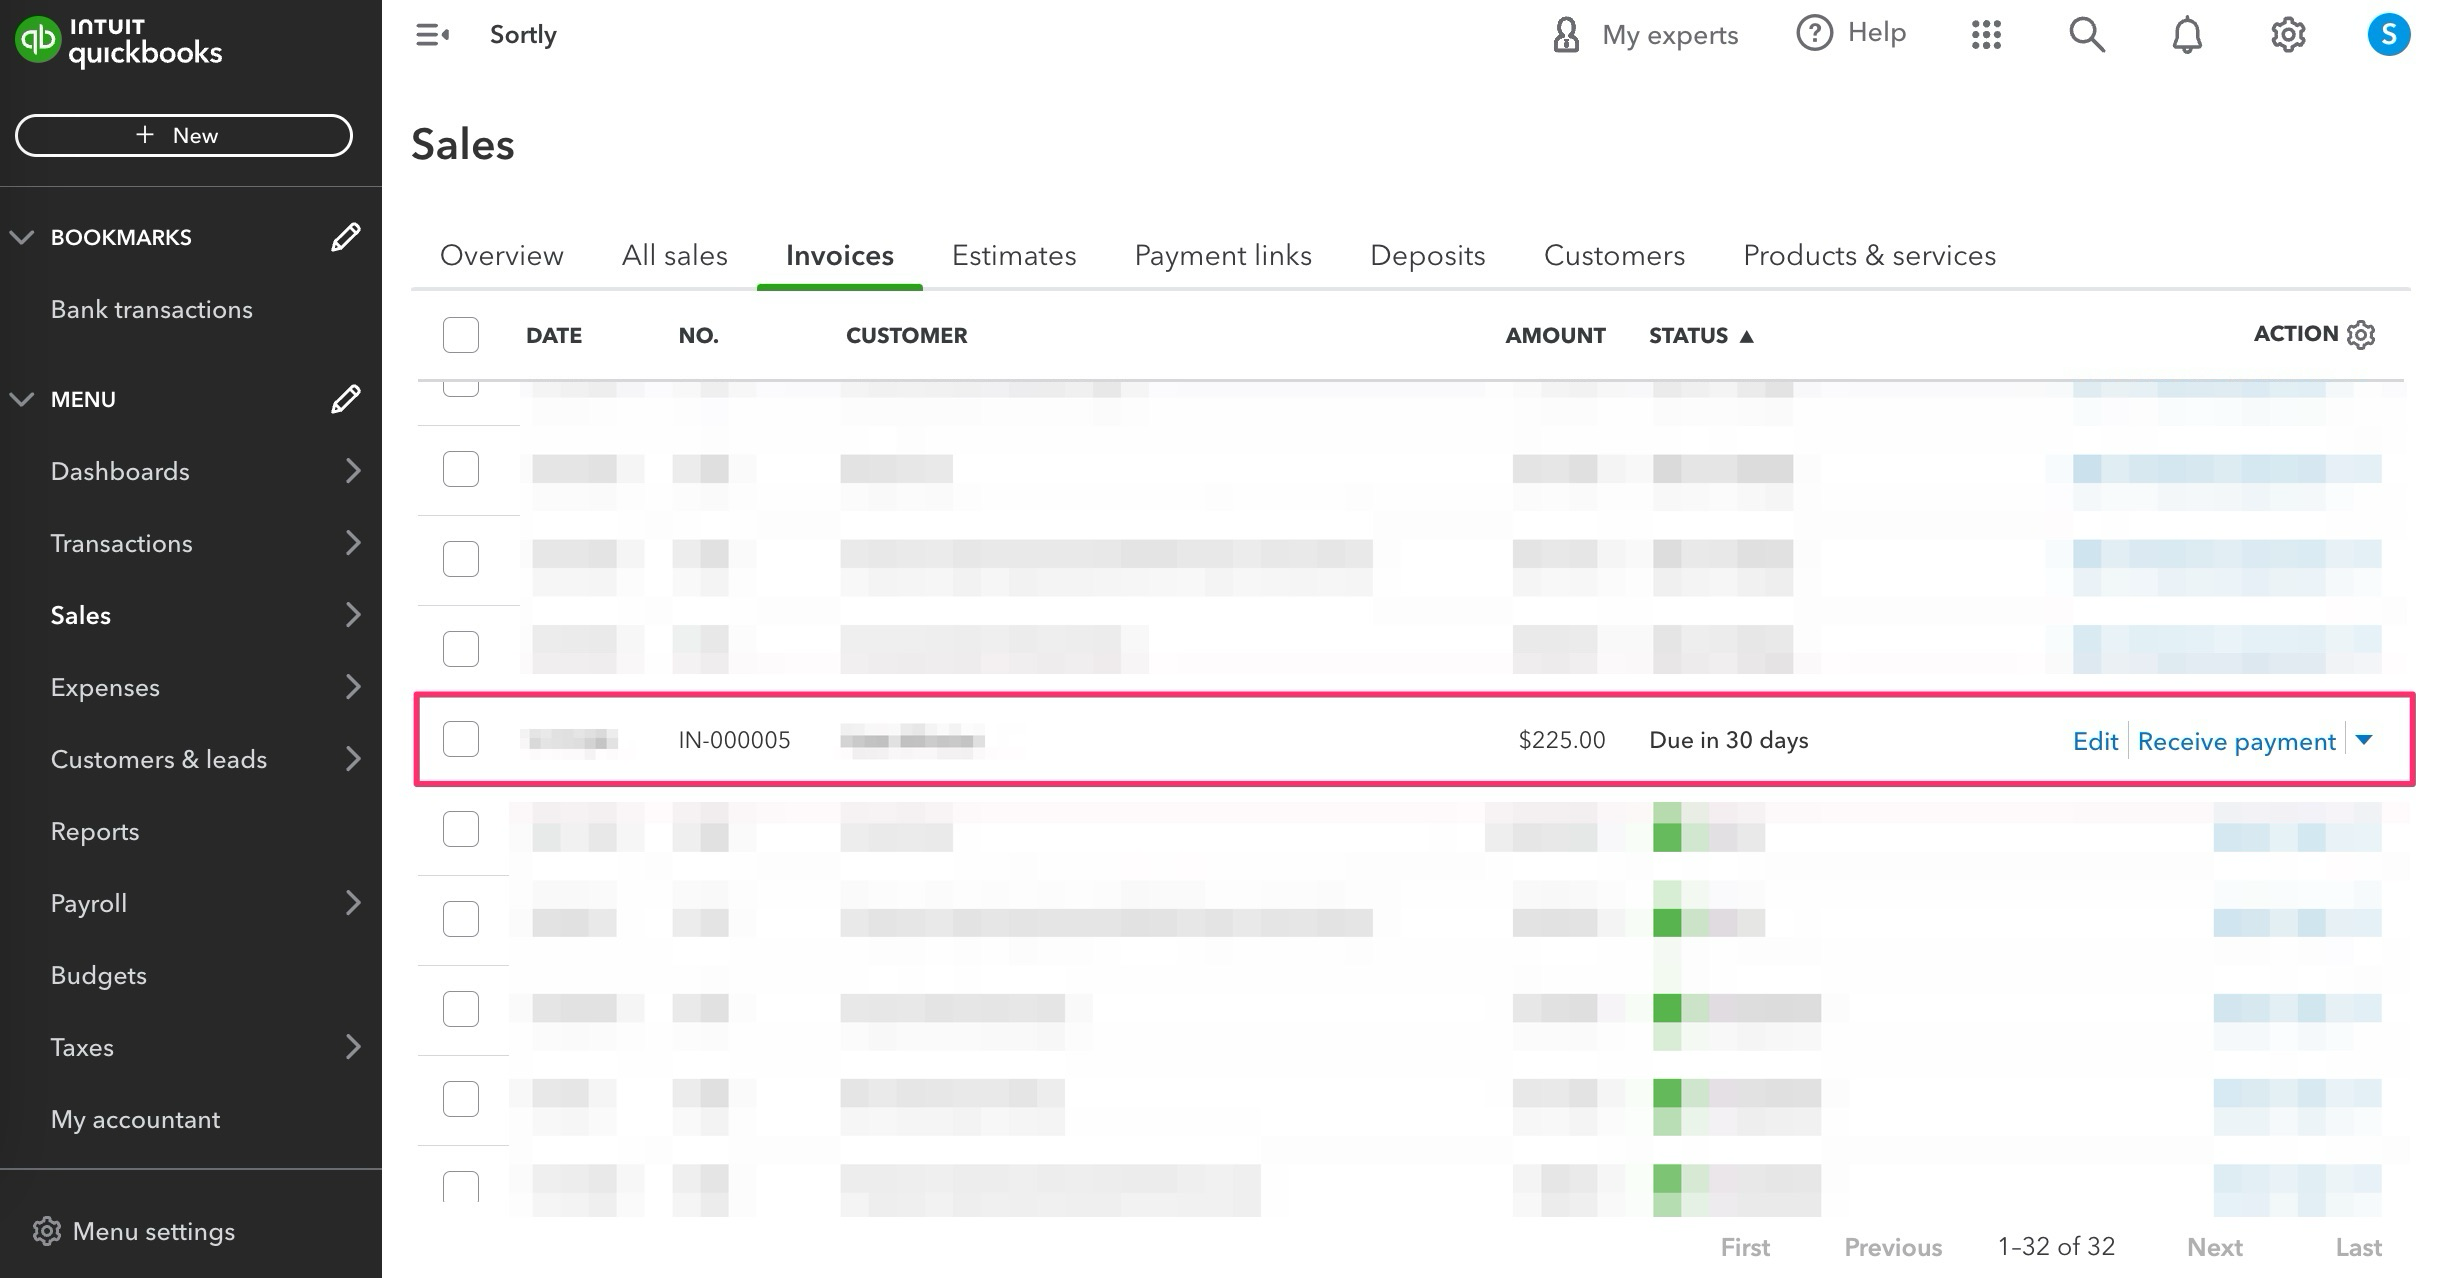
5. 5You can also navigate directly to your QBO account \> Sales \> Invoices
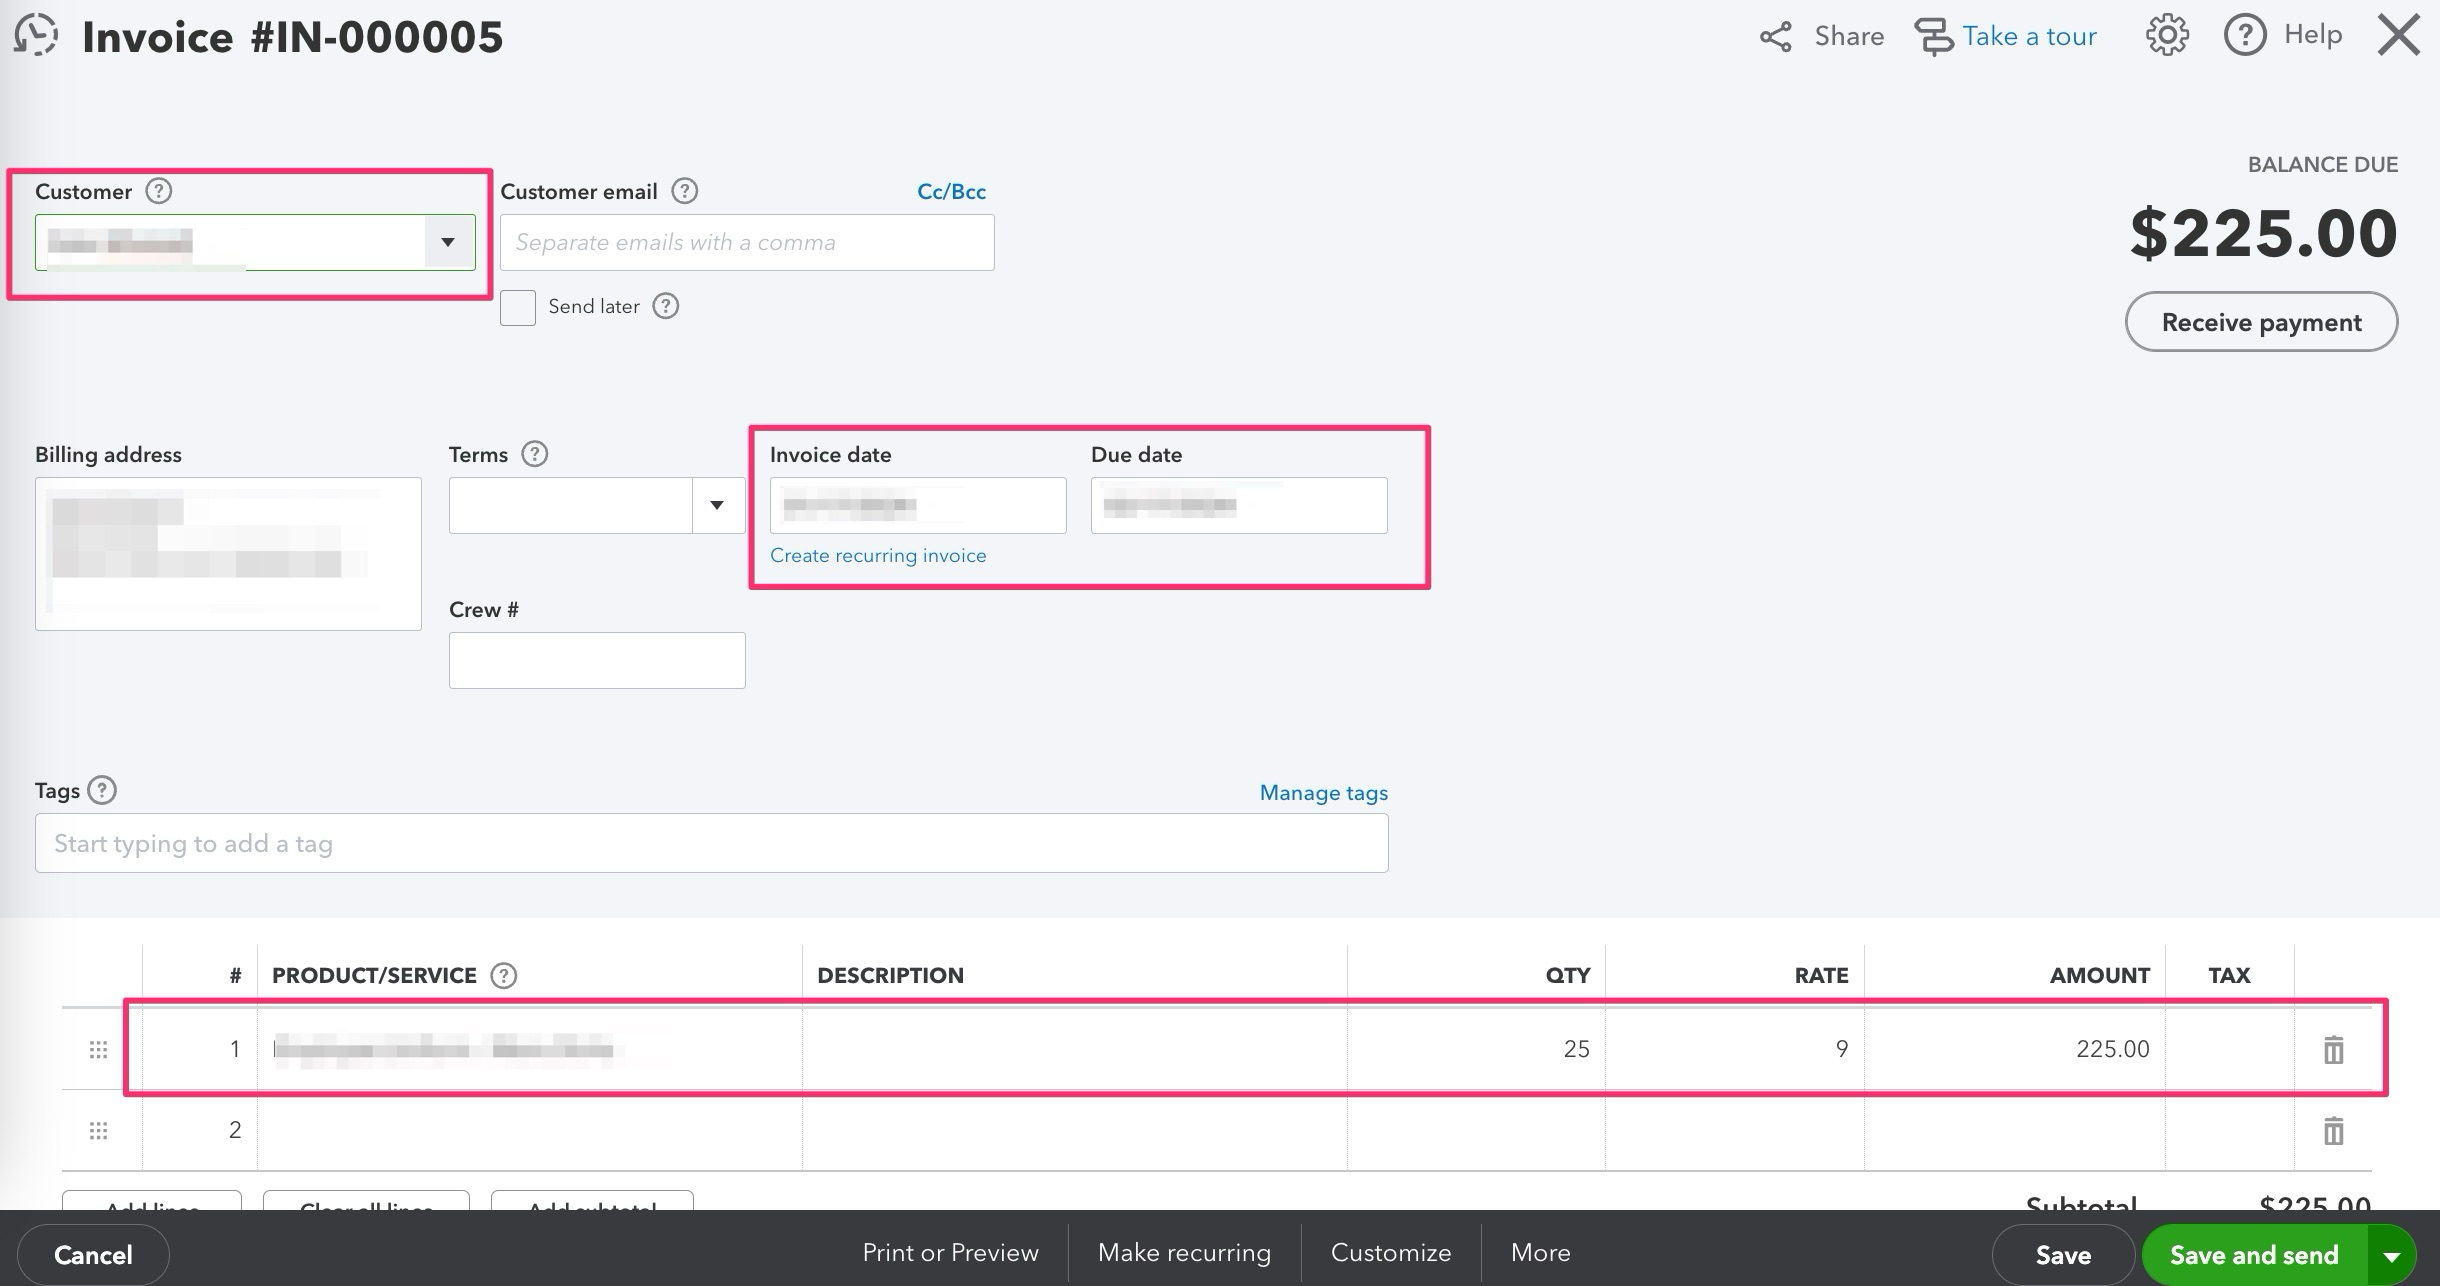
6. 6Once in the invoice, you will see that the information from Sortly has carried over
7. 7If you need to make changes to the invoice, navigate back to your Sortly account, select the invoice, and click **Edit**
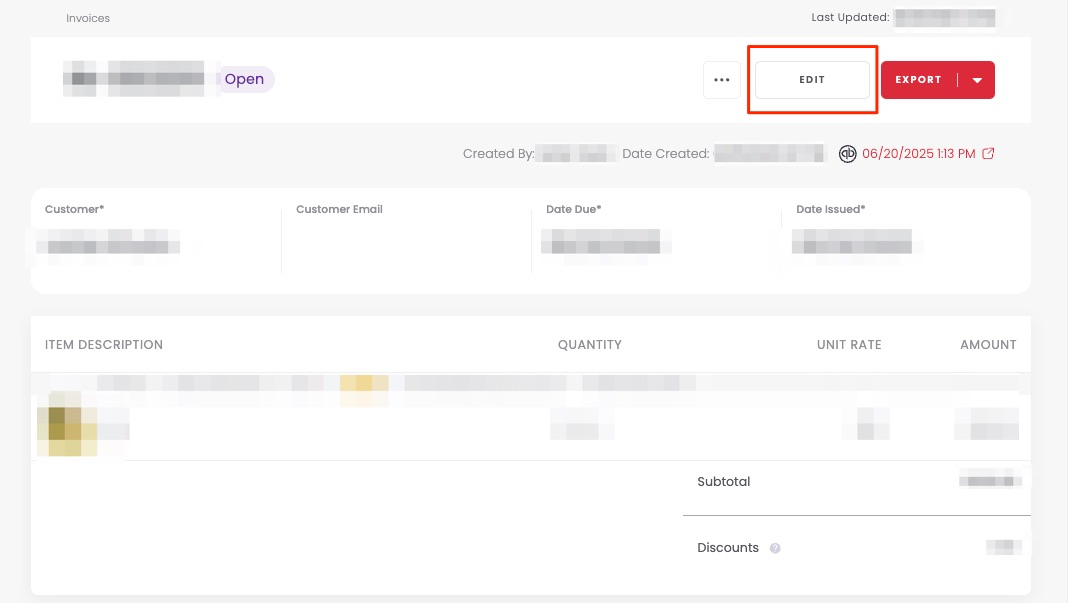
8. 8Make the changes, click **Save**, and then **Send to QuickBooks Online**. This will update the information in your QBO account. You can check the last time the invoice was sent to QBO

### Frequently Asked Questions
Why isn’t my invoice syncing with QuickBooks Online?
Invoices from Sortly will only sync to QuickBooks Online if the assigned account in QuickBooks is an **income account type**. If your invoice isn’t sending, check that the designated account in QuickBooks is categorized as an income account. Other account types, such as expense or liability accounts, are not supported for invoice syncing.
Why don't I see the Invoices feature in my account?
The Invoices feature is available only on the Premium and Enterprise plans. If your account is on the Free, Advanced, or Ultra plan, this option won’t appear. To access Invoices, you’ll need to upgrade to Premium or Enterprise.
[](https://www.sortly.com/)
Copyright © 2026, Sortly Inc.