---
title: Purchase Orders
description: Create and manage Purchase Orders, route them for approval, receive items to update quantities, and manage vendors. For Ultra, Premium, and Enterprise.
---
[Skip to content](https://help.sortly.com/purchase-orders#main-content)

Open main navigation
Close main navigation
Looking for answers? Start here.
- There are no suggestions because the search field is empty.
1. [Sortly Help Center](https://help.sortly.com/?hsLang=en)
2. [Workflows](https://help.sortly.com/workflows?hsLang=en)
3. [Workflows](https://help.sortly.com/workflows?hsLang=en#workflows)
# Purchase Orders
Purchase Orders let you track what you're buying, manage approvals, and update your inventory automatically when items arrive. Create a PO from scratch, add items through the Restock flow, or kick one off directly from a saved Product Link on any item.
Ultra
Premium
Enterprise
In this article
1. [Overview and permissions](https://help.sortly.com/purchase-orders#overview)
2. [Create and manage a Purchase Order](https://help.sortly.com/purchase-orders#create)
3. [Approvals, receiving, and closing](https://help.sortly.com/purchase-orders#lifecycle)
4. [QuickBooks Online](https://help.sortly.com/purchase-orders#qbo)
5. [Vendor management](https://help.sortly.com/purchase-orders#vendors)
6. [Purchase Orders on mobile](https://help.sortly.com/purchase-orders#mobile)
7. [Frequently asked questions](https://help.sortly.com/purchase-orders#faq)
### Overview and permissions
Each Purchase Order shows the following fields in the PO list view:
- PO Number
- Created by / Submitted by
- Status: Draft, Ready to Review, Approved, Ordered, Received
- Last Updated
- Ship To / Vendor
- Pricing and cost information
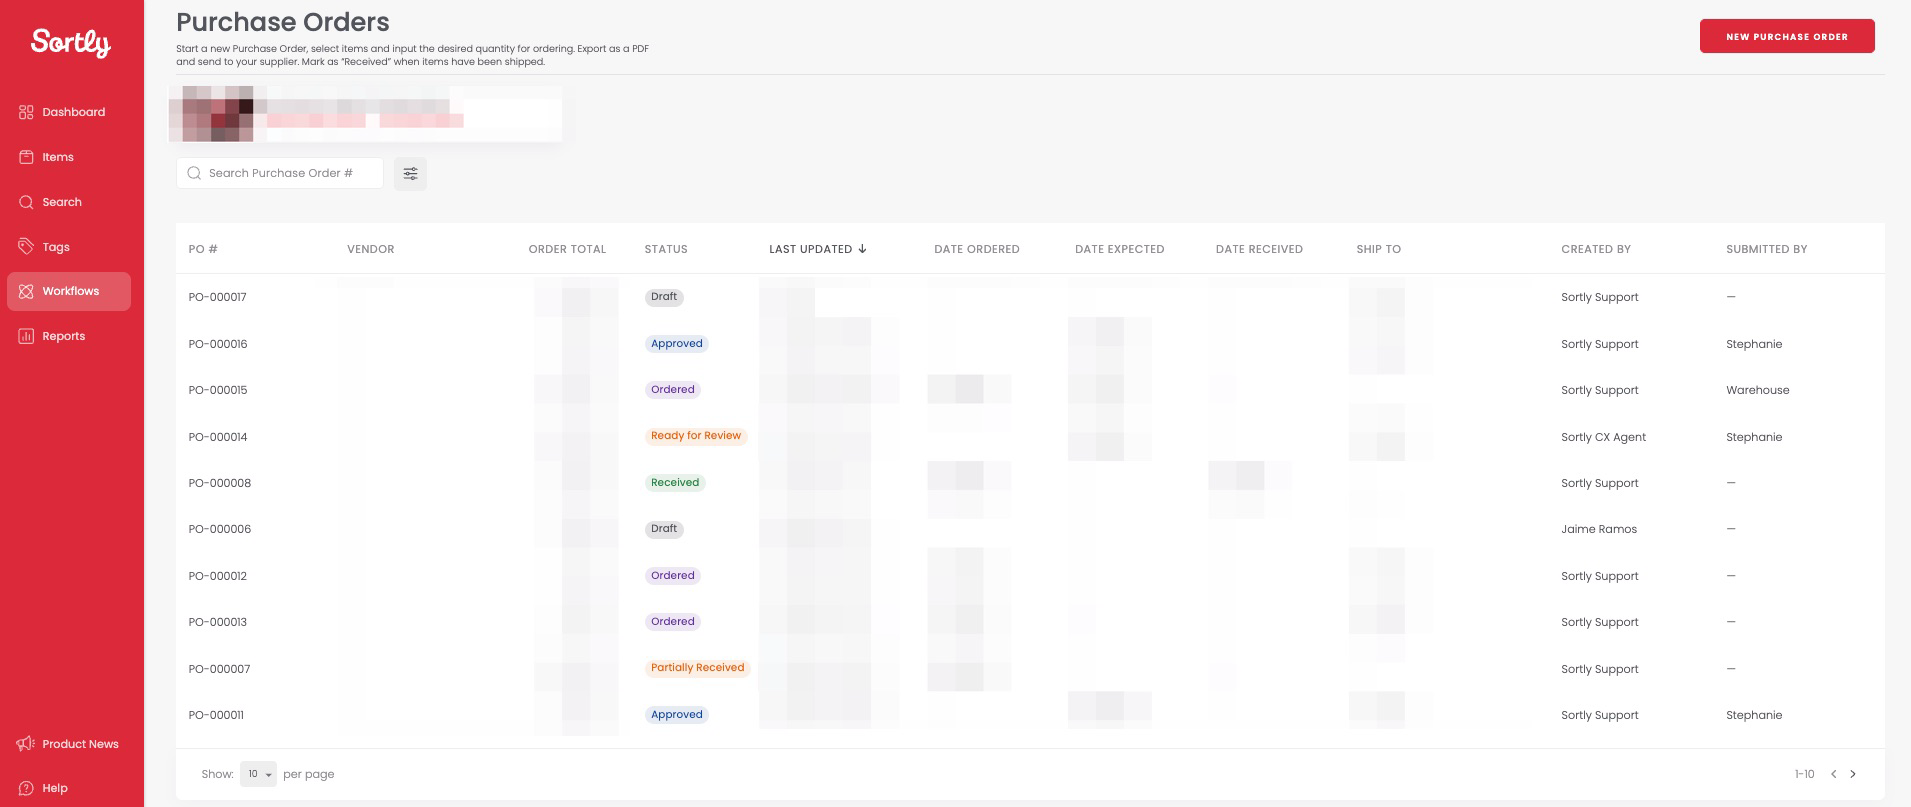
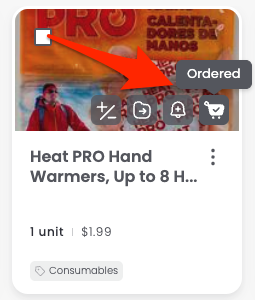
You can also check whether an item has already been ordered before creating a new PO. Items with an active order display a shopping cart icon with a checkmark in Grid view, List view, Advanced Search, and the Low Stock Report. Hover over the icon to see the Ordered label.
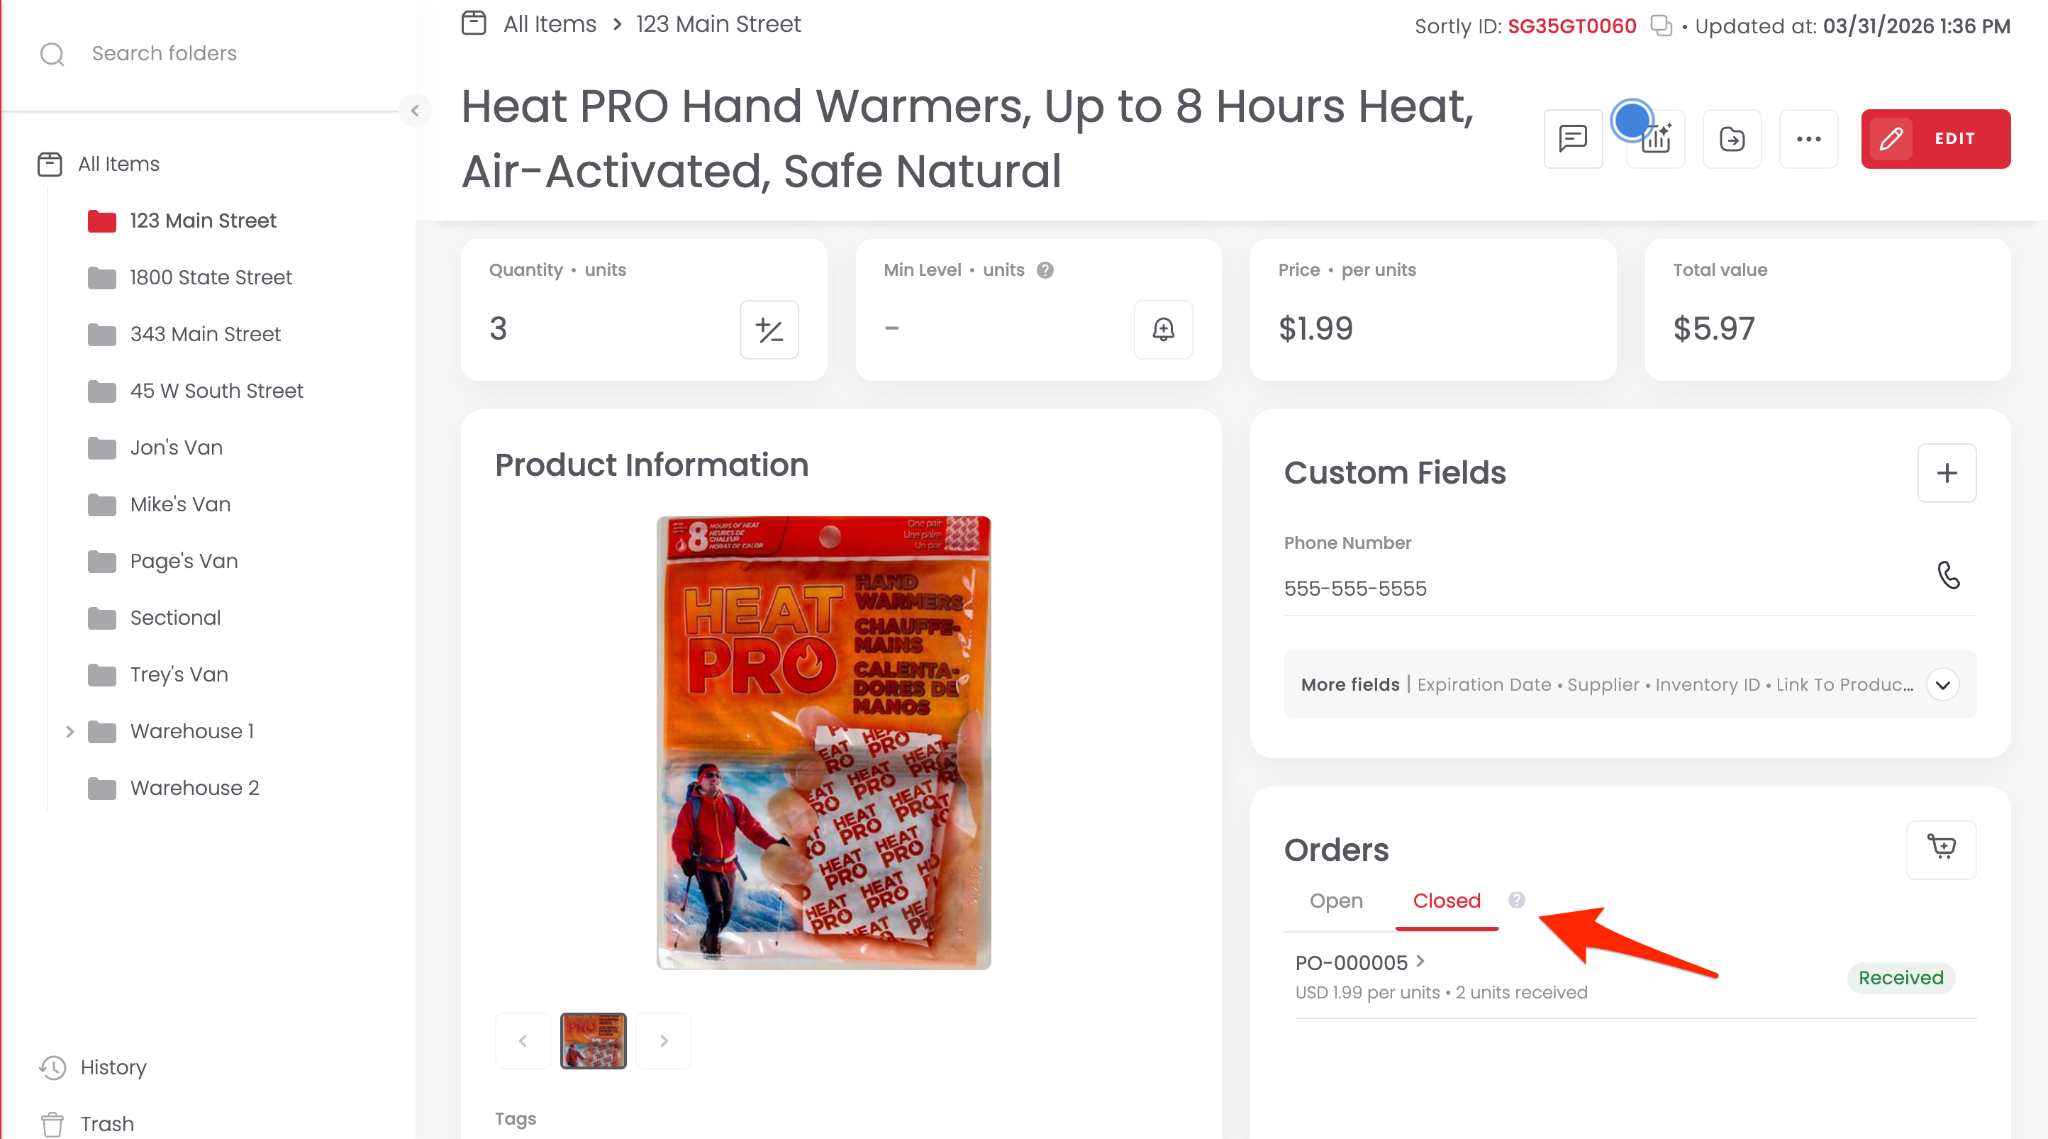
View full PO history for any item on its detail page, in the Workflow tab, or directly from the Restock modal.
#### Permissions
By default, Owners and Admins have full access to Purchase Orders. Team Members can be granted access by going to Settings, then Manage Permissions, then Purchase Orders.
Role
Full access
Notes
Owner
Yes
Can delete POs in any status
Admin
Yes
Team Member
If permitted
Limited capabilities, see FAQ for details
Limited Access
No
---
### Create and manage a Purchase Order
#### Create a Purchase Order
1. 1**Go to Workflows, then Purchase Orders**
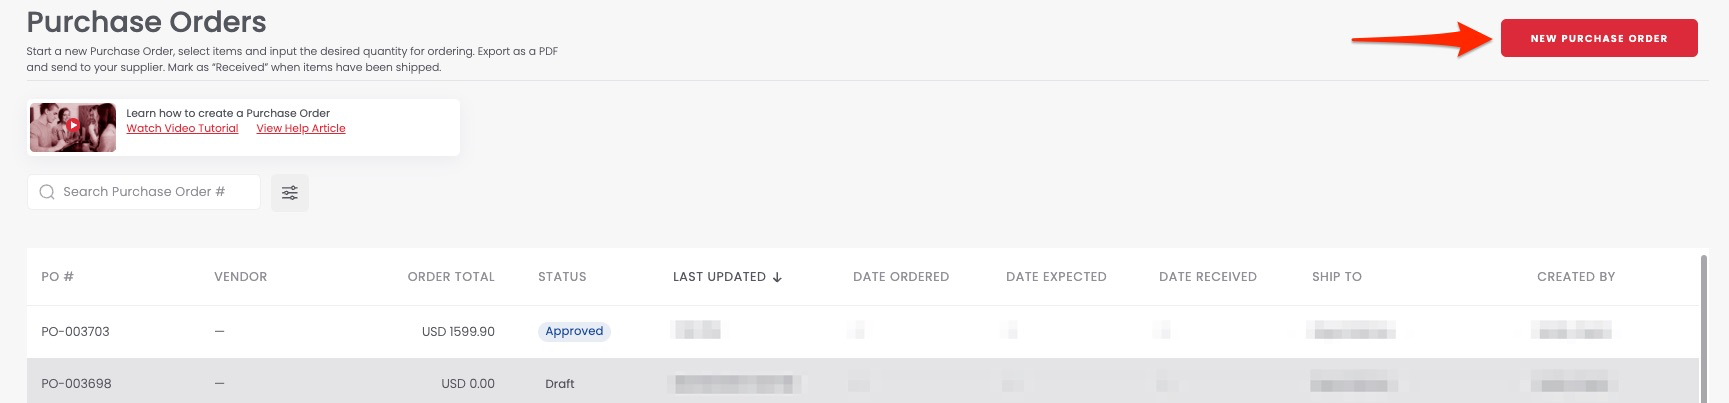
Navigate to Workflows and click Purchase Orders, then click New Purchase Order.
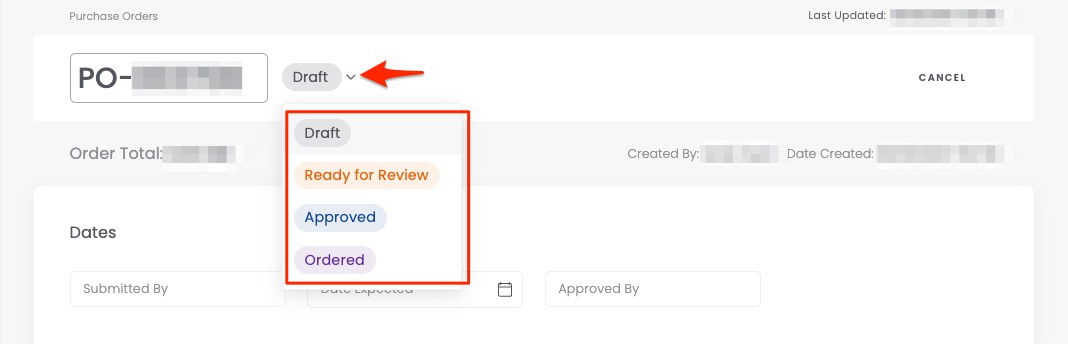
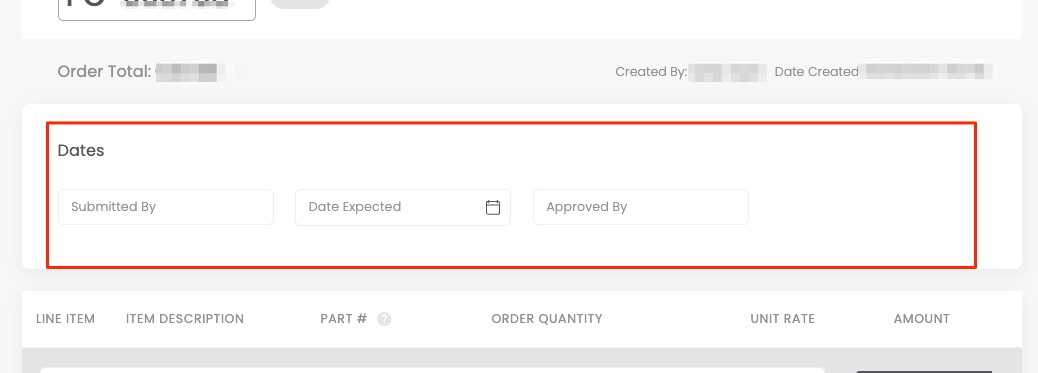
2. 2**Enter the PO number, status, and dates**
Fill in the PO number, set the status, and enter the Submitted By, Date Expected, and Approved By fields.
3. 3**Add items**
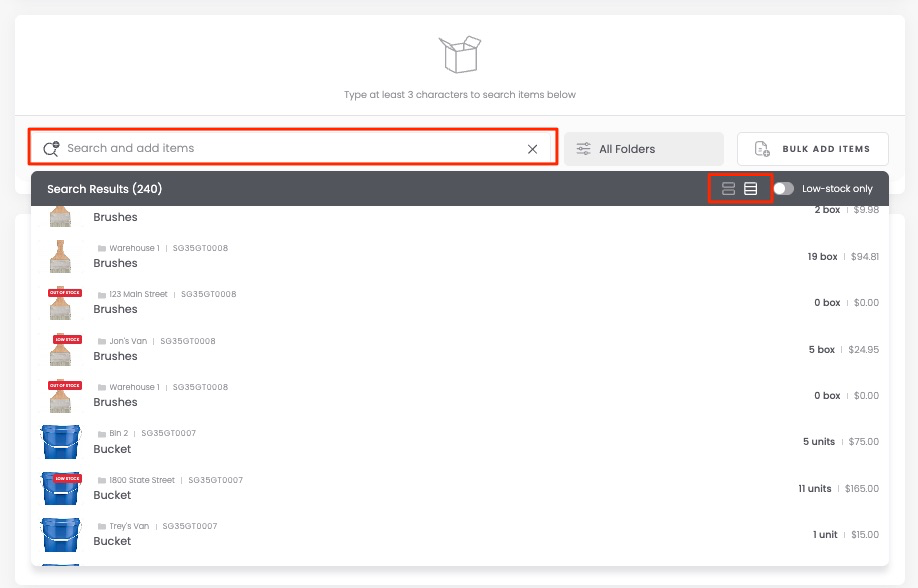
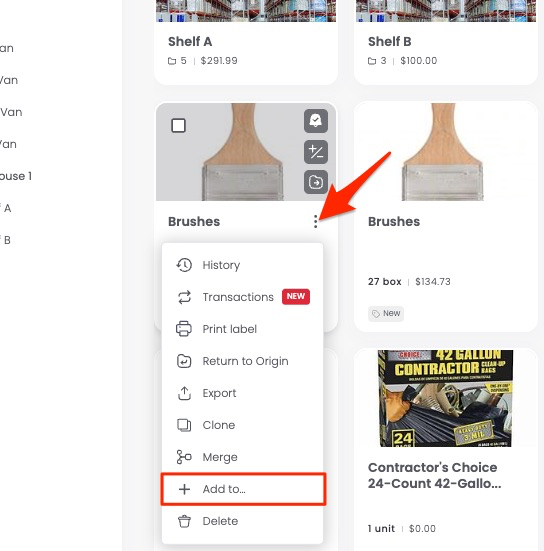
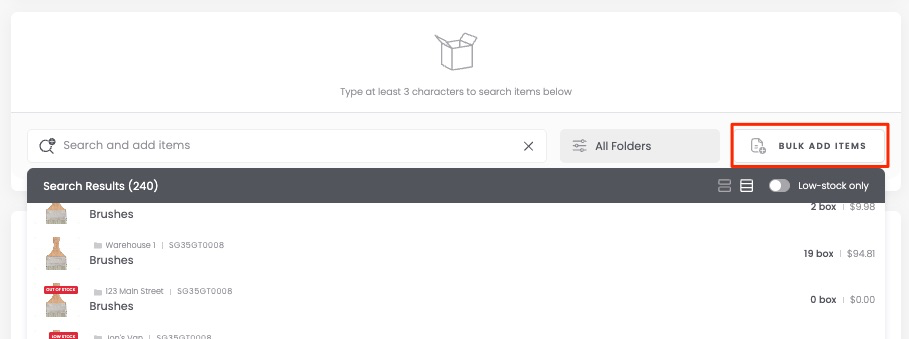
Search for items by name, or click Bulk Add Items to add many at once. The maximum is 100 items per PO. You can also add an item to a PO directly from its item card.
4. 4**Add vendor and shipping details, then save**
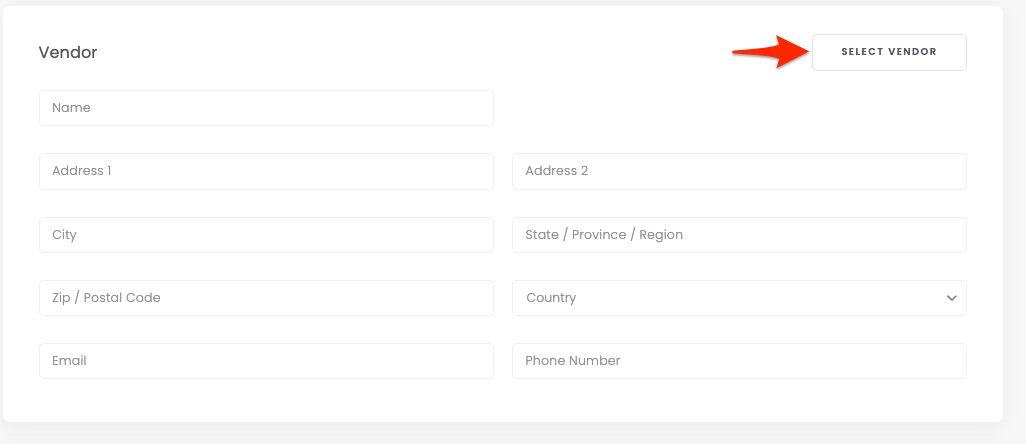
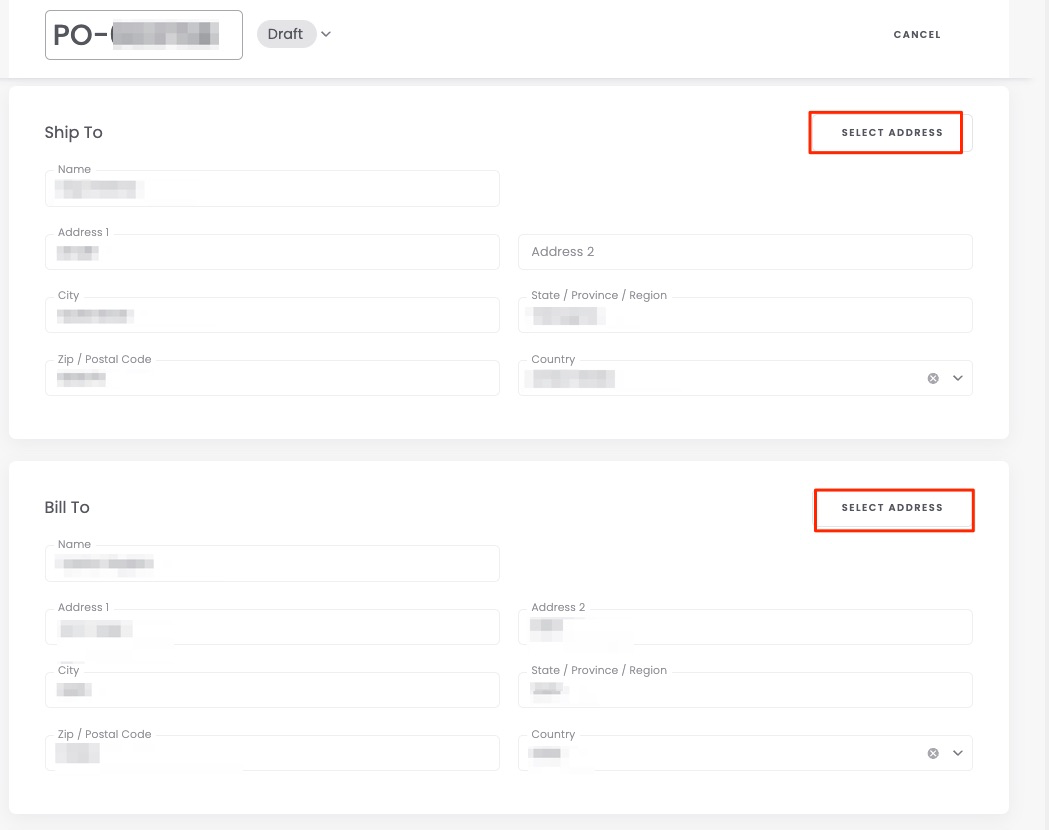
Choose an existing vendor with Select Vendor or enter information manually. Fill in Ship To and Bill To, then click Save.
#### Add multiple items at once
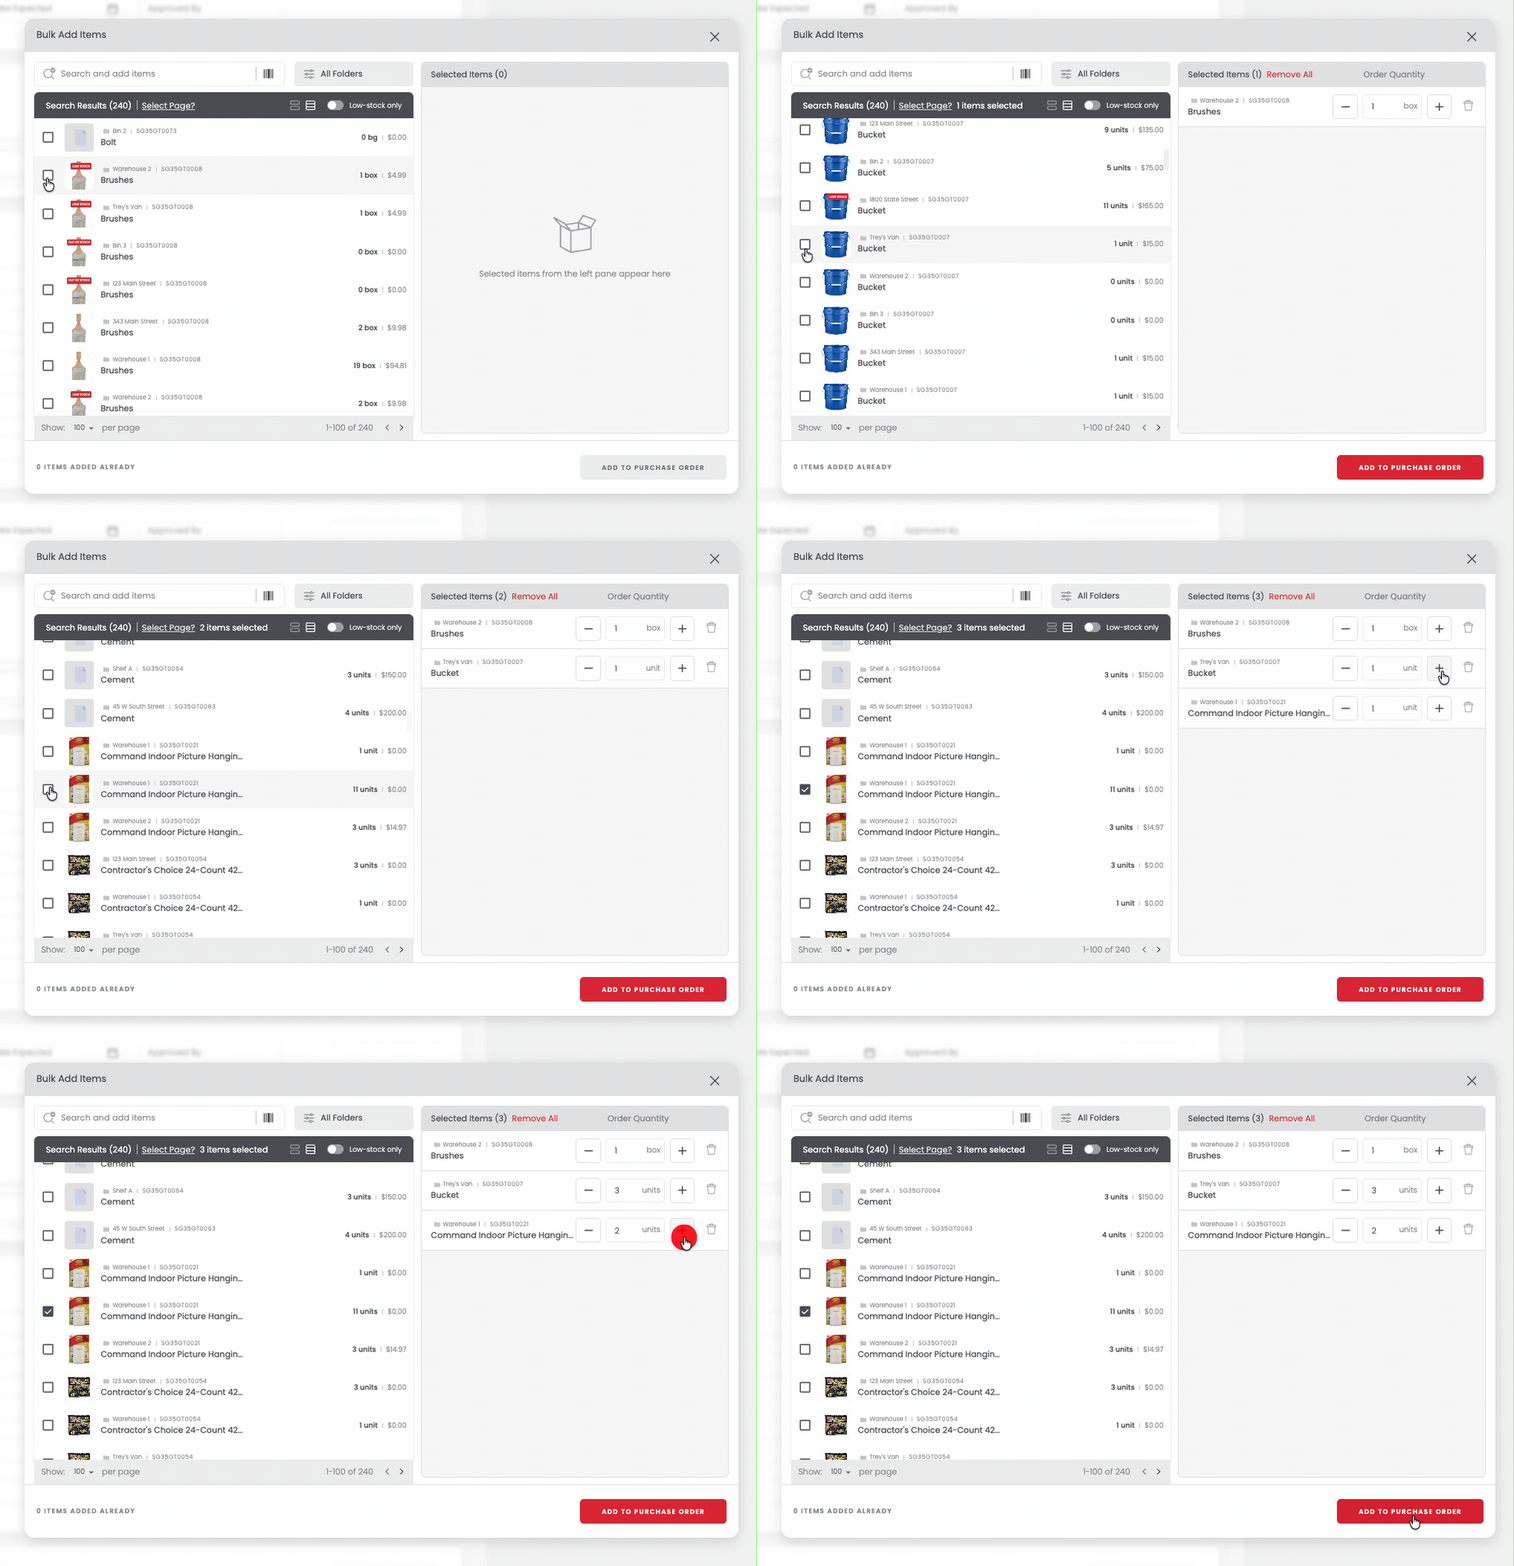
**Using Bulk Add Items:** on the PO creation page, click Bulk Add Items instead of searching, select your items, then click Add to Purchase Order.
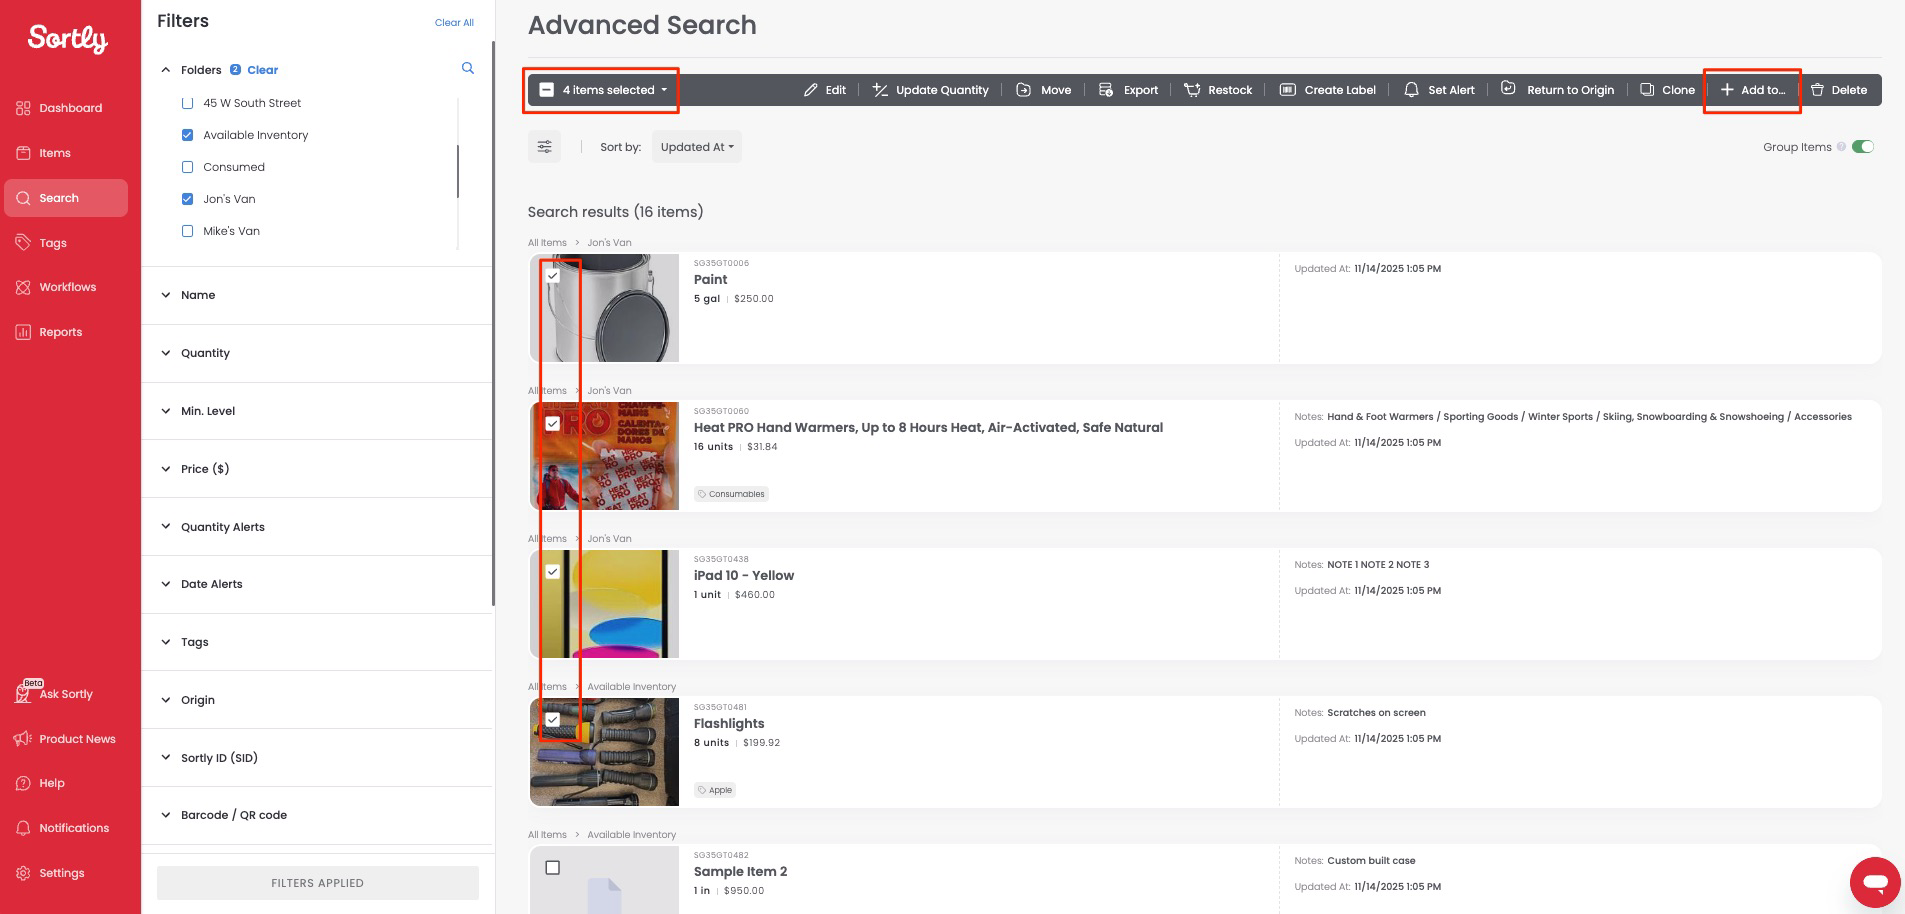
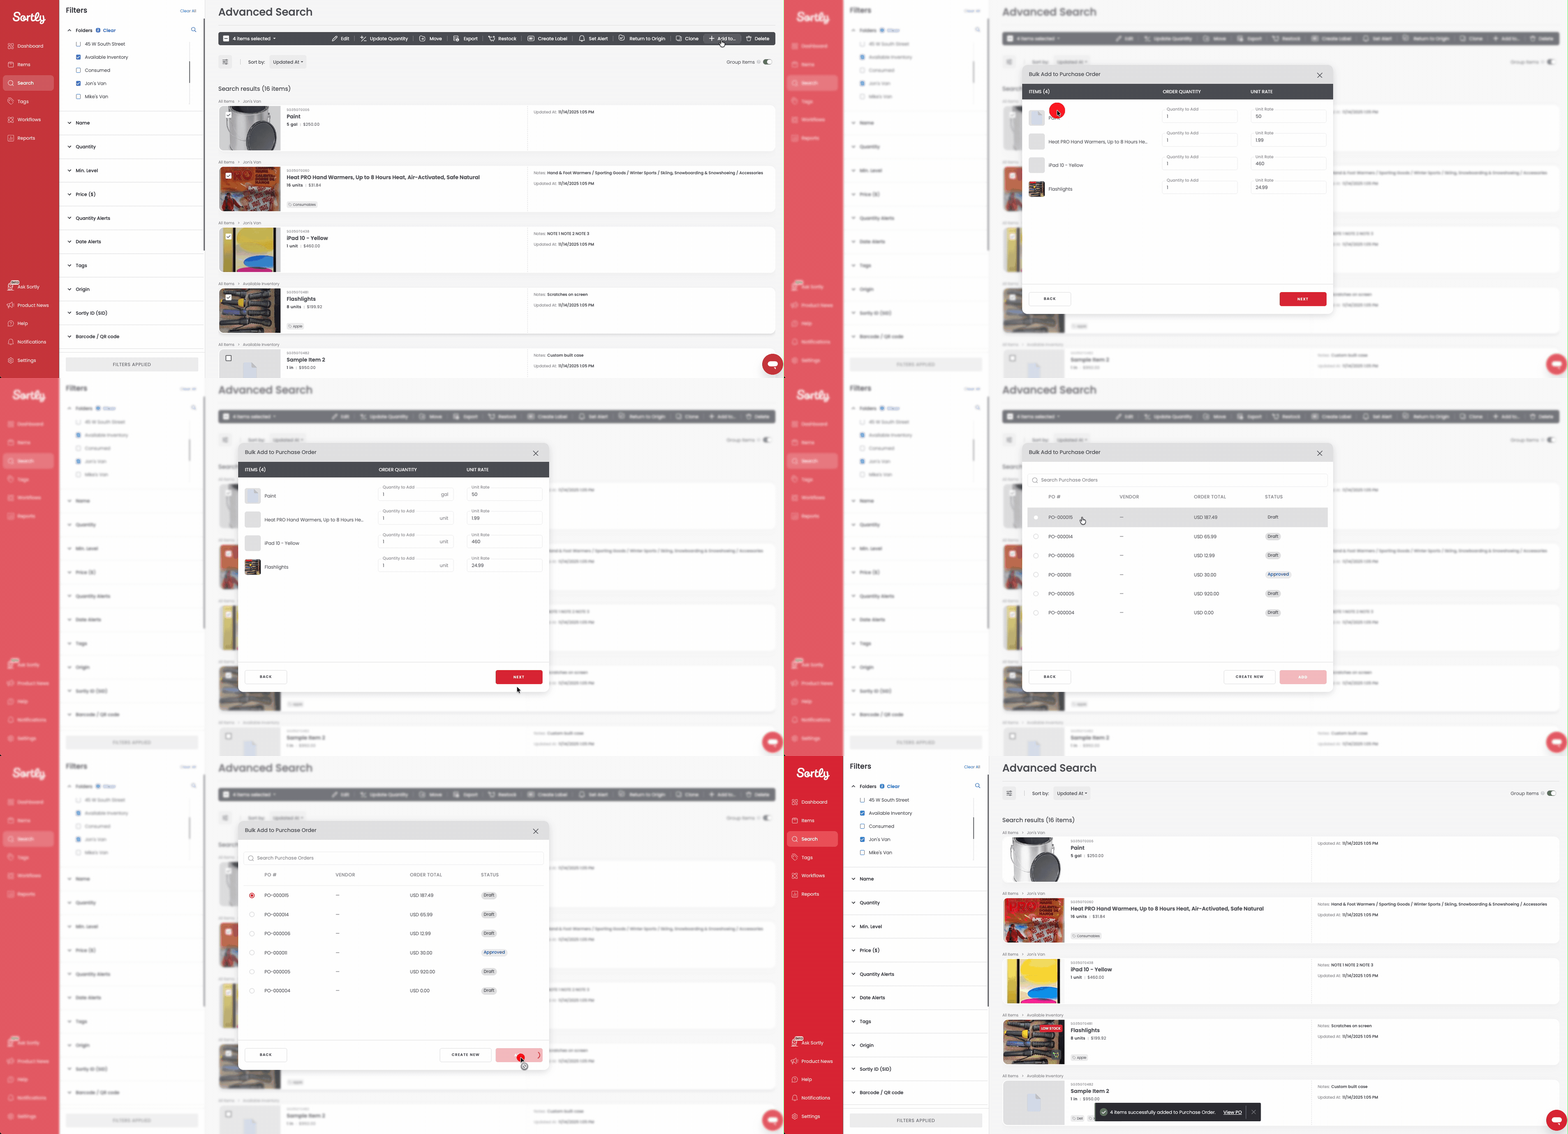
**Via Advanced Search:** apply filters, use the bulk-select checkboxes to choose items, then click Add To, then Purchase Order. Choose a quantity for each item, then select a new or existing PO.
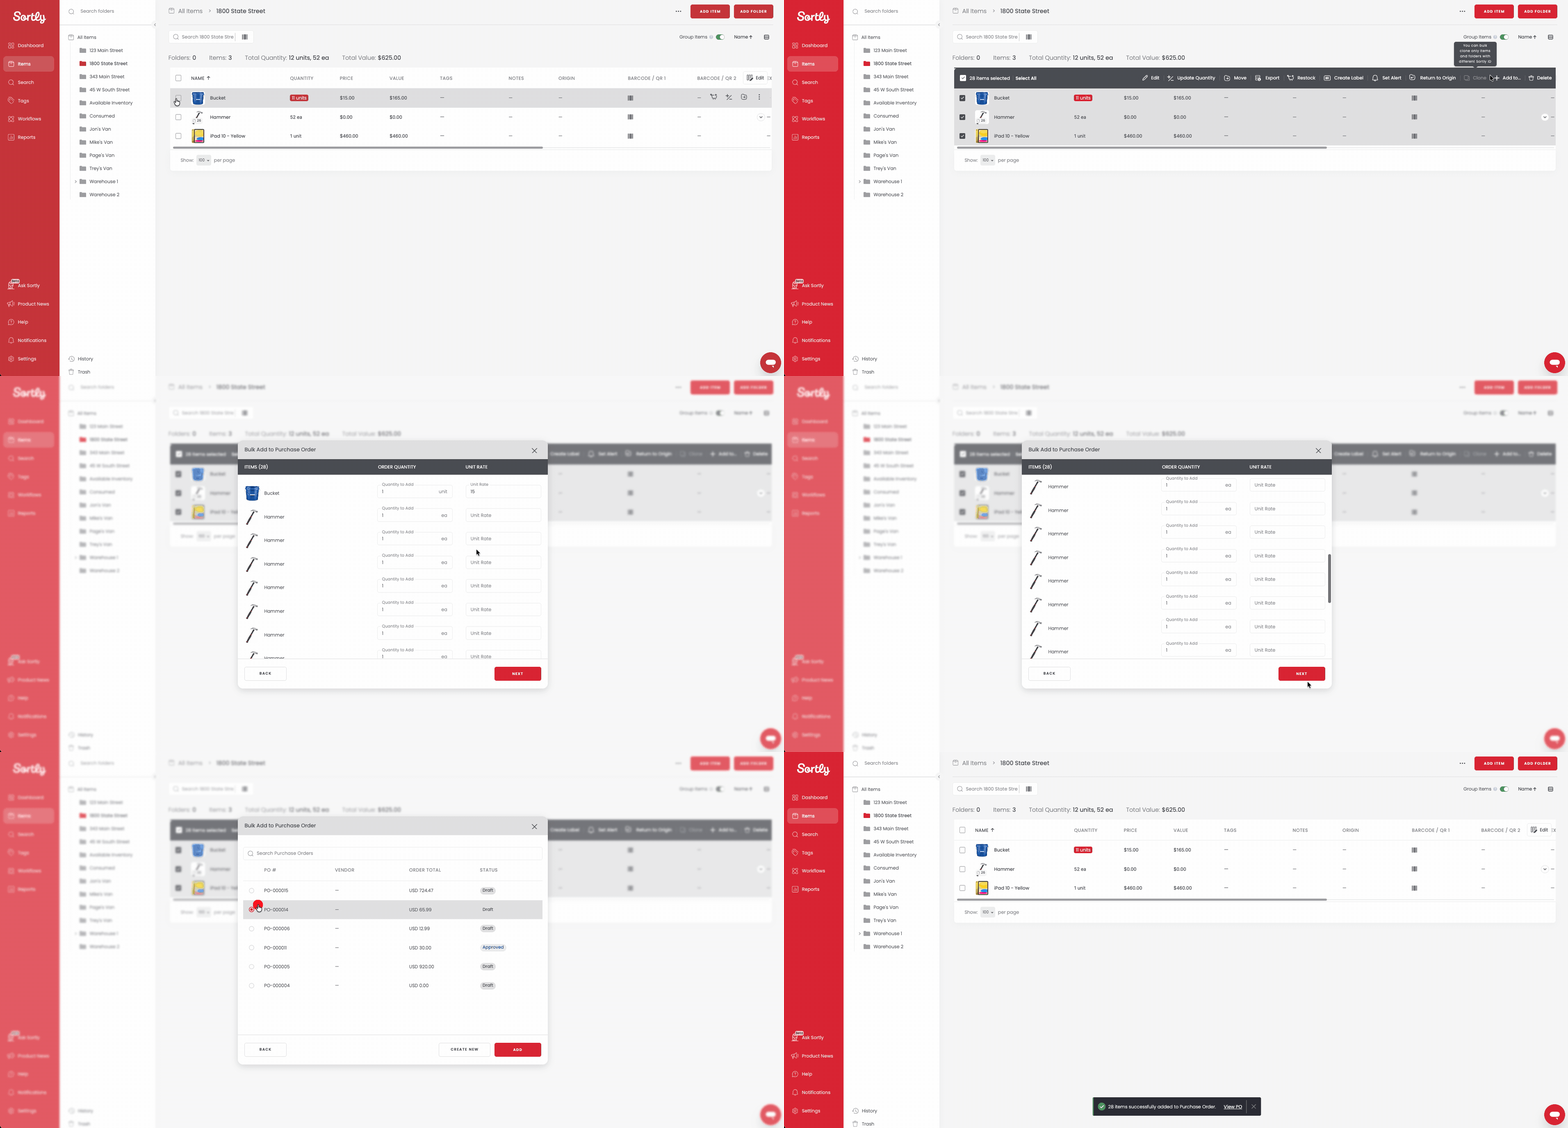
**Via a Folder:** open a folder, select items with the bulk-select checkboxes, and follow the same steps as Advanced Search above.
#### Edit or delete a Purchase Order
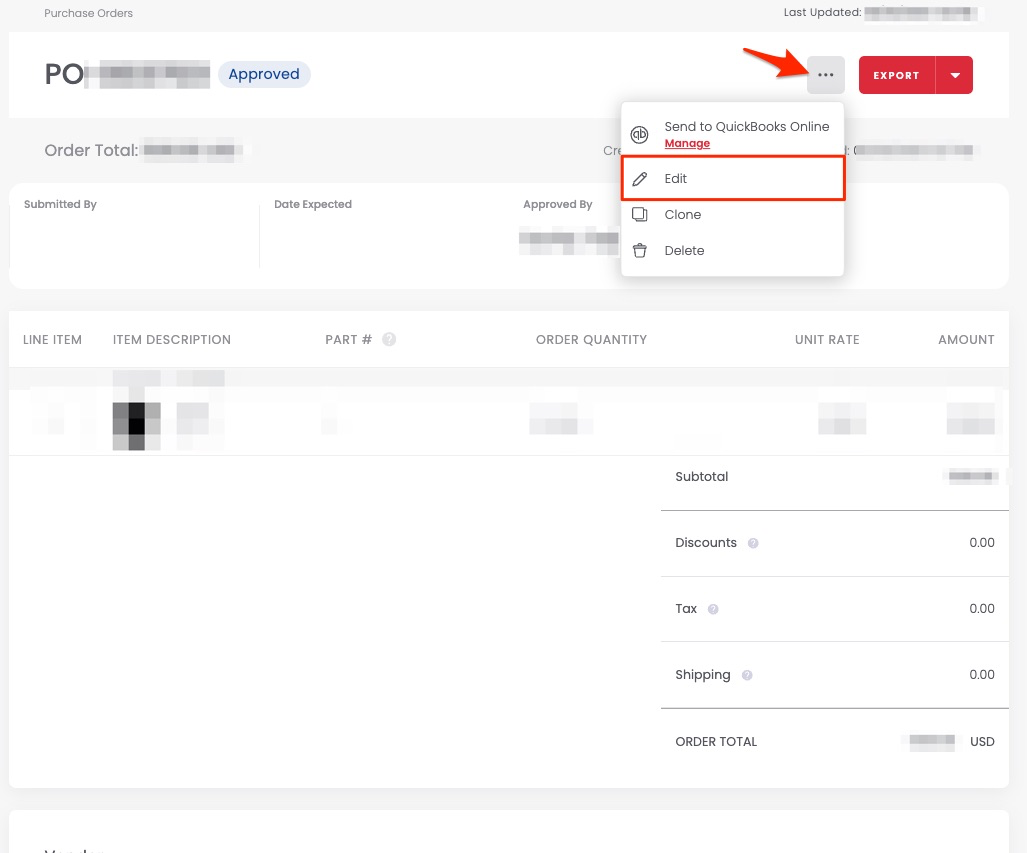
Go to Workflows, then Purchase Orders, and click the PO you want to update. Click the three-dot menu and choose Edit, make your changes, then click Save.
🗑️ Only Owners can delete Purchase Orders, and deletion is permanent. Owners can delete a PO in any status.
💡 You can also start a Purchase Order directly from an item's saved Product Link. [Learn more about Product Link](https://help.sortly.com/hc/en-us/articles/53166785672859-Product-Link?hsLang=en).
---
### Approvals, receiving, and closing
#### Submit for approval
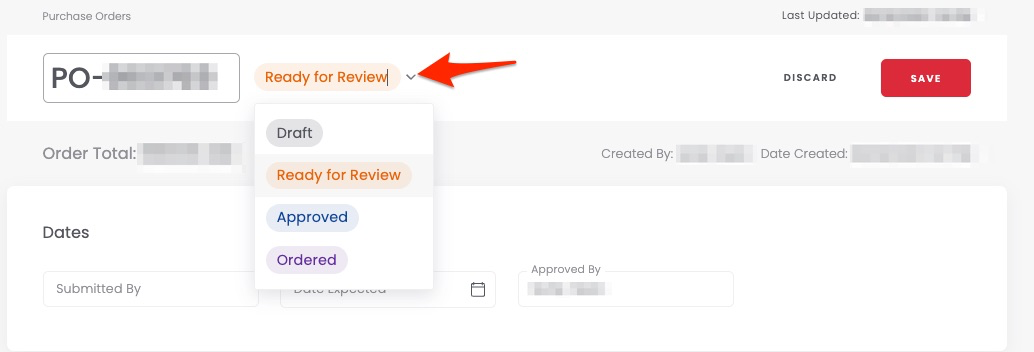
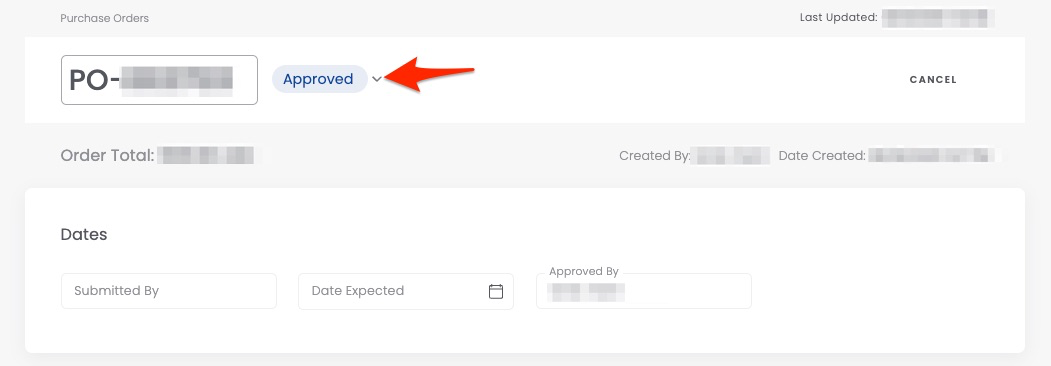
Open the PO and click Edit. Change the status to Ready for Review and click Save. The approver can then log in, review the PO, and change the status to Approved.
#### Receive items
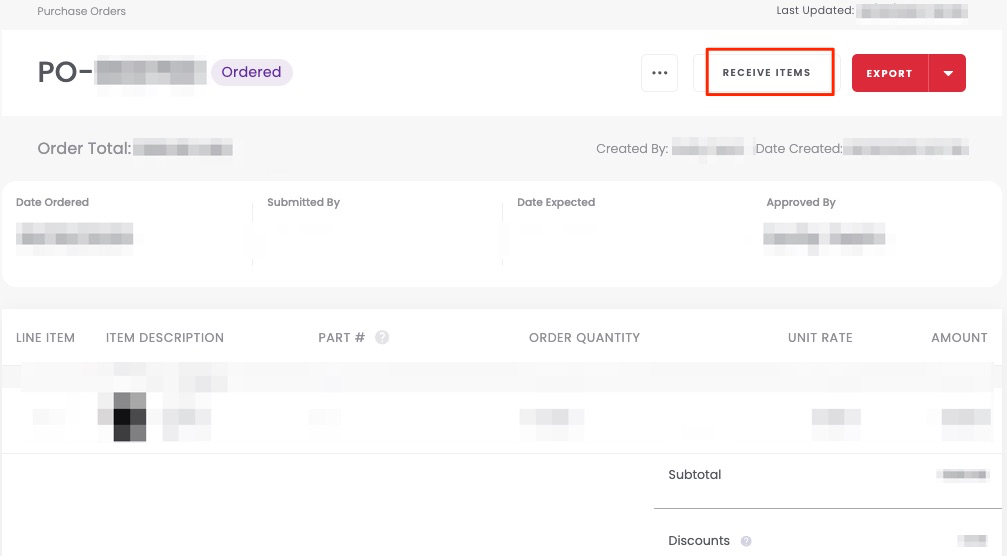
1. 1**Click "Receive Items" on the Purchase Order**
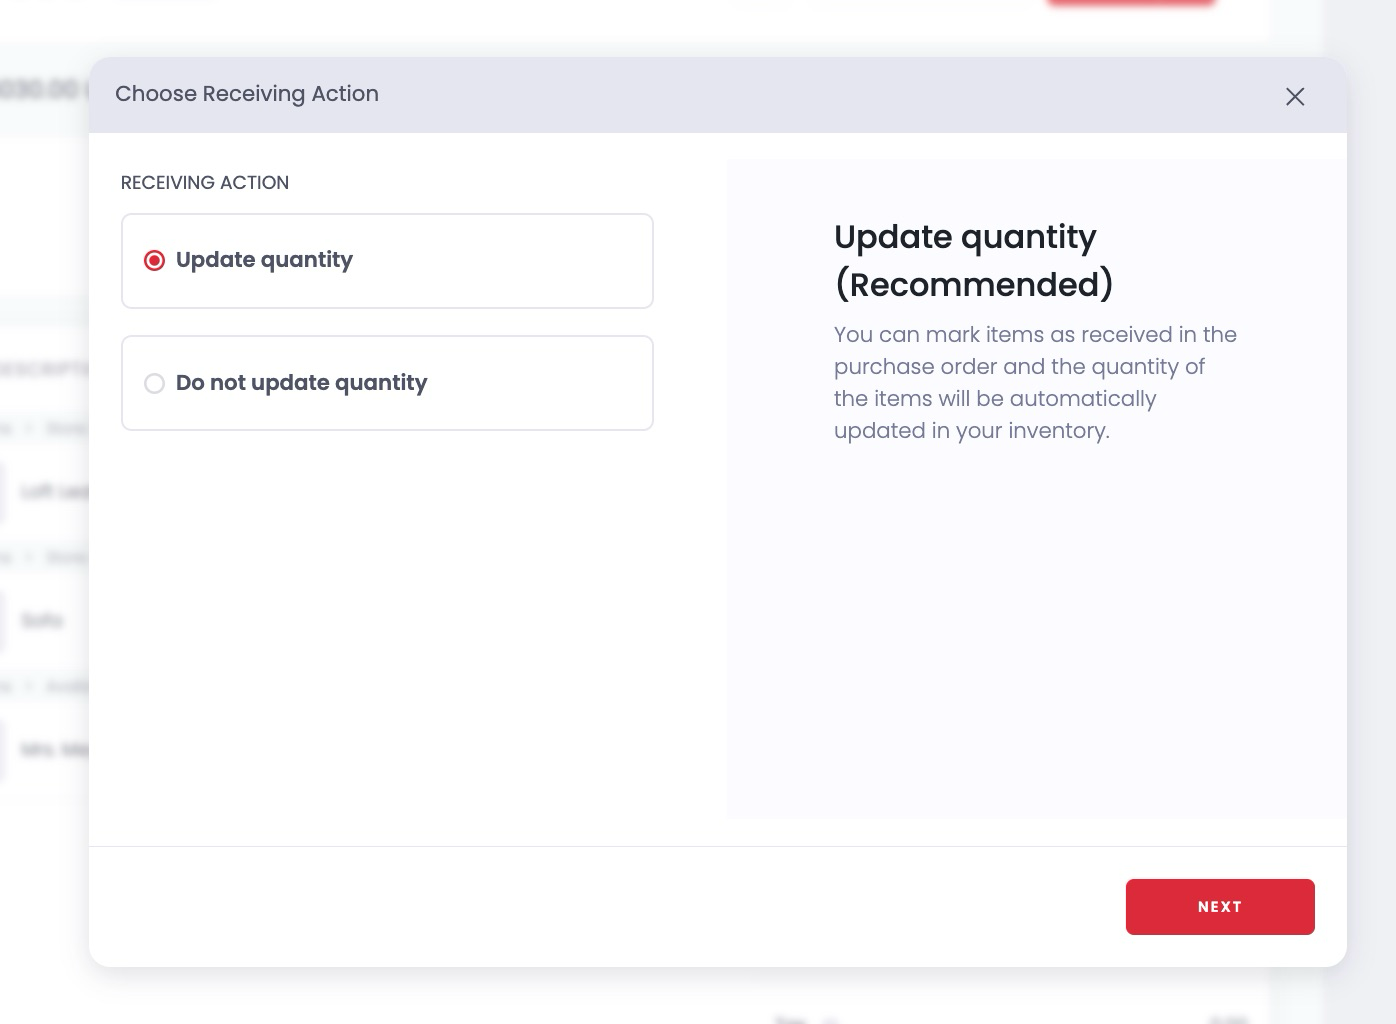
2. 2**Choose whether to update quantity**
Select Update quantity or Do not update quantity. Updating quantity is recommended.
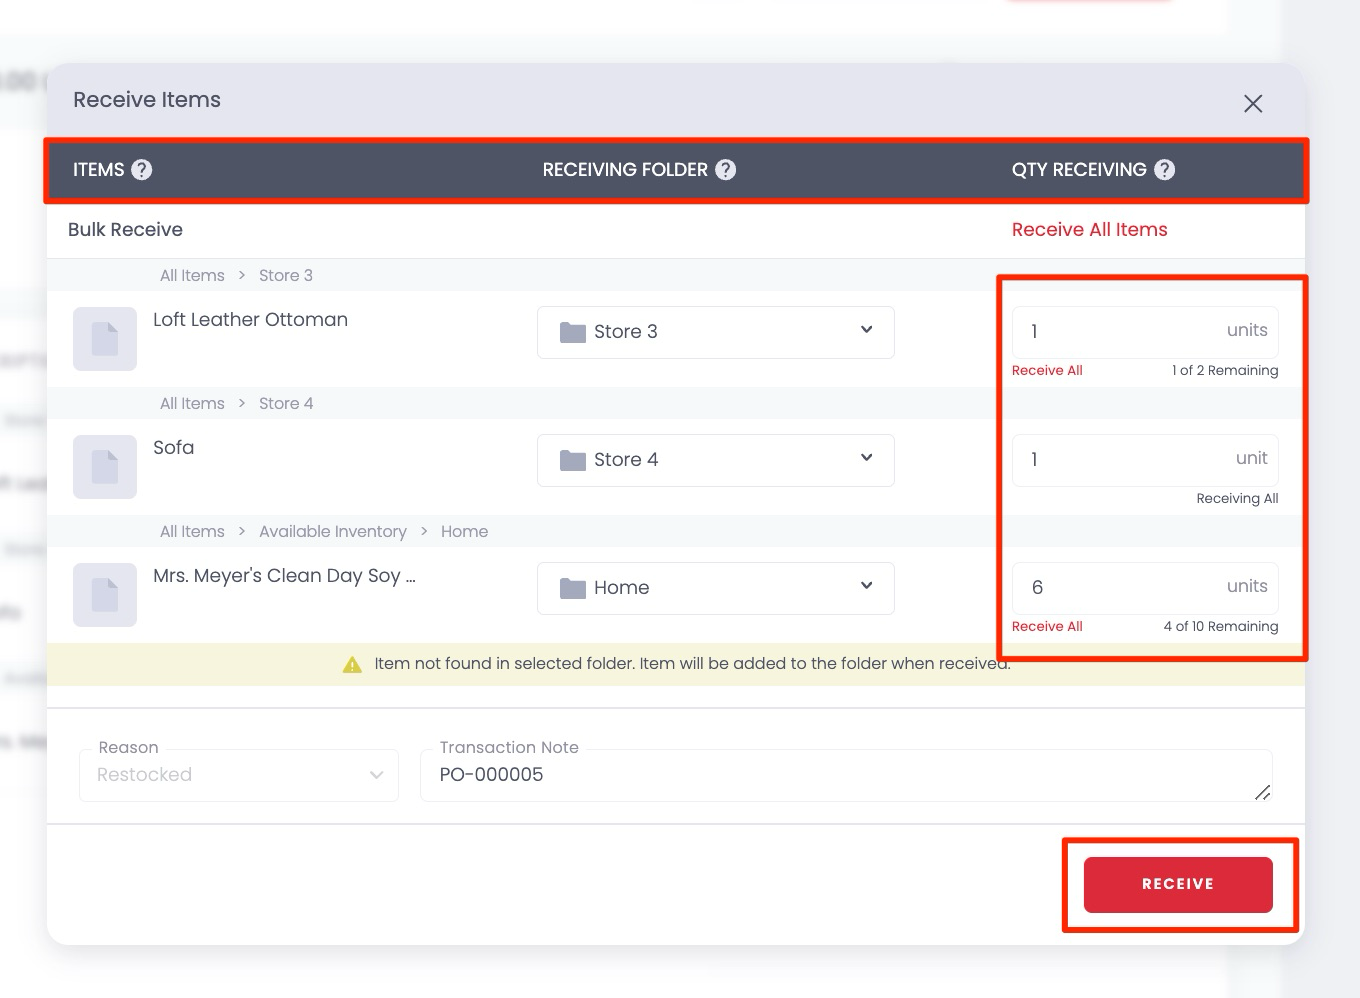
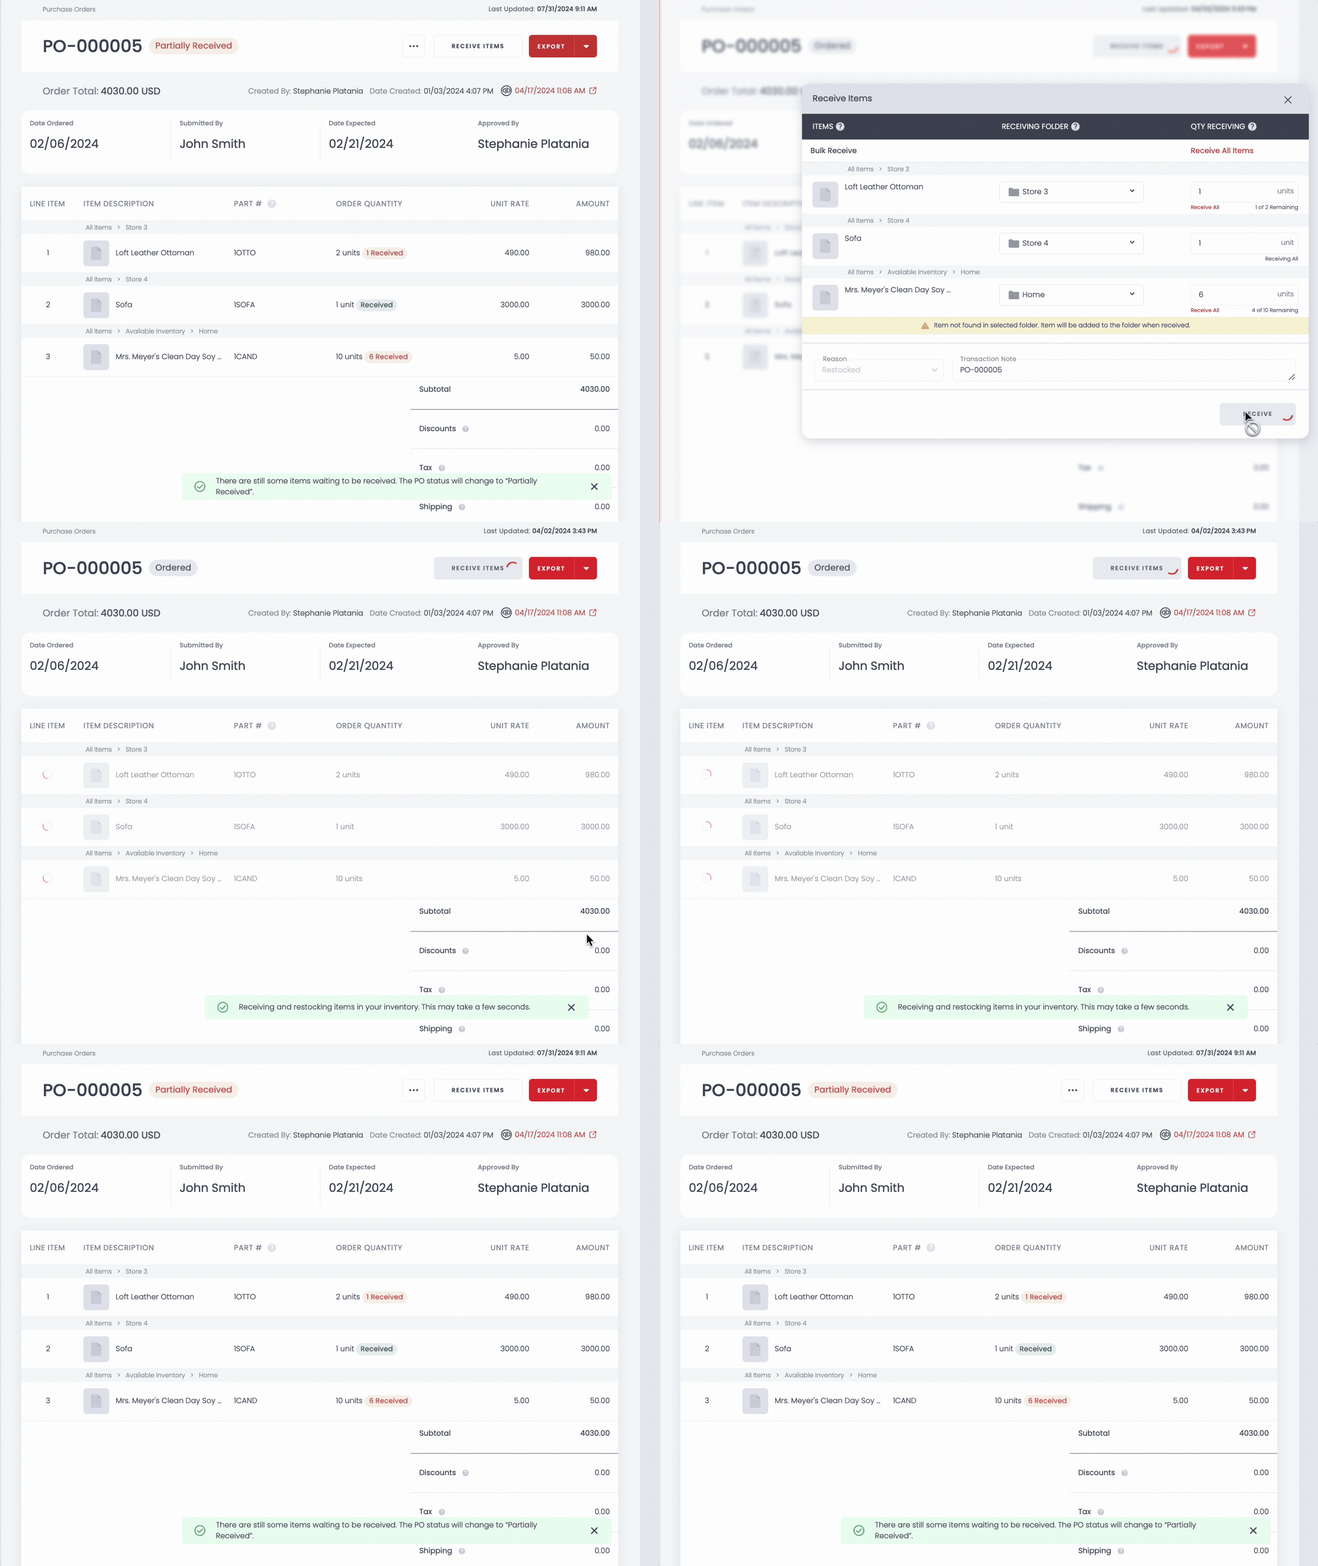
3. 3**Choose receiving folder and confirm quantities**
Click Next, select the receiving folder, and enter the quantity for each item. If you receive only some items, the PO moves to Partially Received status. Repeat the process when the rest arrive.
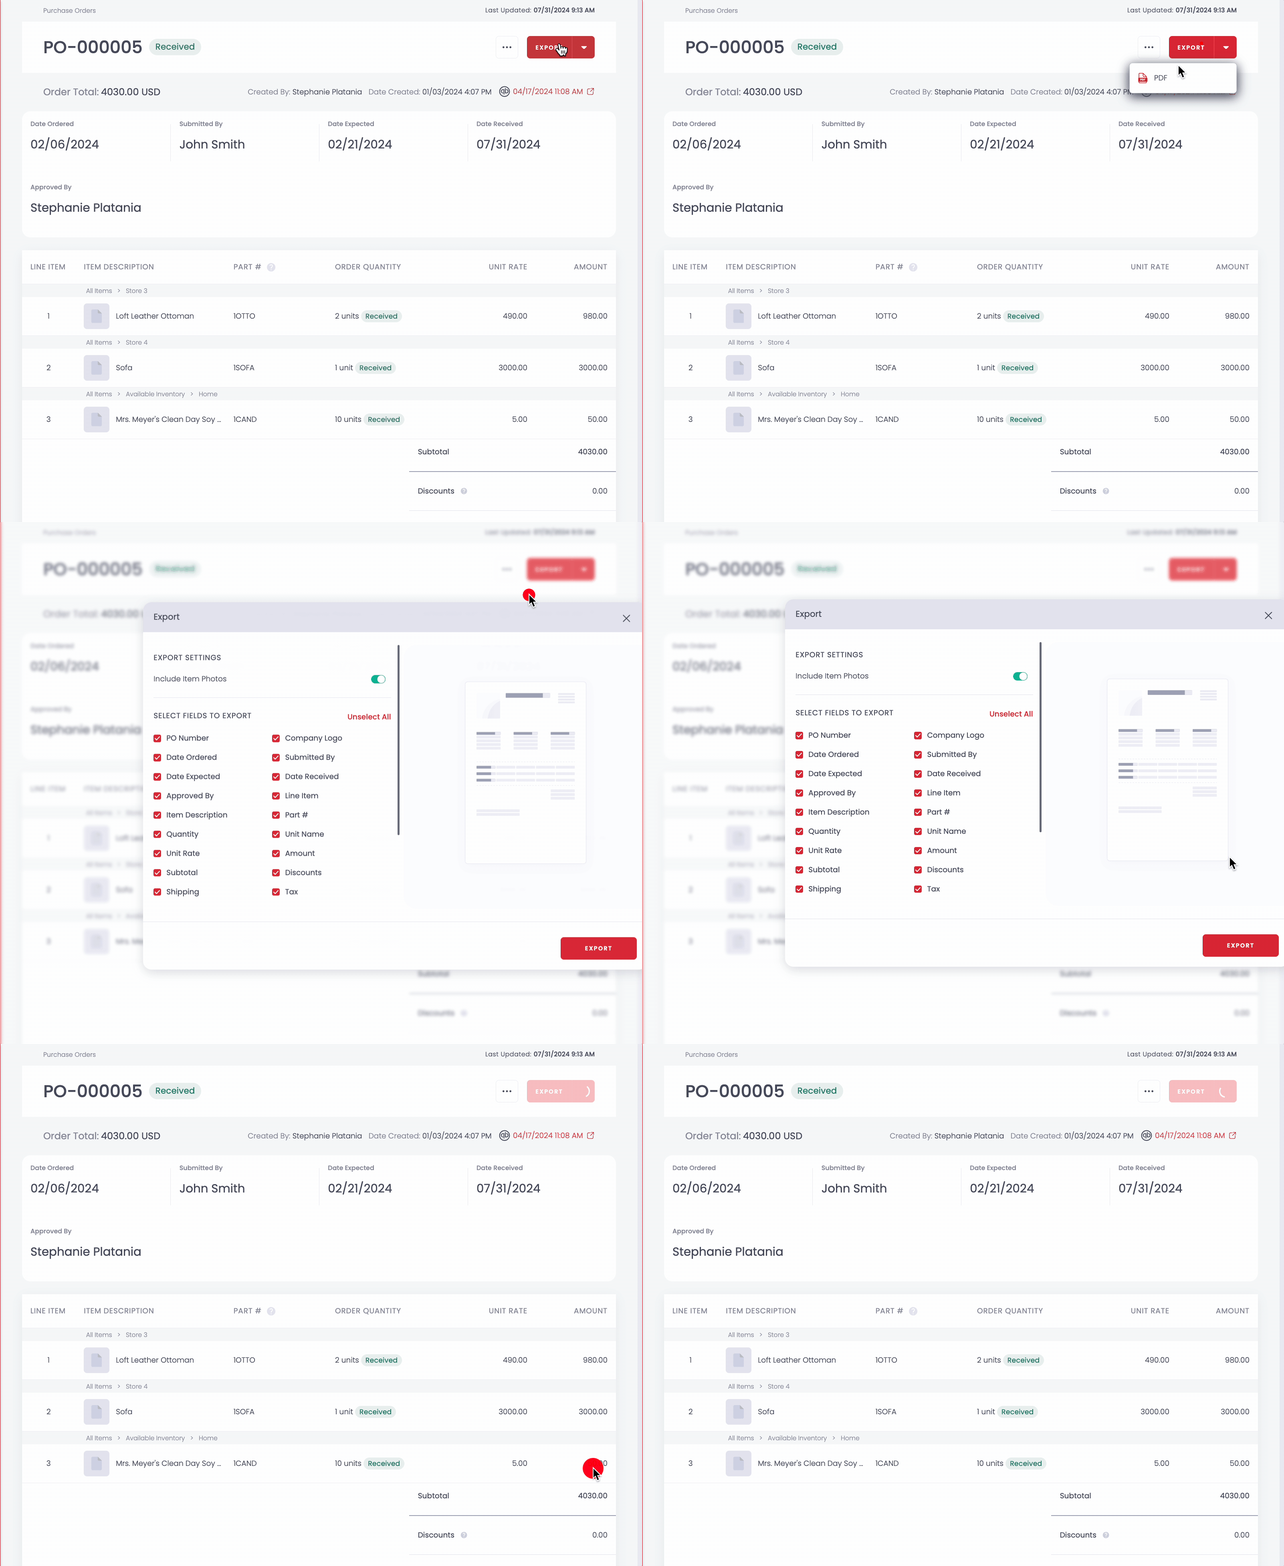
4. 4**Export the completed PO**
Once all items are received, export the PO to PDF to share with your supplier or for your records.
#### Close a Purchase Order
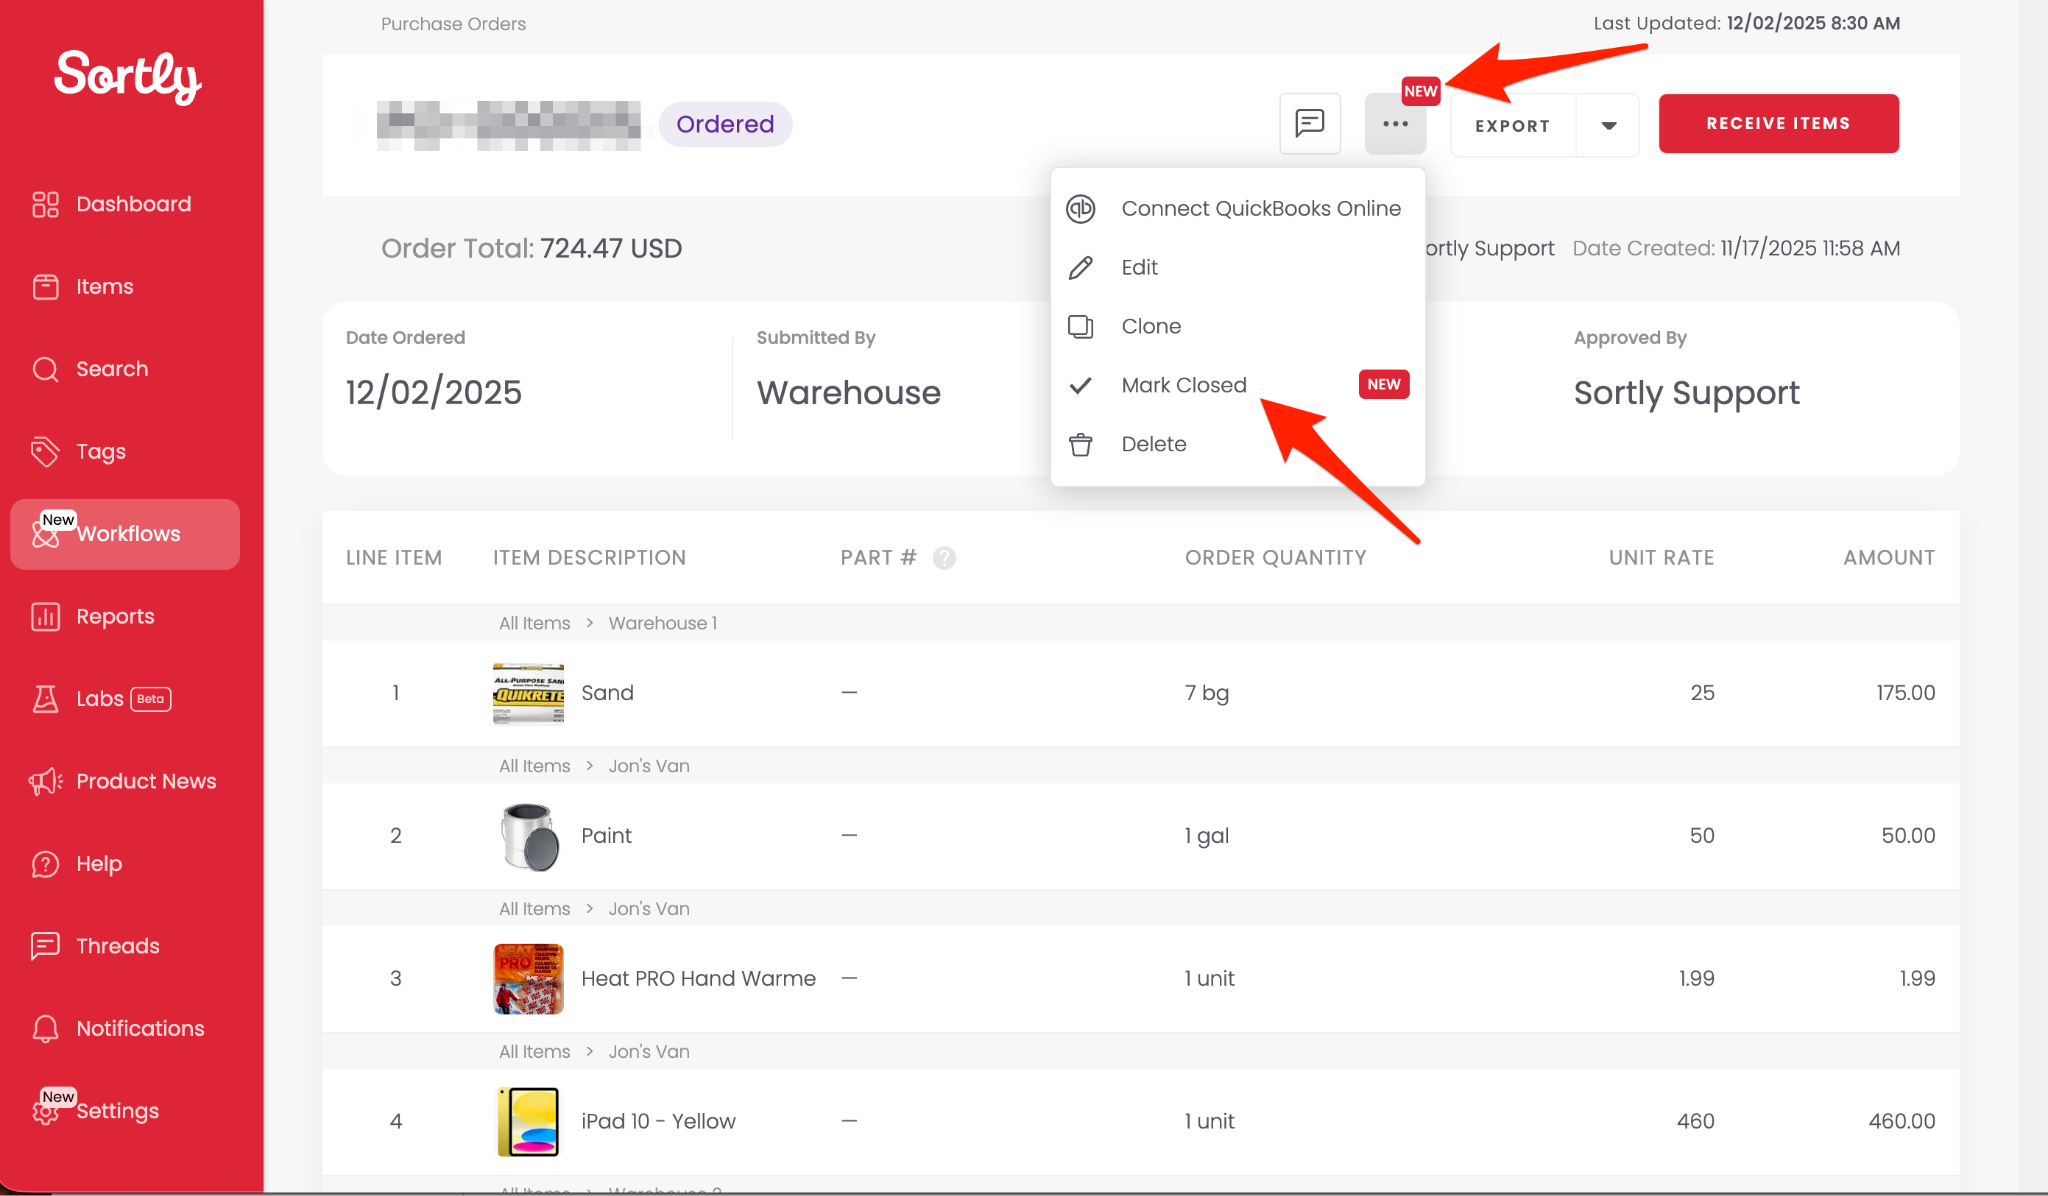
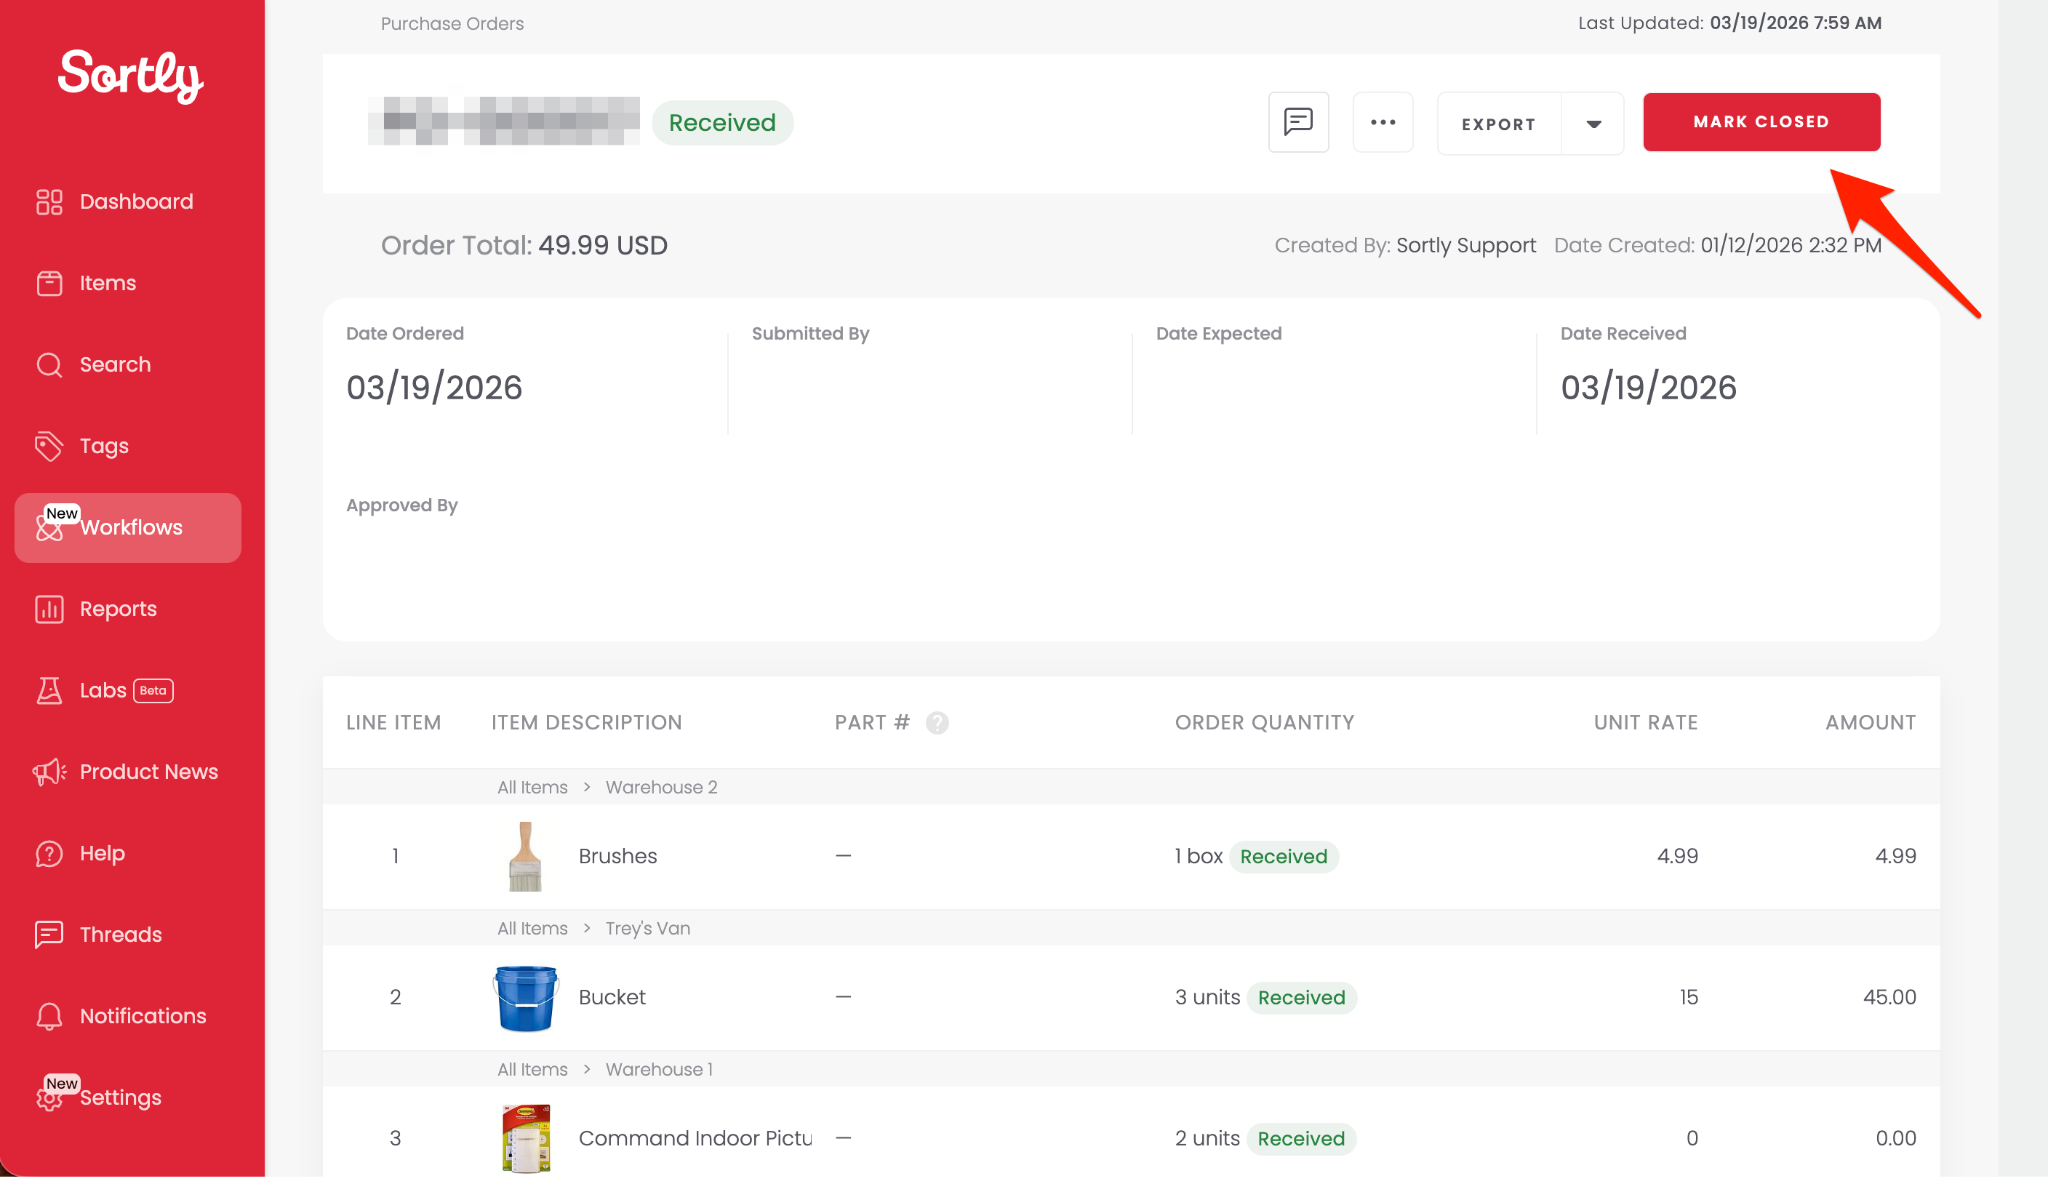
Once a PO is fully or partially received, you can mark it as Closed to indicate no further updates are needed.
🗑️ Once a Purchase Order is marked as Closed, it cannot be reopened.
- If the PO is in **Ordered** or **Partially Received** status, open the three-dot menu in the upper right and select Mark Closed.
- If the PO is already in **Received** status, click the red Mark Closed button on the PO page.
---
### QuickBooks Online
Premium
Enterprise
#### Connect your QBO account
You only need to do this once.
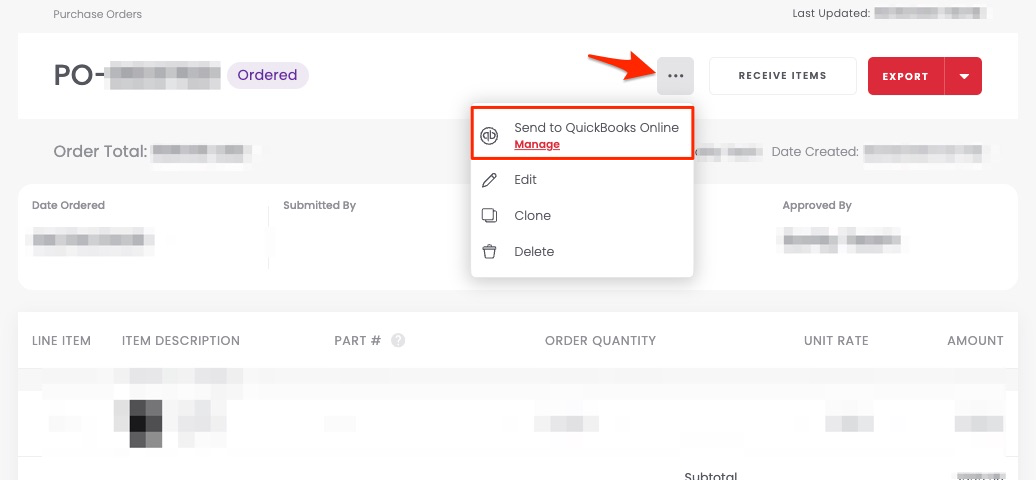
1. 1**Go to Purchase Orders and click Manage**
2. 2**Follow the prompts to connect your QBO account**
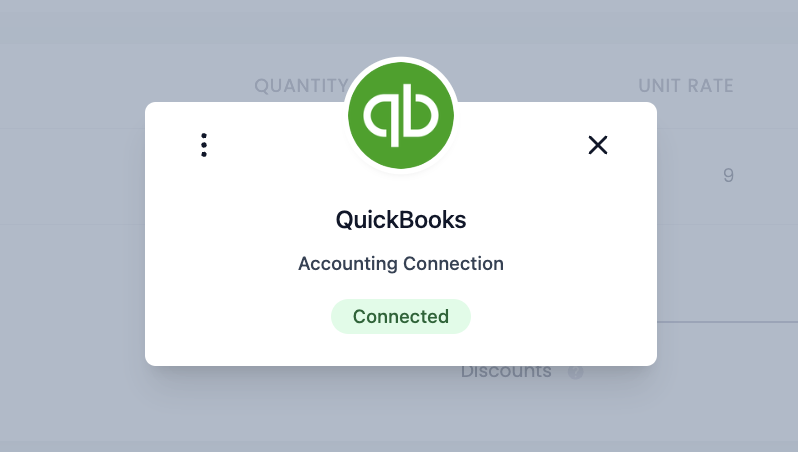
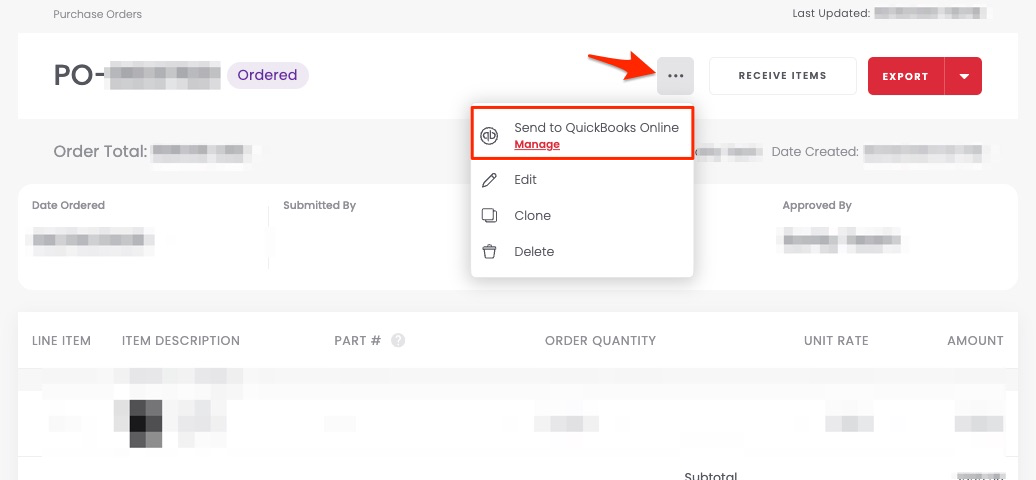
Once connected, a Send to QuickBooks Online button appears on each PO.
#### Send a Purchase Order to QBO
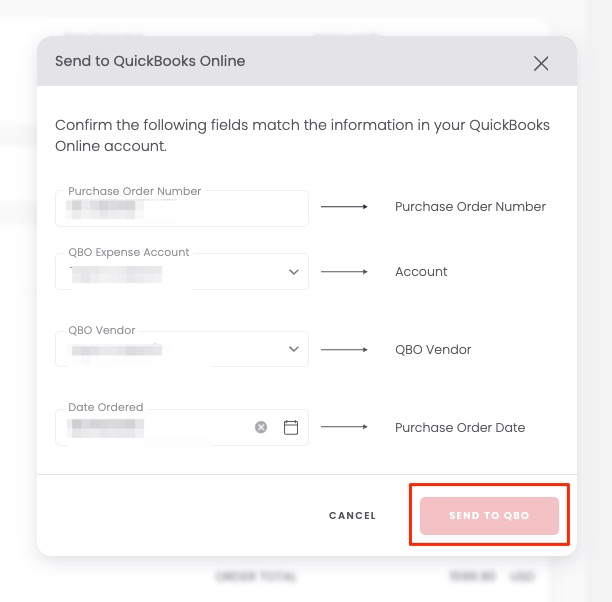
1. 1**Open the PO and click "Send to QuickBooks Online"**
Fill in the fields to match your QBO account and click Send to QBO.
2. 2**Confirm the success notification**
A confirmation appears with a link to open the PO directly in QBO. The last-synced timestamp updates on the PO in Sortly.

💡 To update a PO already sent to QBO, edit it in Sortly and click Send to QuickBooks Online again. The changes will sync across.
---
### Vendor management
Saving vendors in Sortly lets you pull their details directly into any Purchase Order without re-entering them each time.
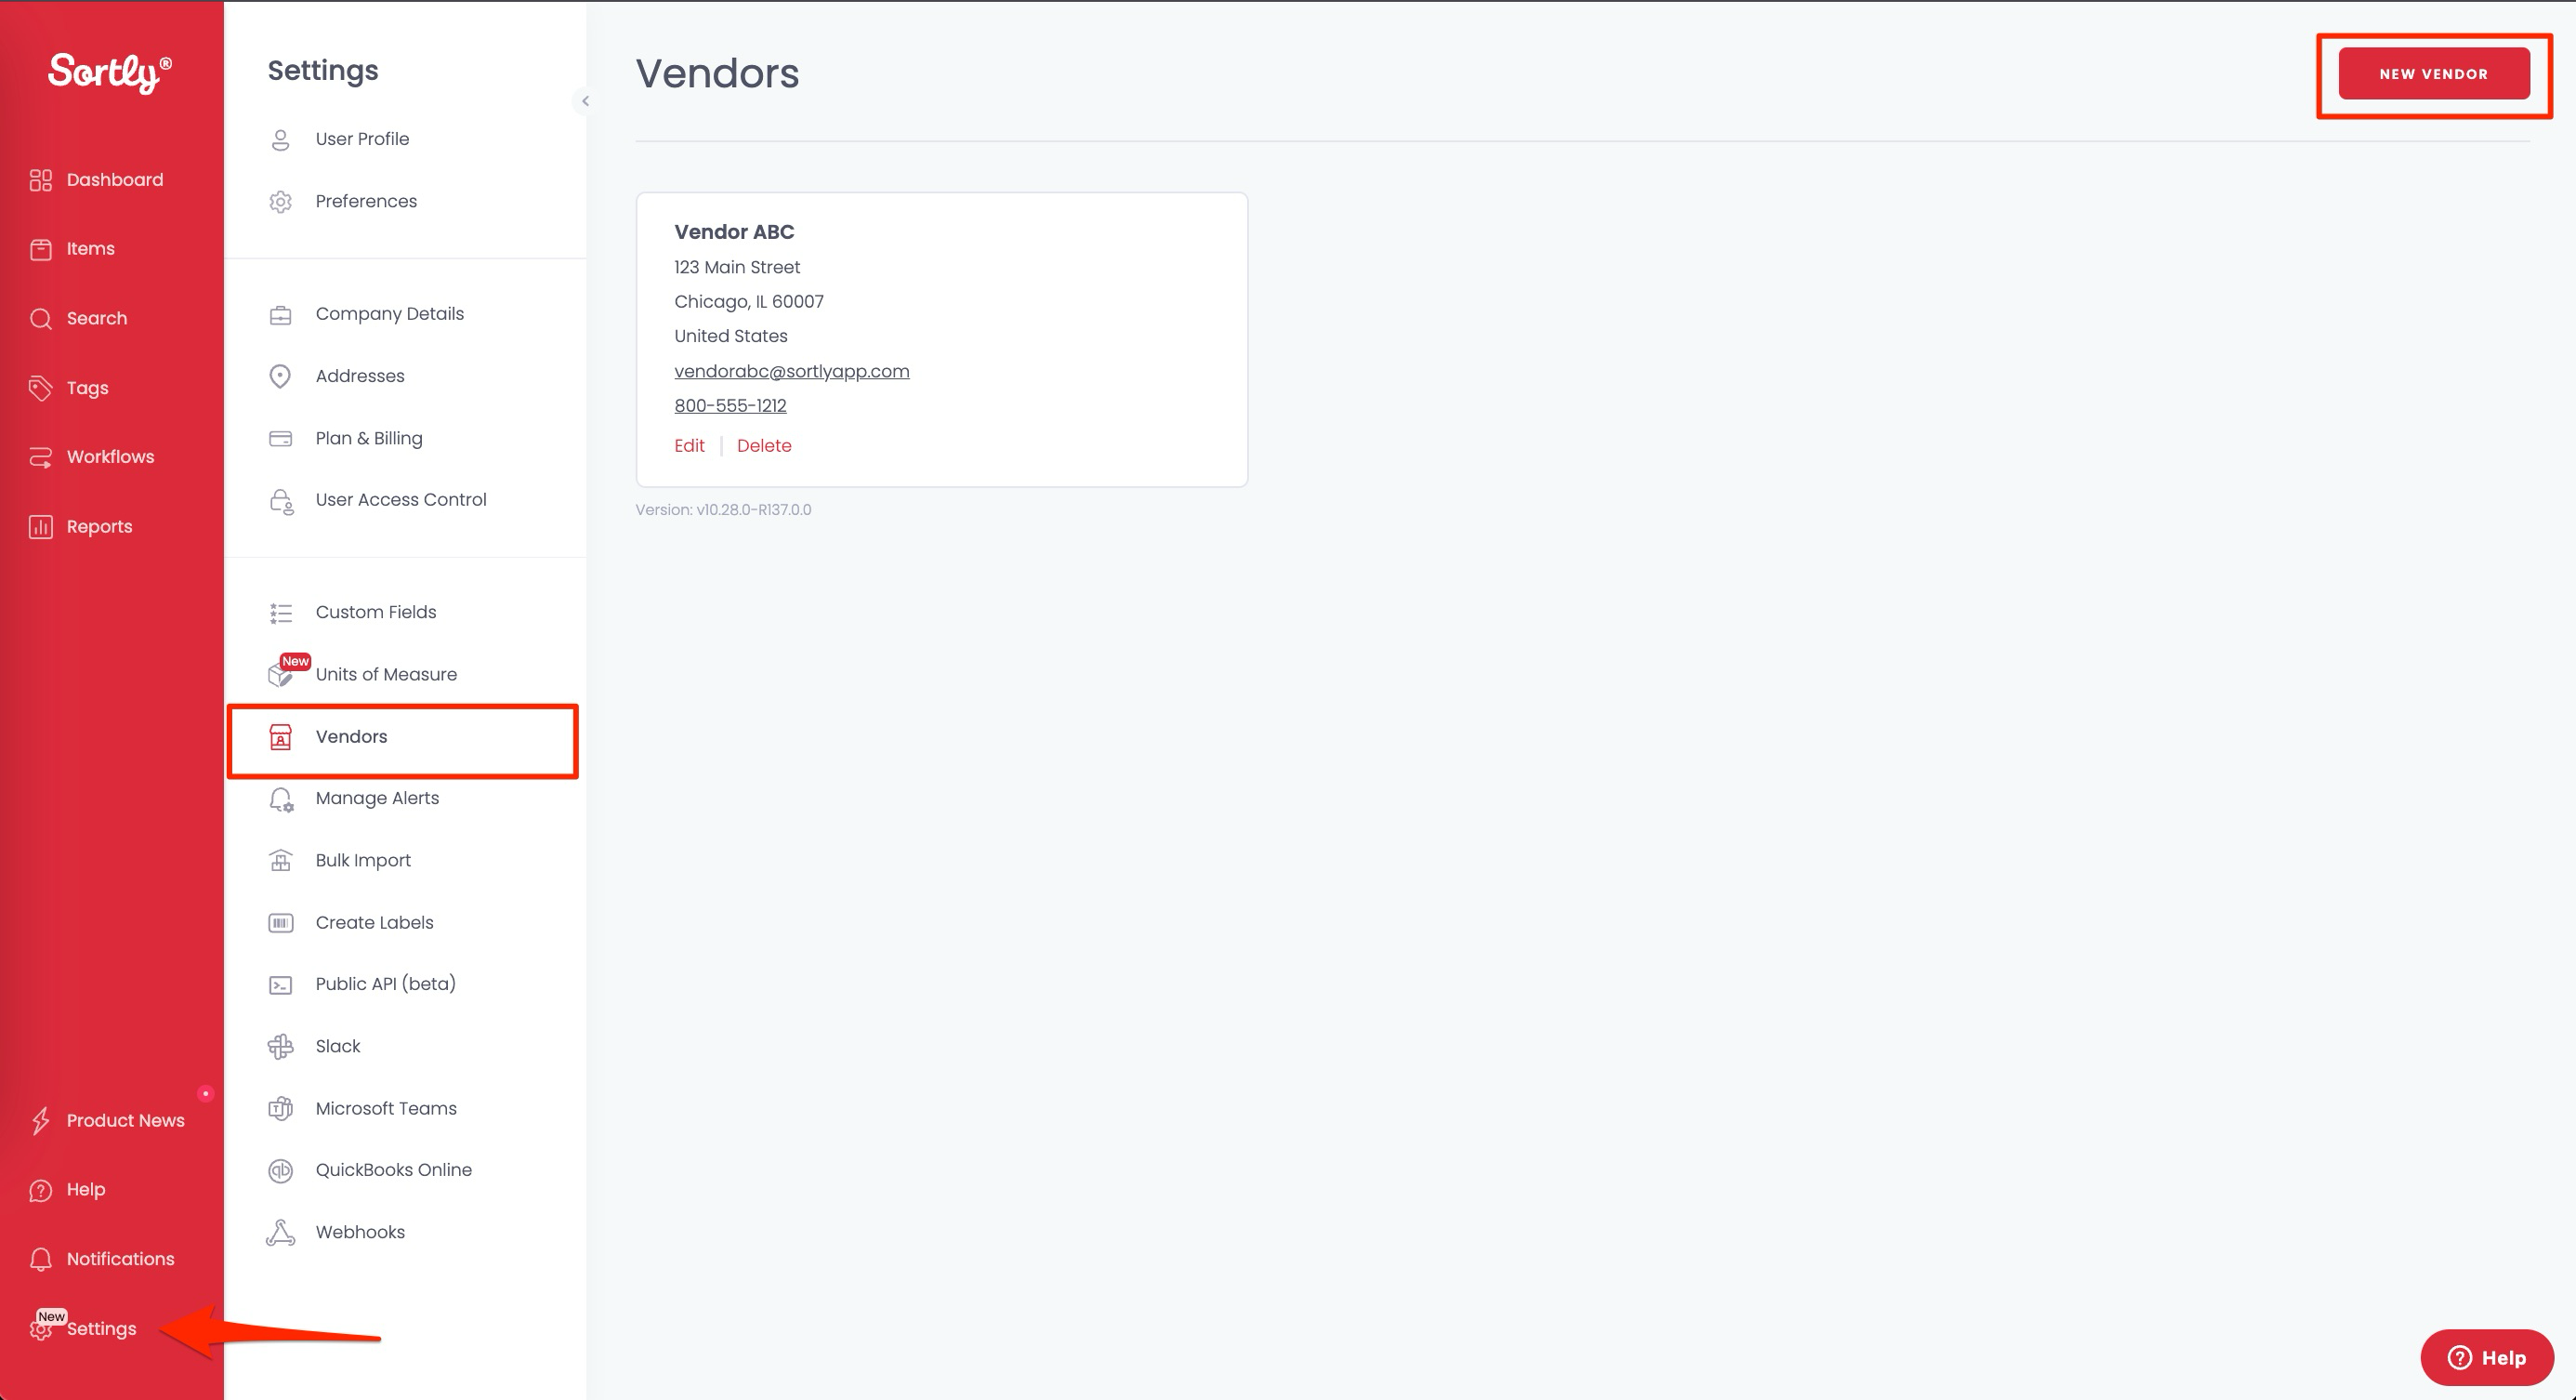
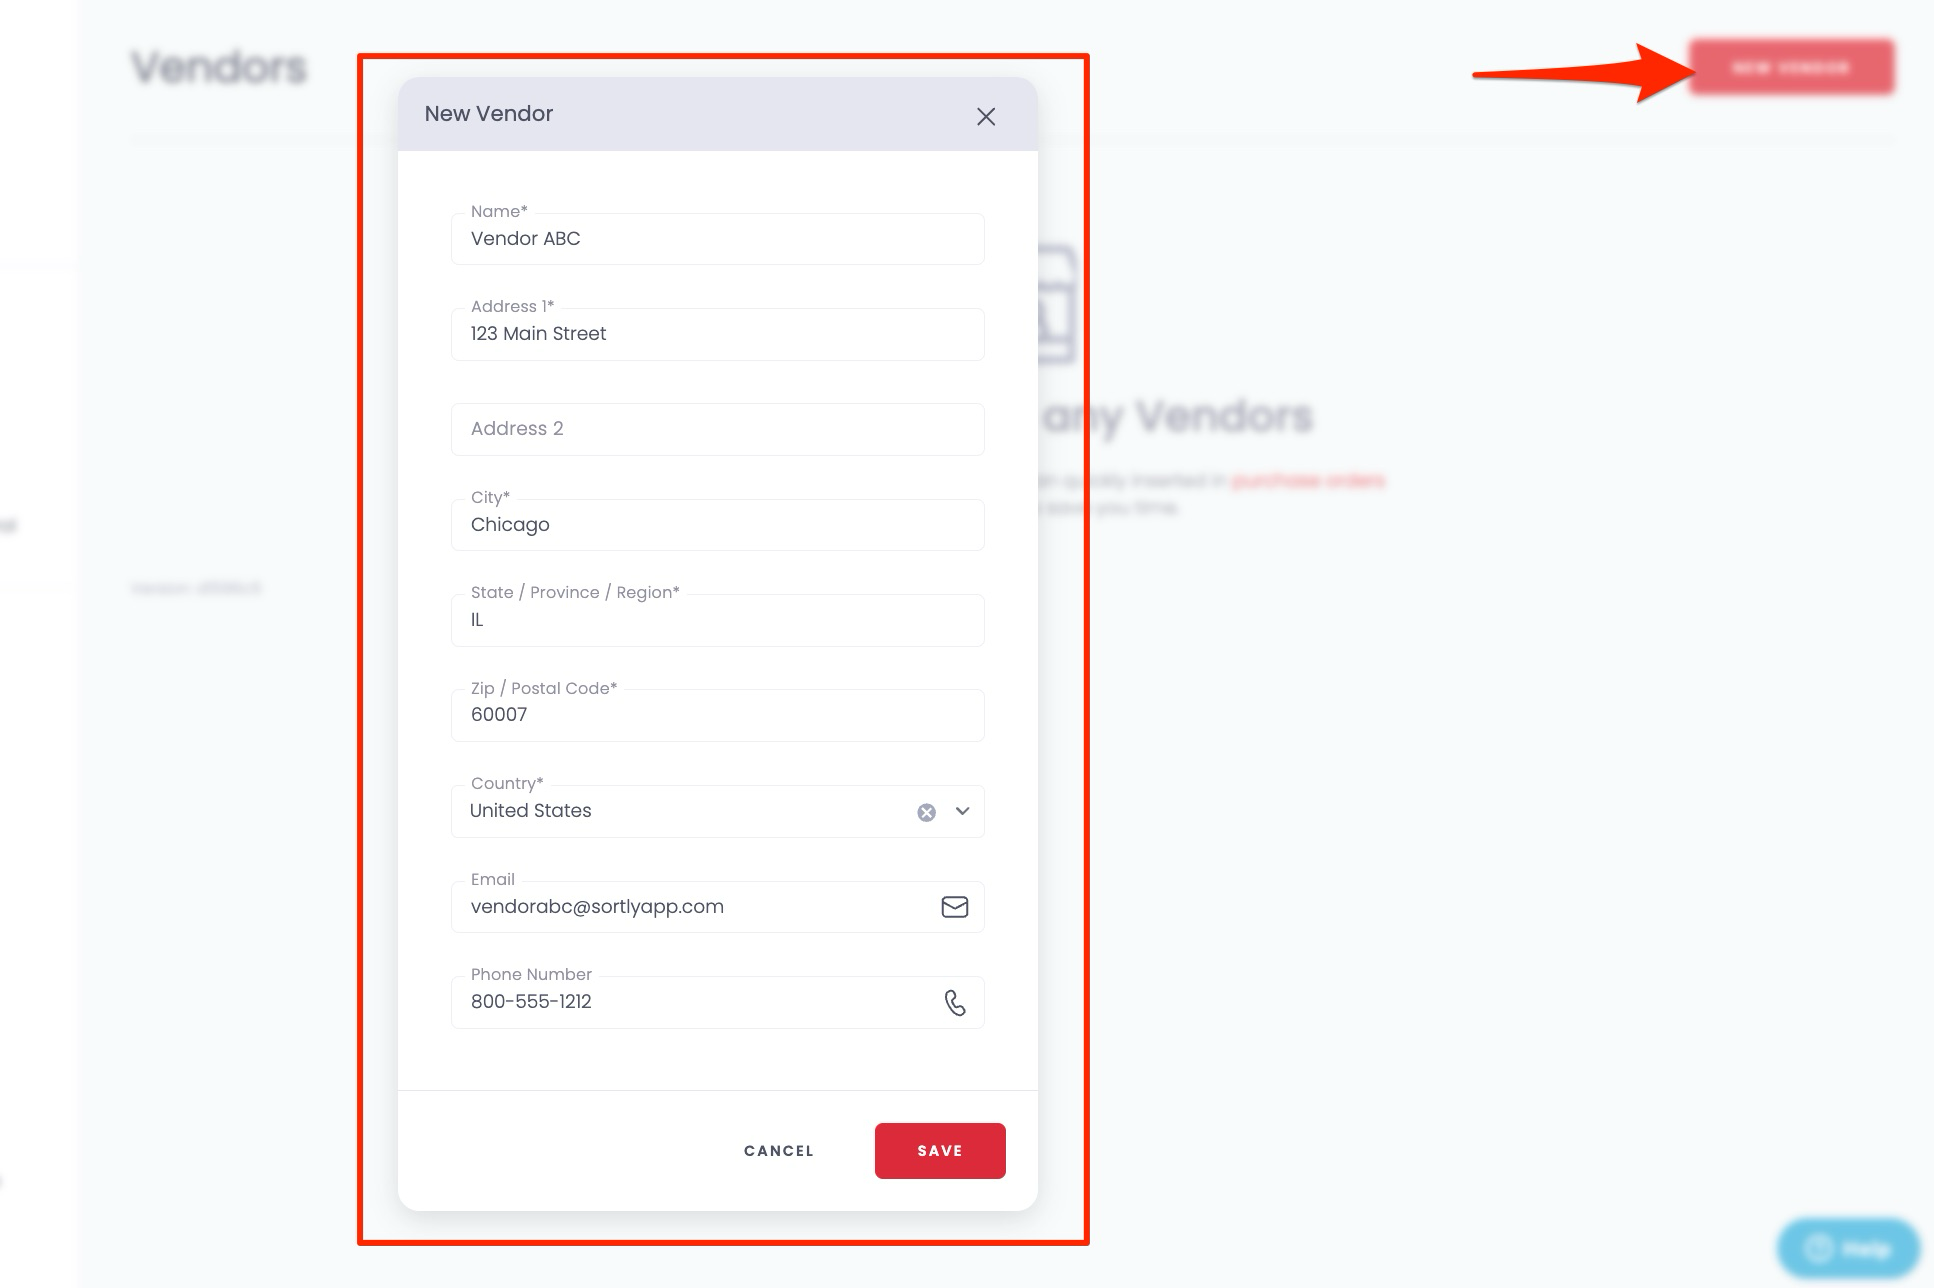
1. 1**Go to Settings, then Vendors, and click "New Vendor"**
Enter the vendor's contact and company information, then click Save.
2. 2**Add the vendor to a PO**
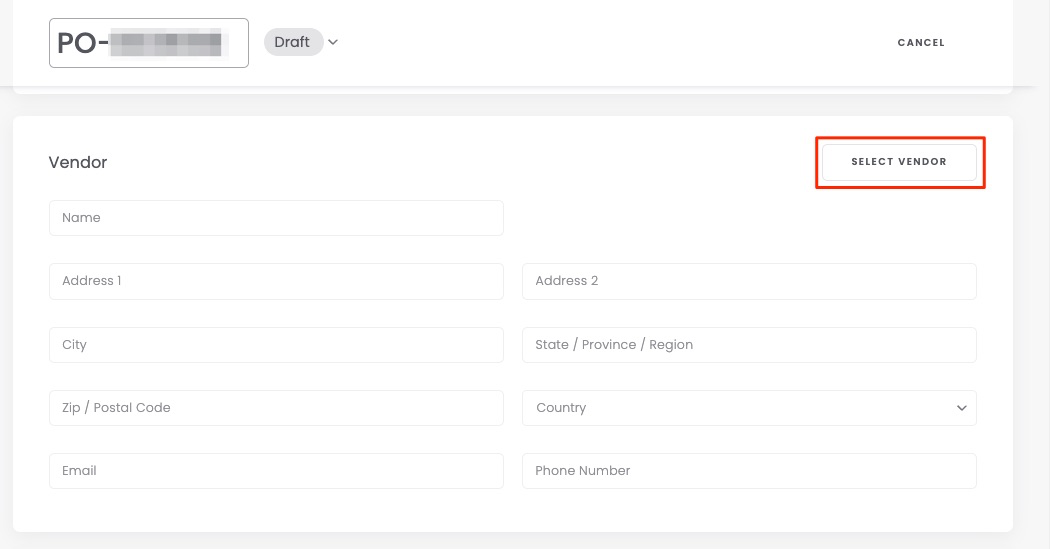
Open a PO, click Select Vendor, choose your vendor, and click Save. The vendor will appear on the PO and in the main Purchase Orders list.
---
### Purchase Orders on mobile
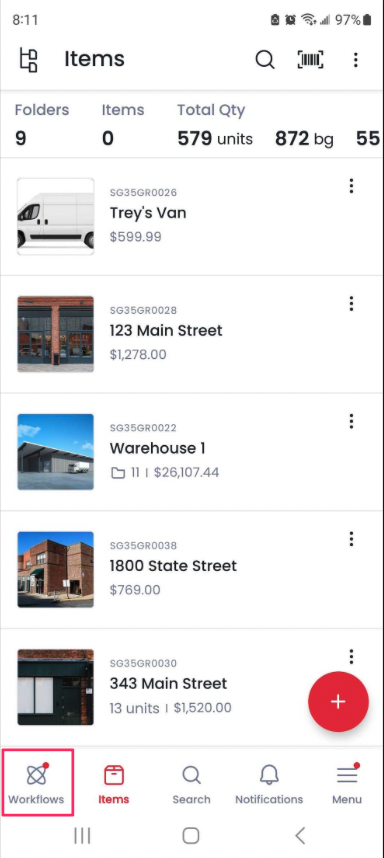
From the Sortly mobile app, you can add items to an existing PO, create a new PO (saved as Draft), and receive items, all from Workflows, then Purchase Orders. Full PO management, including editing, approvals, vendor details, and QBO export, is available on the web.
### Frequently Asked Questions
How many items can I add to a Purchase Order?
Up to 100 items per Purchase Order.
What can Team Members do with Purchase Orders?
If granted access by an Owner or Admin, Team Members can:
- View all items in a PO, even without View/Edit access to those items
- Remove items from a PO
- Receive items into folders they have Edit or Move permissions for
- Clone a PO (visible items only)
- Export a PO
Team Members cannot receive items into folders they don't have Move permissions for, delete locked POs, edit or create vendors, access QuickBooks Online, or enable PO access for custom roles.
Can I search for items to add to a PO by scanning a barcode?
Yes. When adding items to a PO, tap the barcode icon on the right side of the search bar and scan the item's barcode or QR code.
Can I scan items to receive them on the mobile app?
Scanning to receive items is not available on mobile. You can receive items manually from the mobile app by going to Workflows, then Purchase Orders, and tapping Receive Items on the PO.
Why isn't my Purchase Order syncing with QuickBooks Online?
Only expense account types can be selected when sending a PO to QBO. Check that the account in QuickBooks is categorized as an expense account. Income and liability account types are not supported.
Is QuickBooks Online export available on the Ultra plan?
No. QBO export is only available on Premium and Enterprise plans. You can [upgrade your plan](https://app.sortly.com/change-plan) or [contact our team](https://help.sortly.com/hc/en-us/requests/new?hsLang=en) to find the best option.
How many vendors can I add?
Ultra and Premium plans support up to 100 vendors. Enterprise plans support up to 1,000 vendors.
Can I create a new item directly from a Purchase Order?
No. Items need to already exist in your inventory before they can be added to a PO.
Can I turn off Purchase Order email notifications?
Yes. Go to Company Preferences and toggle the Purchase Order notification setting to Off.
[](https://www.sortly.com/)
Copyright © 2026, Sortly Inc.