Skip to content
English
  • There are no suggestions because the search field is empty.

Add, Import, and Edit Vendors

Keep track of the suppliers you buy from by adding them as vendors in Sortly. Each vendor stores its contact details in one place, so you know who to reach when you need to place an order. This article walks you through adding a vendor manually, adding vendors through an import, and editing a vendor.

Ultra
Premium
Enterprise

Add a Vendor Manually

Adding vendors manually is a great option when you have just a few to add.
1
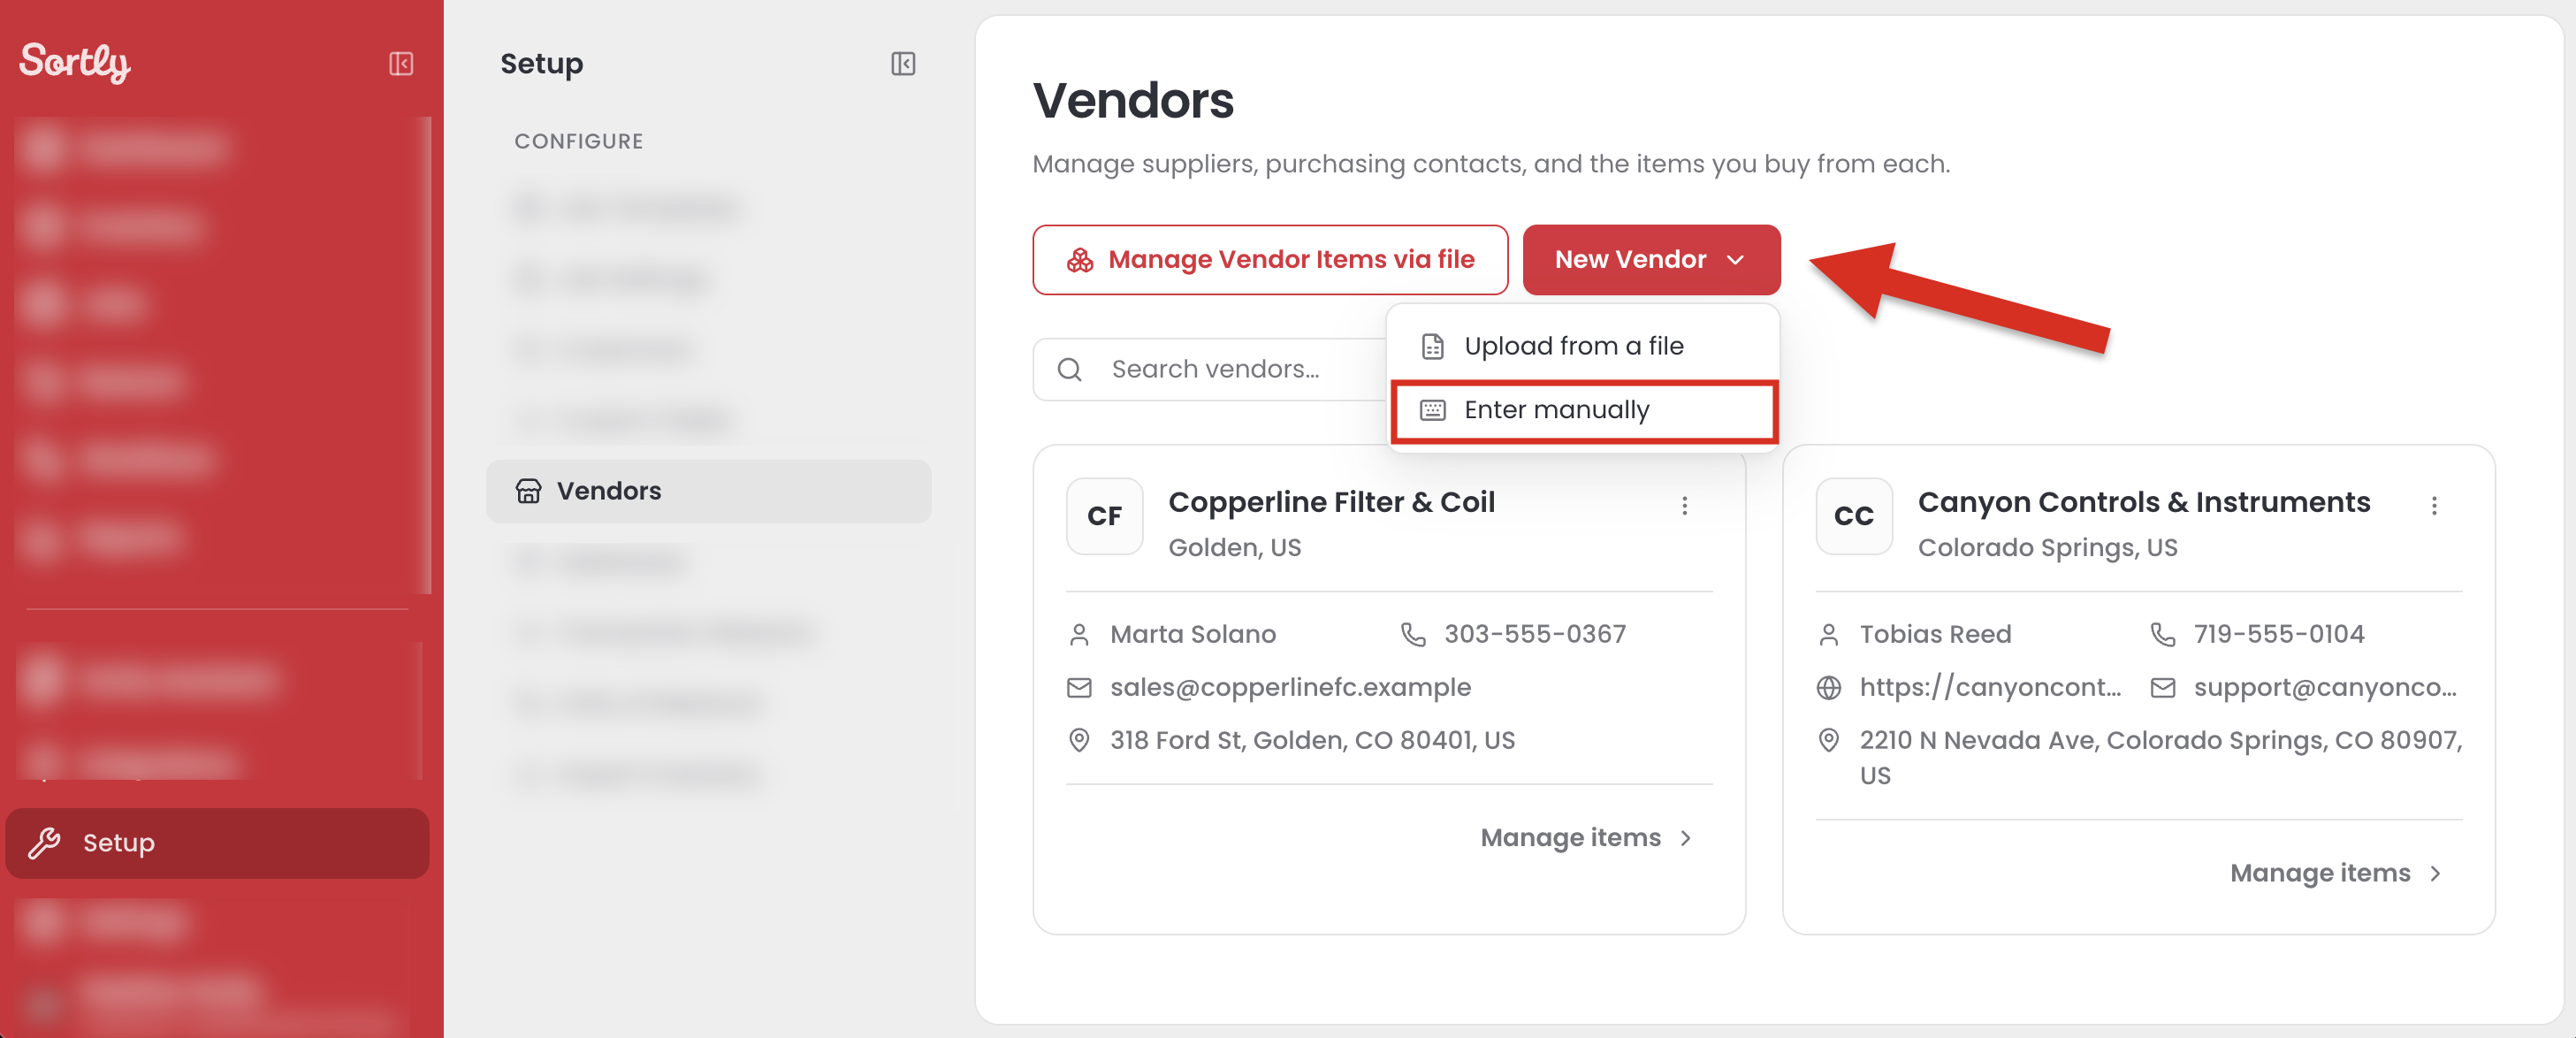
Select Setup at the bottom of the left menu.
2
Select Vendors under Configure.
3
Select New Vendor, then select Enter manually.
4
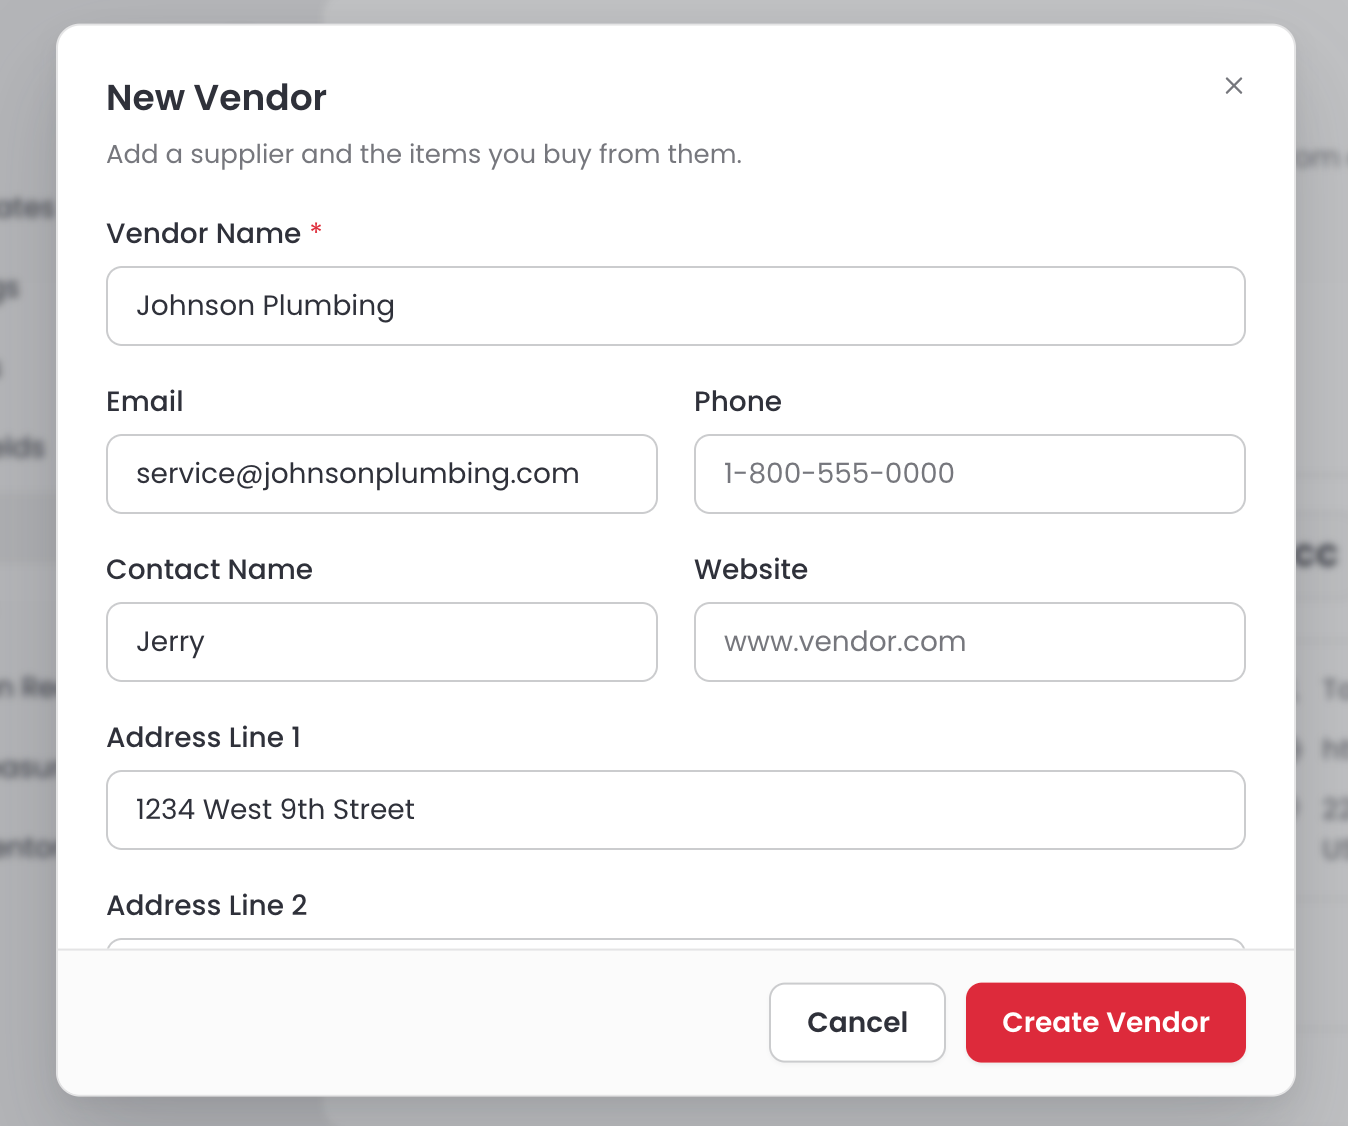
Enter the vendor's name in the Vendor Name field. This is the only required field.
5
Add any other details you have, such as Email, Phone, Contact Name, Website, etc.
6
Select Create Vendor. The vendor appears in your Vendors list, and Sortly confirms that it was added.
⚠️ If an email address is not valid, Sortly asks you to enter a valid one.
The Vendors page with the New Vendor menu open and Enter manually highlighted
The New Vendor form filled in with Create Vendor at the bottom

Import Vendors from a File

Importing is the fastest way to add many vendors at once. Upload a CSV or Excel file (.csv or .xlsx) with your vendors in it, check them over, and Sortly adds them for you.
1
Select Setup at the bottom of the left menu, then select Vendors under Configure.
2
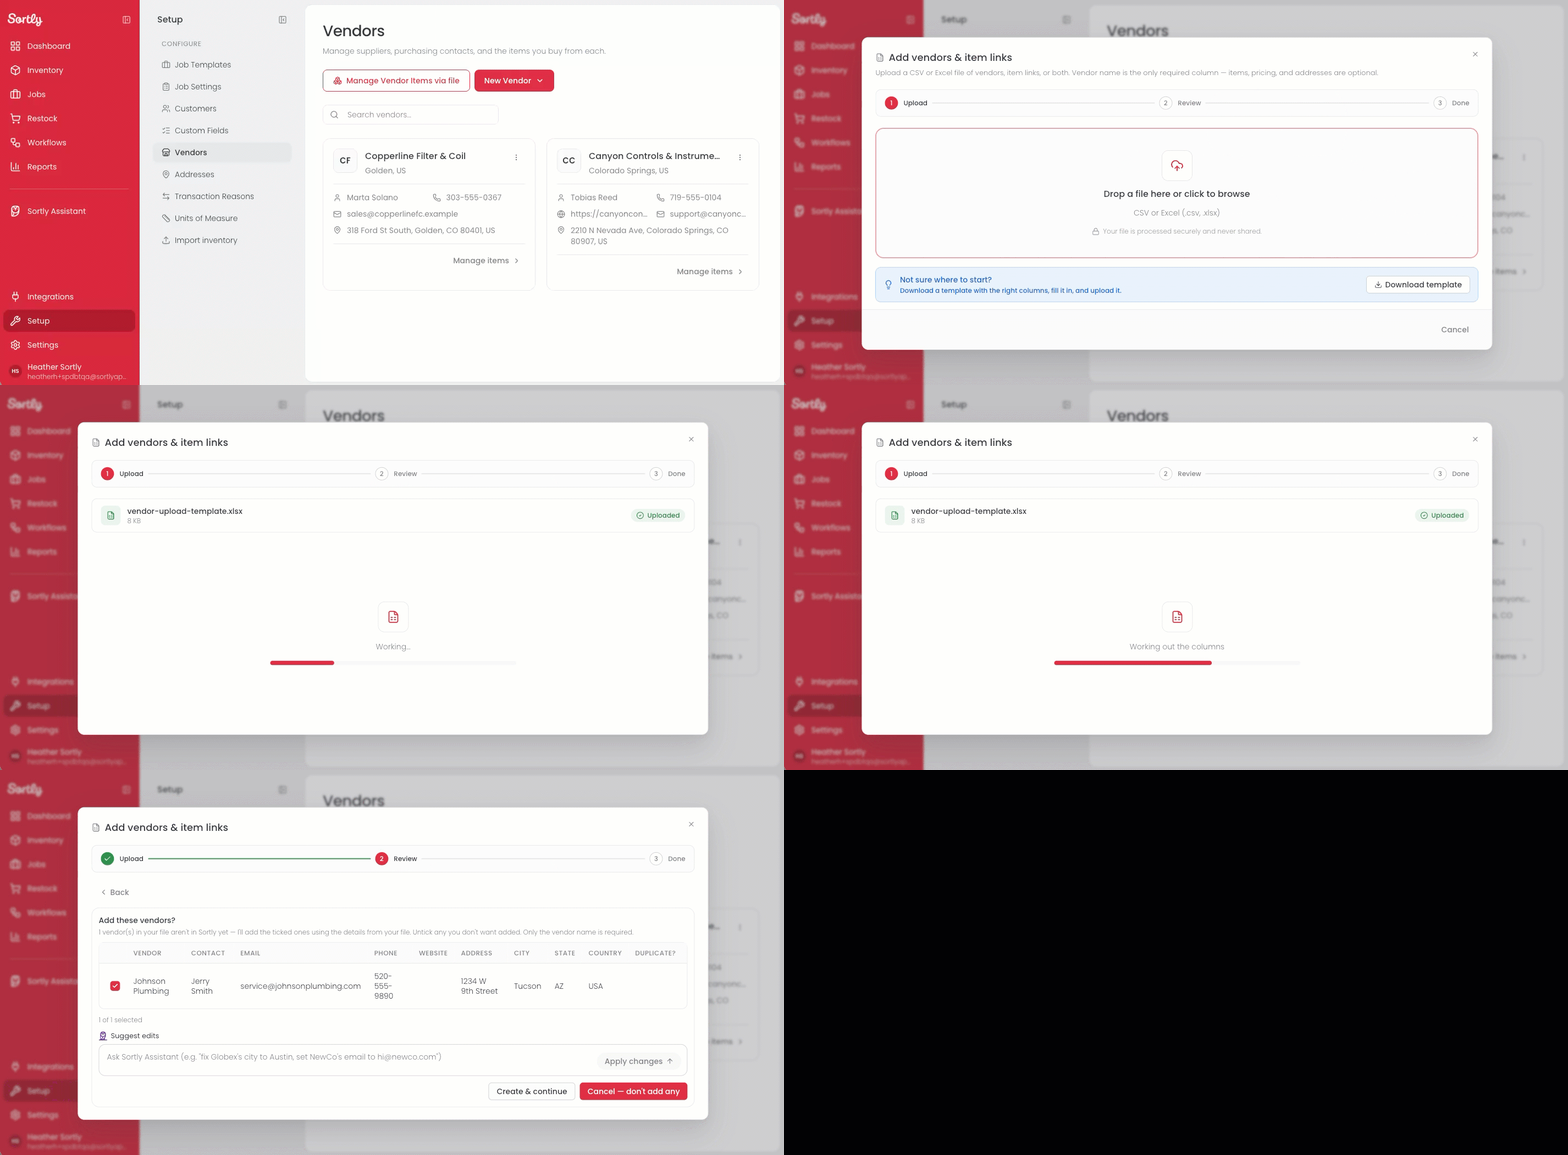
Select New Vendor, then select Upload from a file. The Add vendors & item links window opens.
3
If you do not have a file yet, select Download template. The template has the right columns already set up. Fill it in with your vendors and save it.
4
Drag your file into the window, or click the upload area to browse for it. Sortly checks the columns and your vendors.
5
On the Review step, check the vendors Sortly found. Untick any vendor you do not want to add. If a vendor already exists in Sortly, it is marked in the Duplicate? column.
6
Select Create & continue. To cancel instead, select Cancel — don't add any.
7
When you see All done, select Done. The new vendors appear in your Vendors list.
Importing vendors from a file, from the New Vendor menu to the Done screen

Expected Columns

Below the upload area, the Expected columns section shows the columns your file can include. It is for reference only, so you cannot edit it. Only vendor_name is required. Every other column is optional.
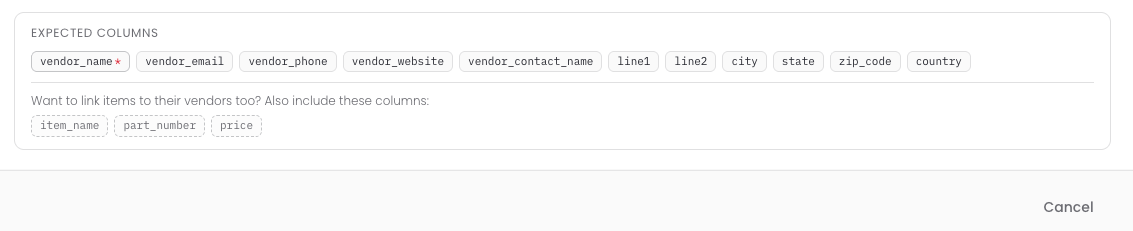
The Expected columns section listing the vendor columns and the item link columns

To link items to their vendors in the same file, also include the item_name, part_number, and price columns.


Edit a Vendor

Need to update a vendor's name, contact details, or address? You can change any of them from the Vendors page.
1
Select Setup at the bottom of the left menu, then select Vendors under Configure.
2
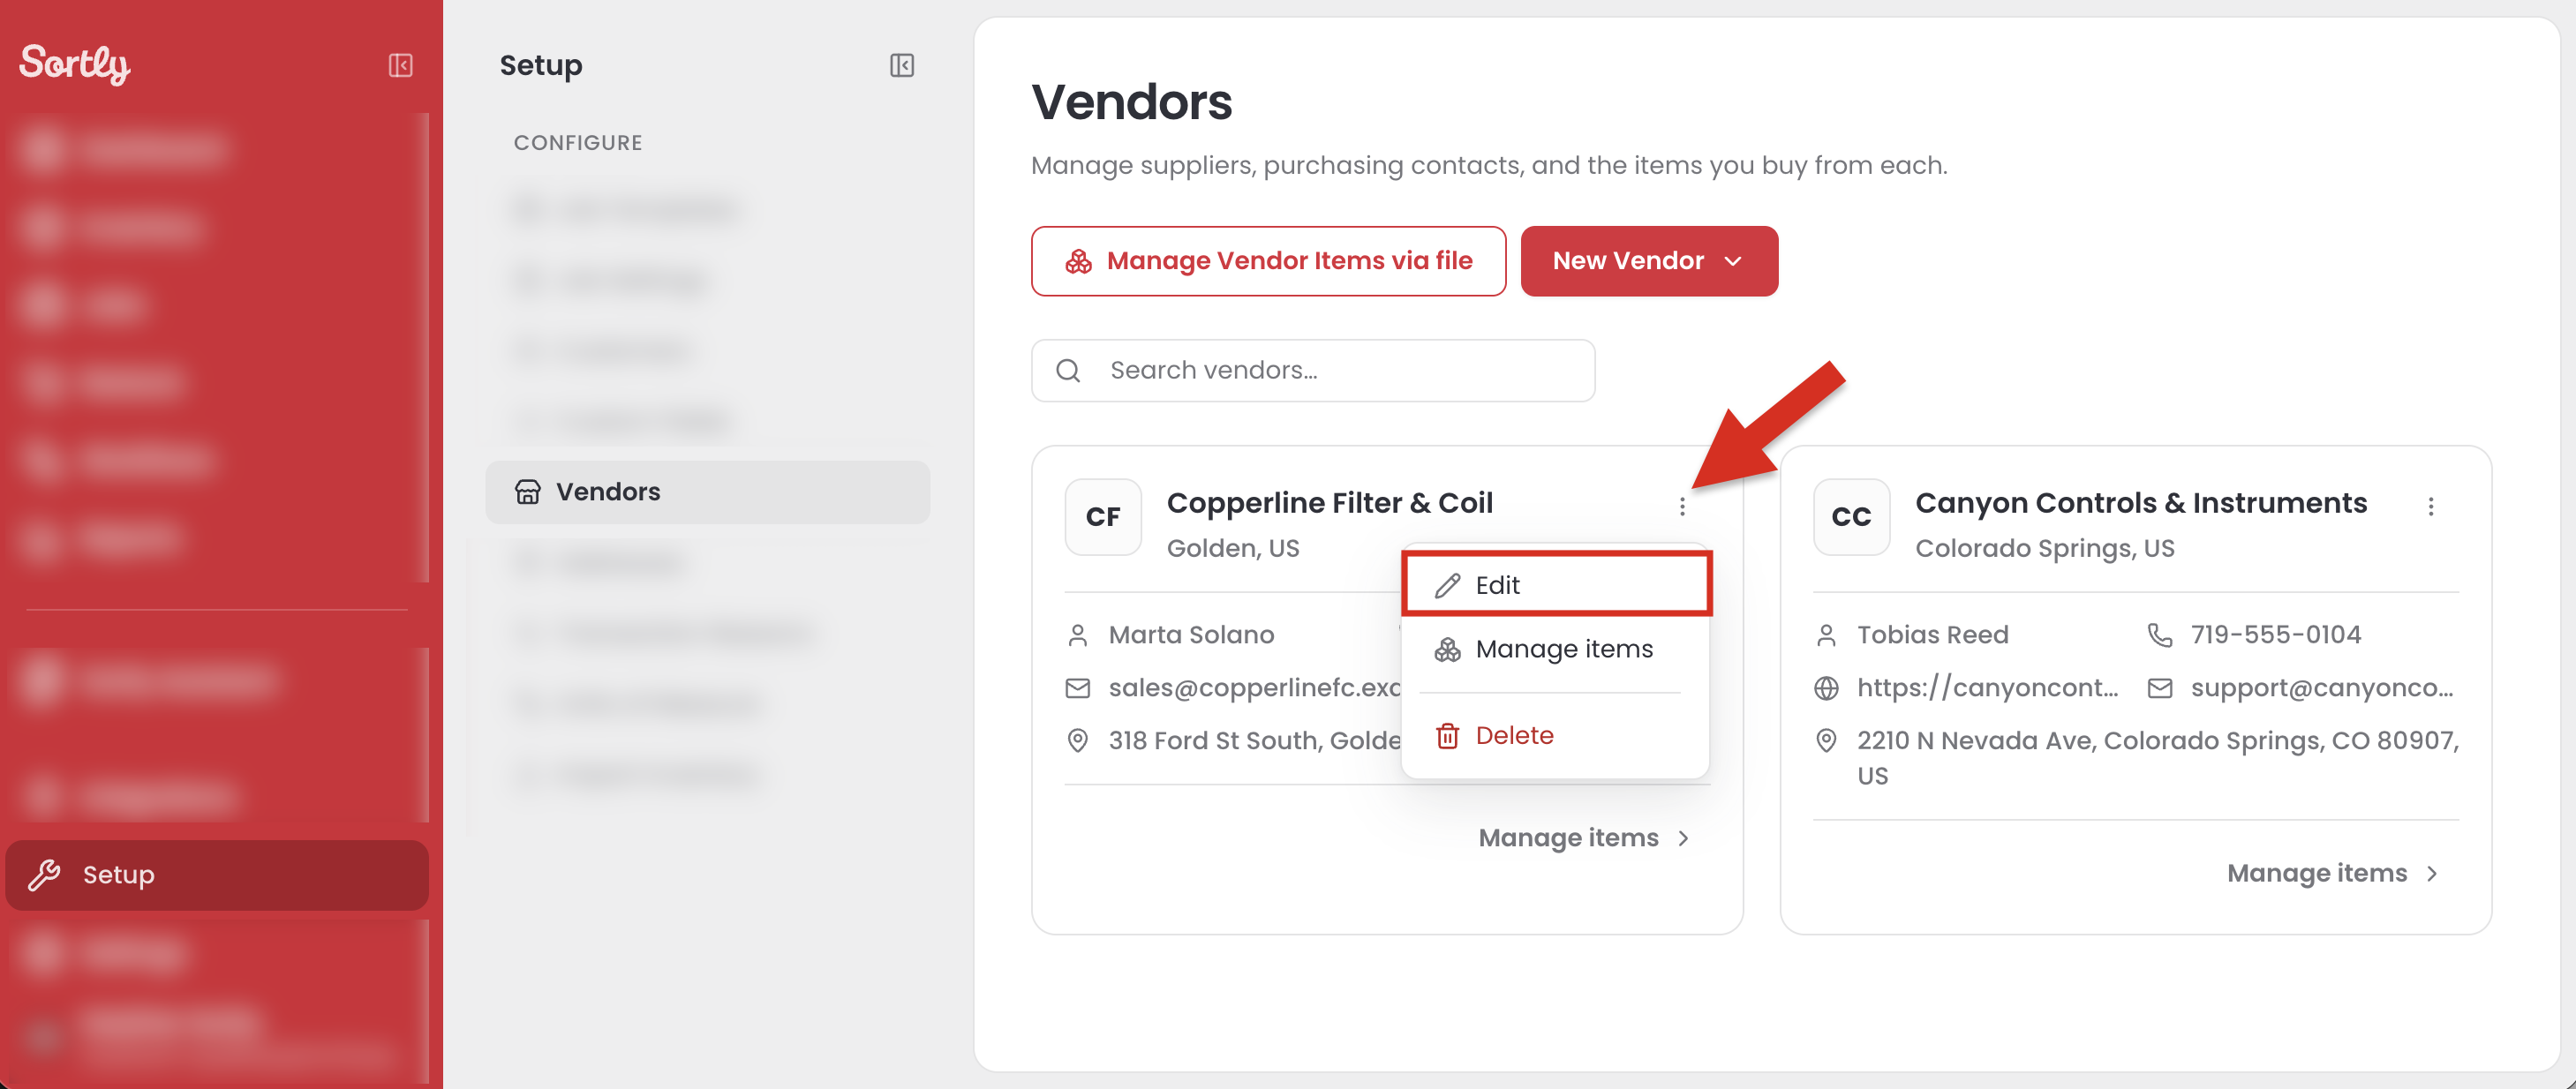
Select the three dots in the top right corner of the vendor's card, then select Edit.
3
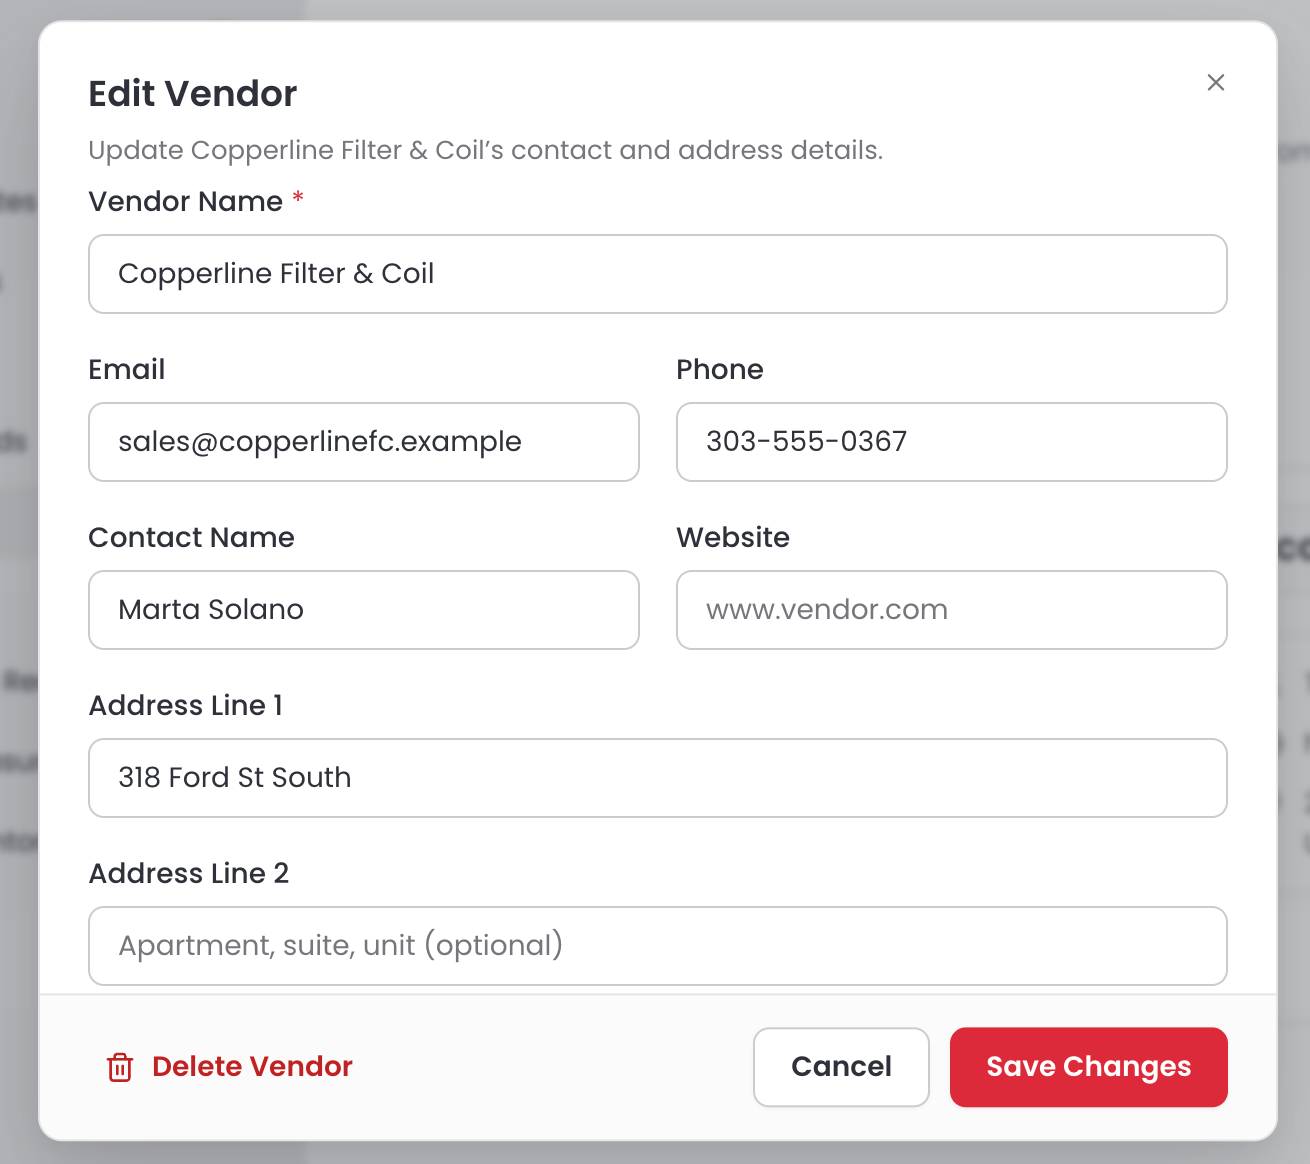
Update the details you want to change in the Edit Vendor window.
4
Select Save Changes. The vendor's card shows the new details, and Sortly confirms that the vendor was updated.
A vendor card with the three dots menu open and Edit highlighted
The Edit Vendor window with Save Changes at the bottom
💡 To delete a vendor, select Delete from the three dots menu, or select Delete Vendor in the Edit Vendor window.

Frequently Asked Questions

How many vendors can I add?
Ultra and Premium plans support up to 100 vendors. Enterprise plans support up to 1,000 vendors.
What information do I need to add a vendor?
Only the vendor name is required.
What file types can I import?
CSV and Excel (.csv, .xlsx).
Can I link items to vendors in the import?
Yes, with the item_name, part_number, and price columns.
Can I delete a vendor?
Yes, from the three dots menu or the Edit Vendor window.