
Stock Counts make it easy to verify your inventory and keep quantities accurate, all directly in Sortly. With clear workflows, role-based permissions, and real-time syncing across web and mobile, you can complete physical counts quickly and confidently, without relying on spreadsheets or risking manual errors.
Whether you're performing a full audit of your entire inventory or running a smaller, periodic cycle count, Stock Counts help ensure your data stays consistent and reliable across your account.
In this article
What are Stock Counts?
Stock Counts allow you to physically verify your inventory quantities directly in Sortly. With this feature, you can:
- Create a new stock count and assign it to specific team members
- Count and track quantities in real time across web and mobile
- Compare expected vs. actual quantities and resolve discrepancies
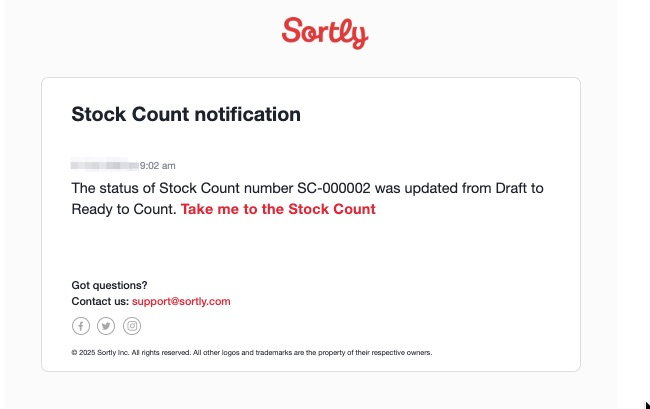
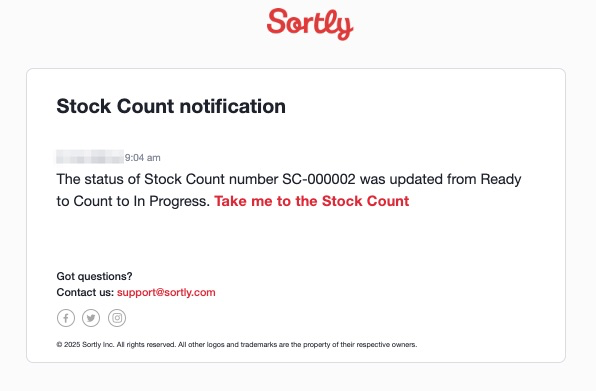
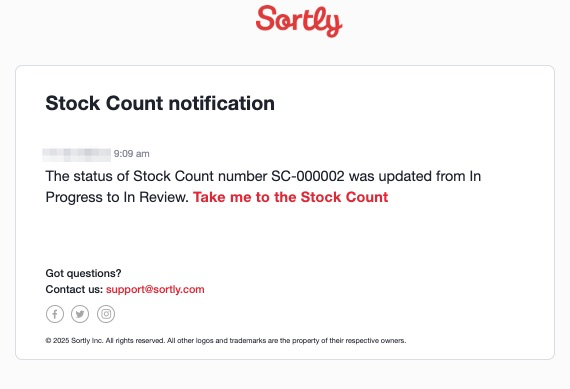
- Move stock counts through clear stages: Draft, then Ready to Count, then In Progress, then In Review, then Complete (or Voided)
- Export detailed stock count reports for audits or offline use
Stock Counts make inventory verification simple, traceable, and collaborative, all within Sortly.
How to access Stock Counts
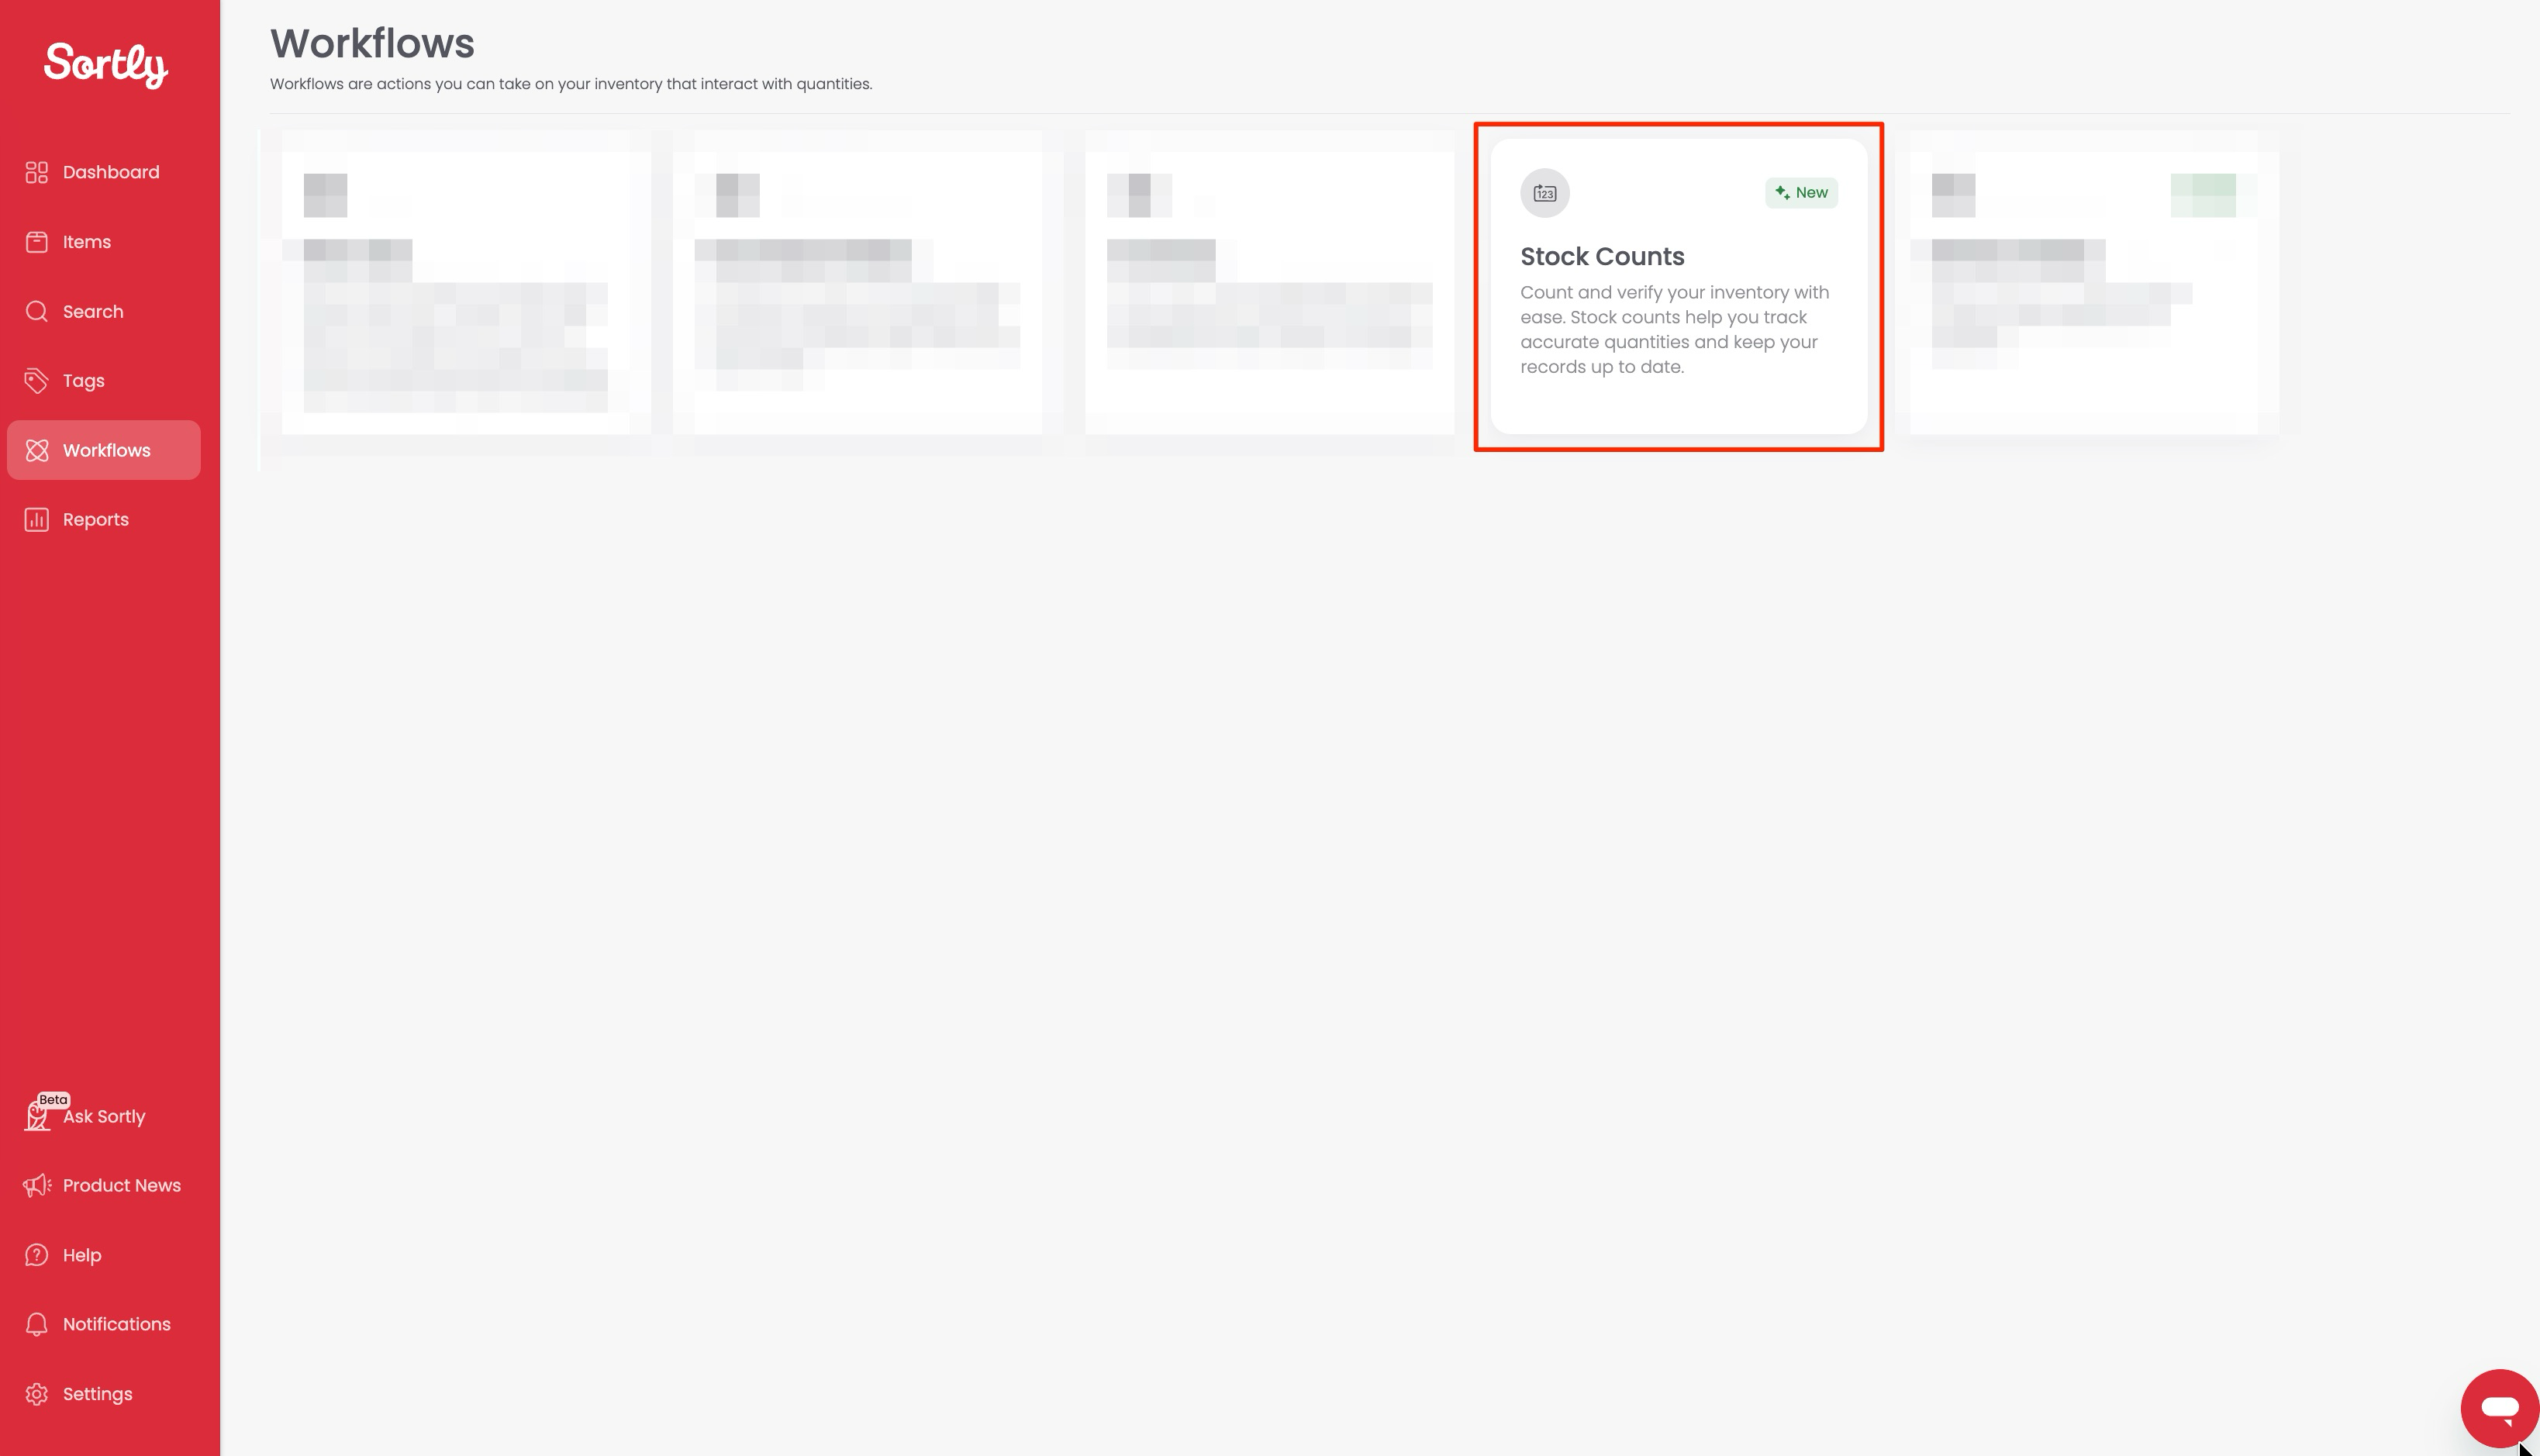
You can find Stock Counts in the Workflows tab on the web app or in the Sortly mobile app.
How to create a Stock Count
1Go to Workflows, then Stock Counts.
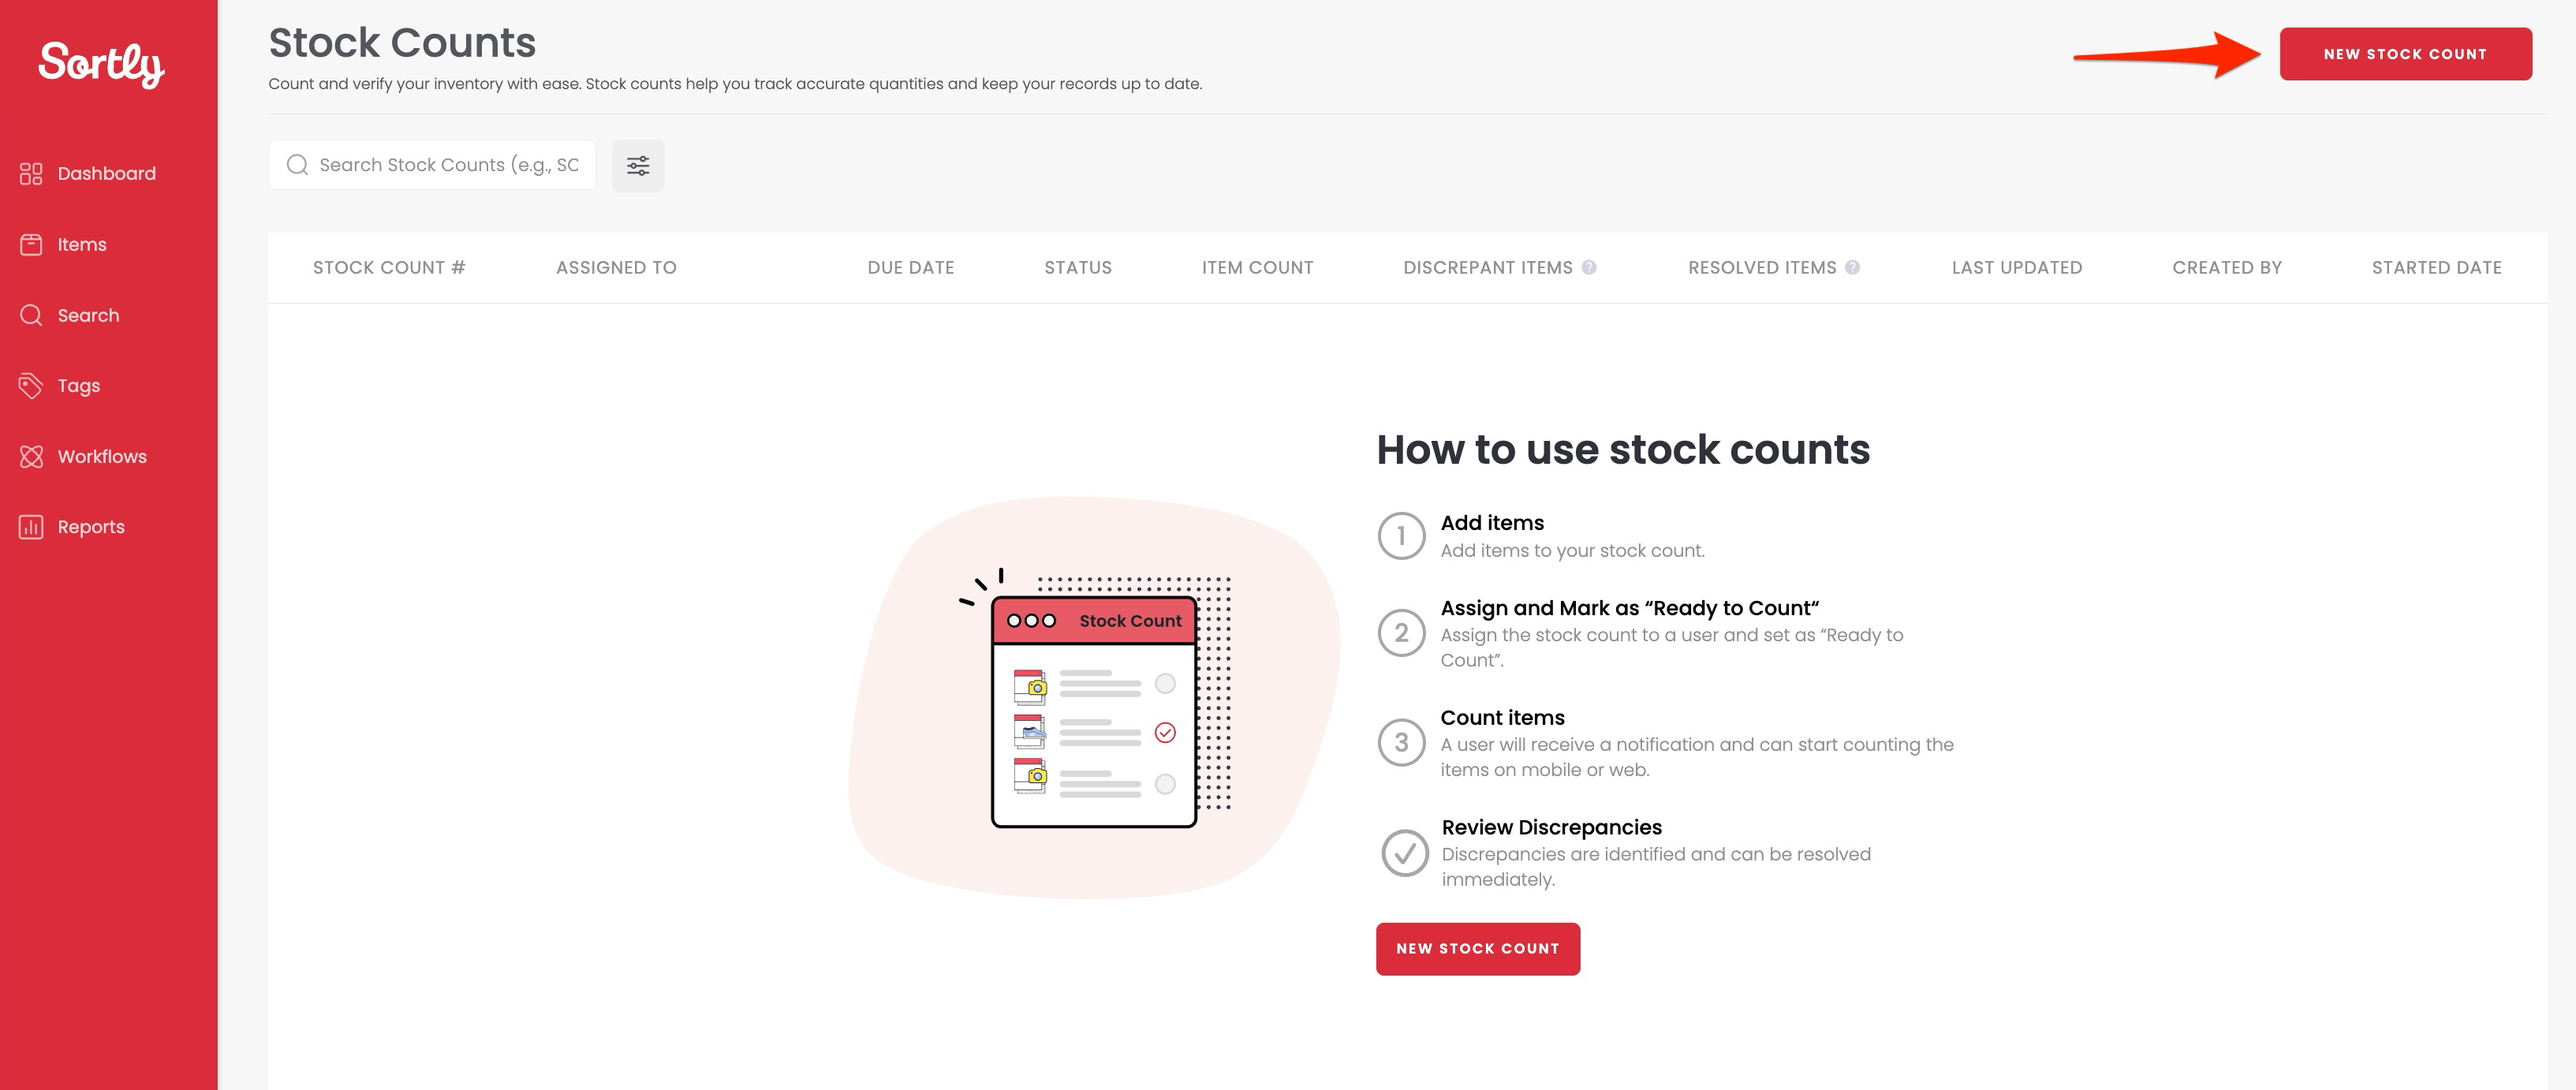
2Click New Stock Count.
3Enter a Stock Count name and optional due date.
4Assign the count to a specific user or to "Everyone."
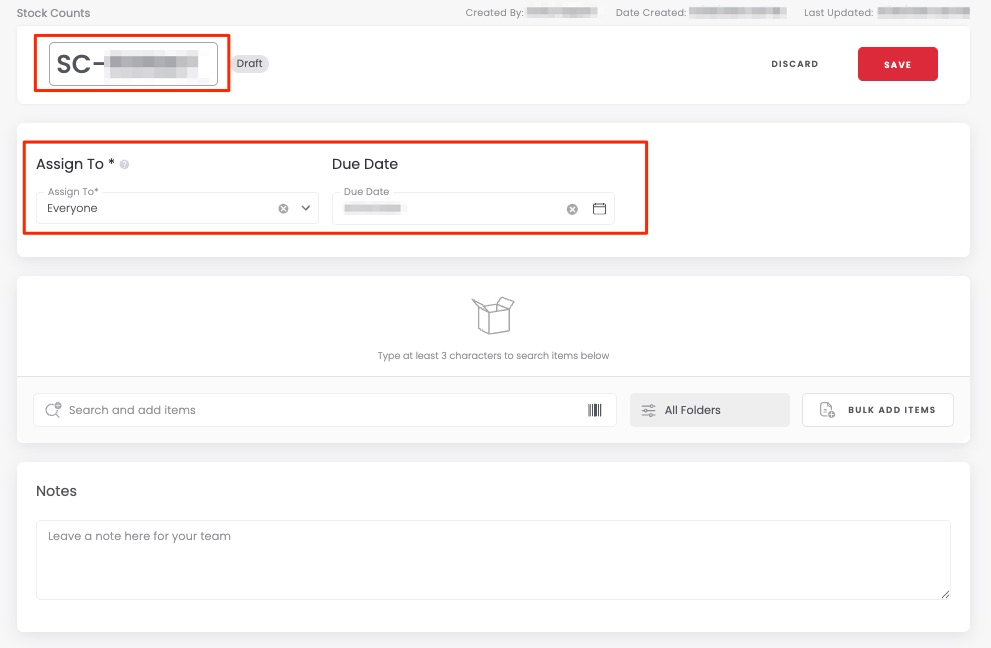
5Click Create to save your draft. Once created, you can start adding items to your stock count.
How to add and manage items
1Search to add items to the Stock Count. You can also enable Scanning Mode on the web app to scan to add.
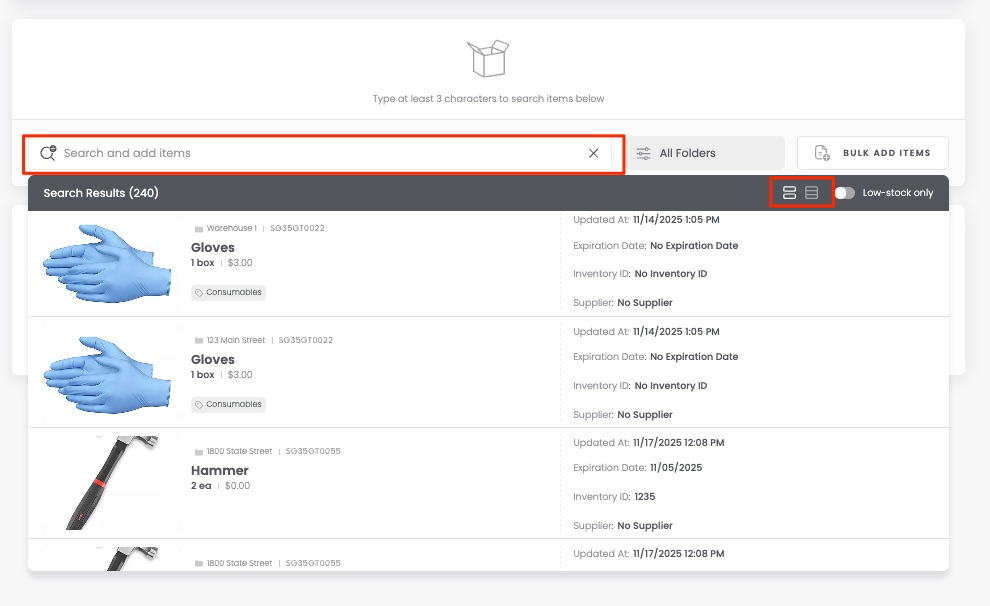
2Click Save and your Stock Count will be in the Ready to Count status.
Add multiple items to a Stock Count at once
You can add many items to a Stock Count simultaneously in several ways: from the Bulk Add Items option, from a Folder, or via Advanced Search.
Bulk Add Items
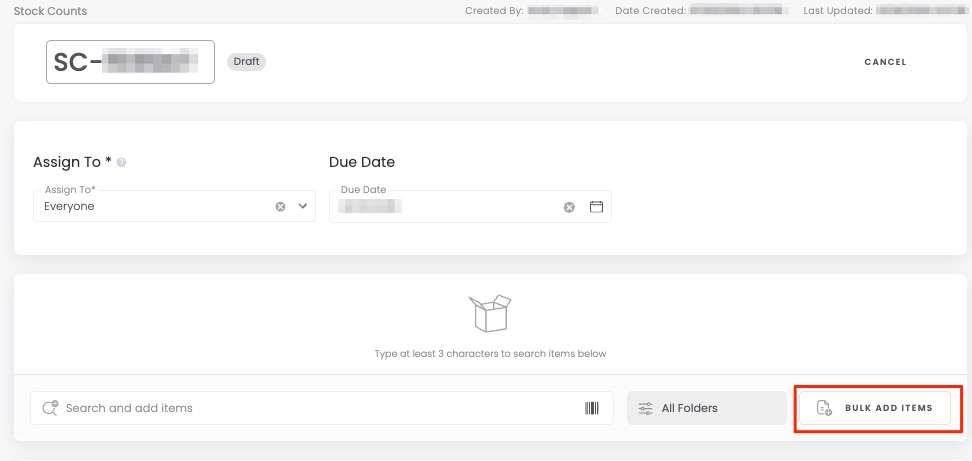
1Choose the Bulk Add Items option on the Stock Count creation page.
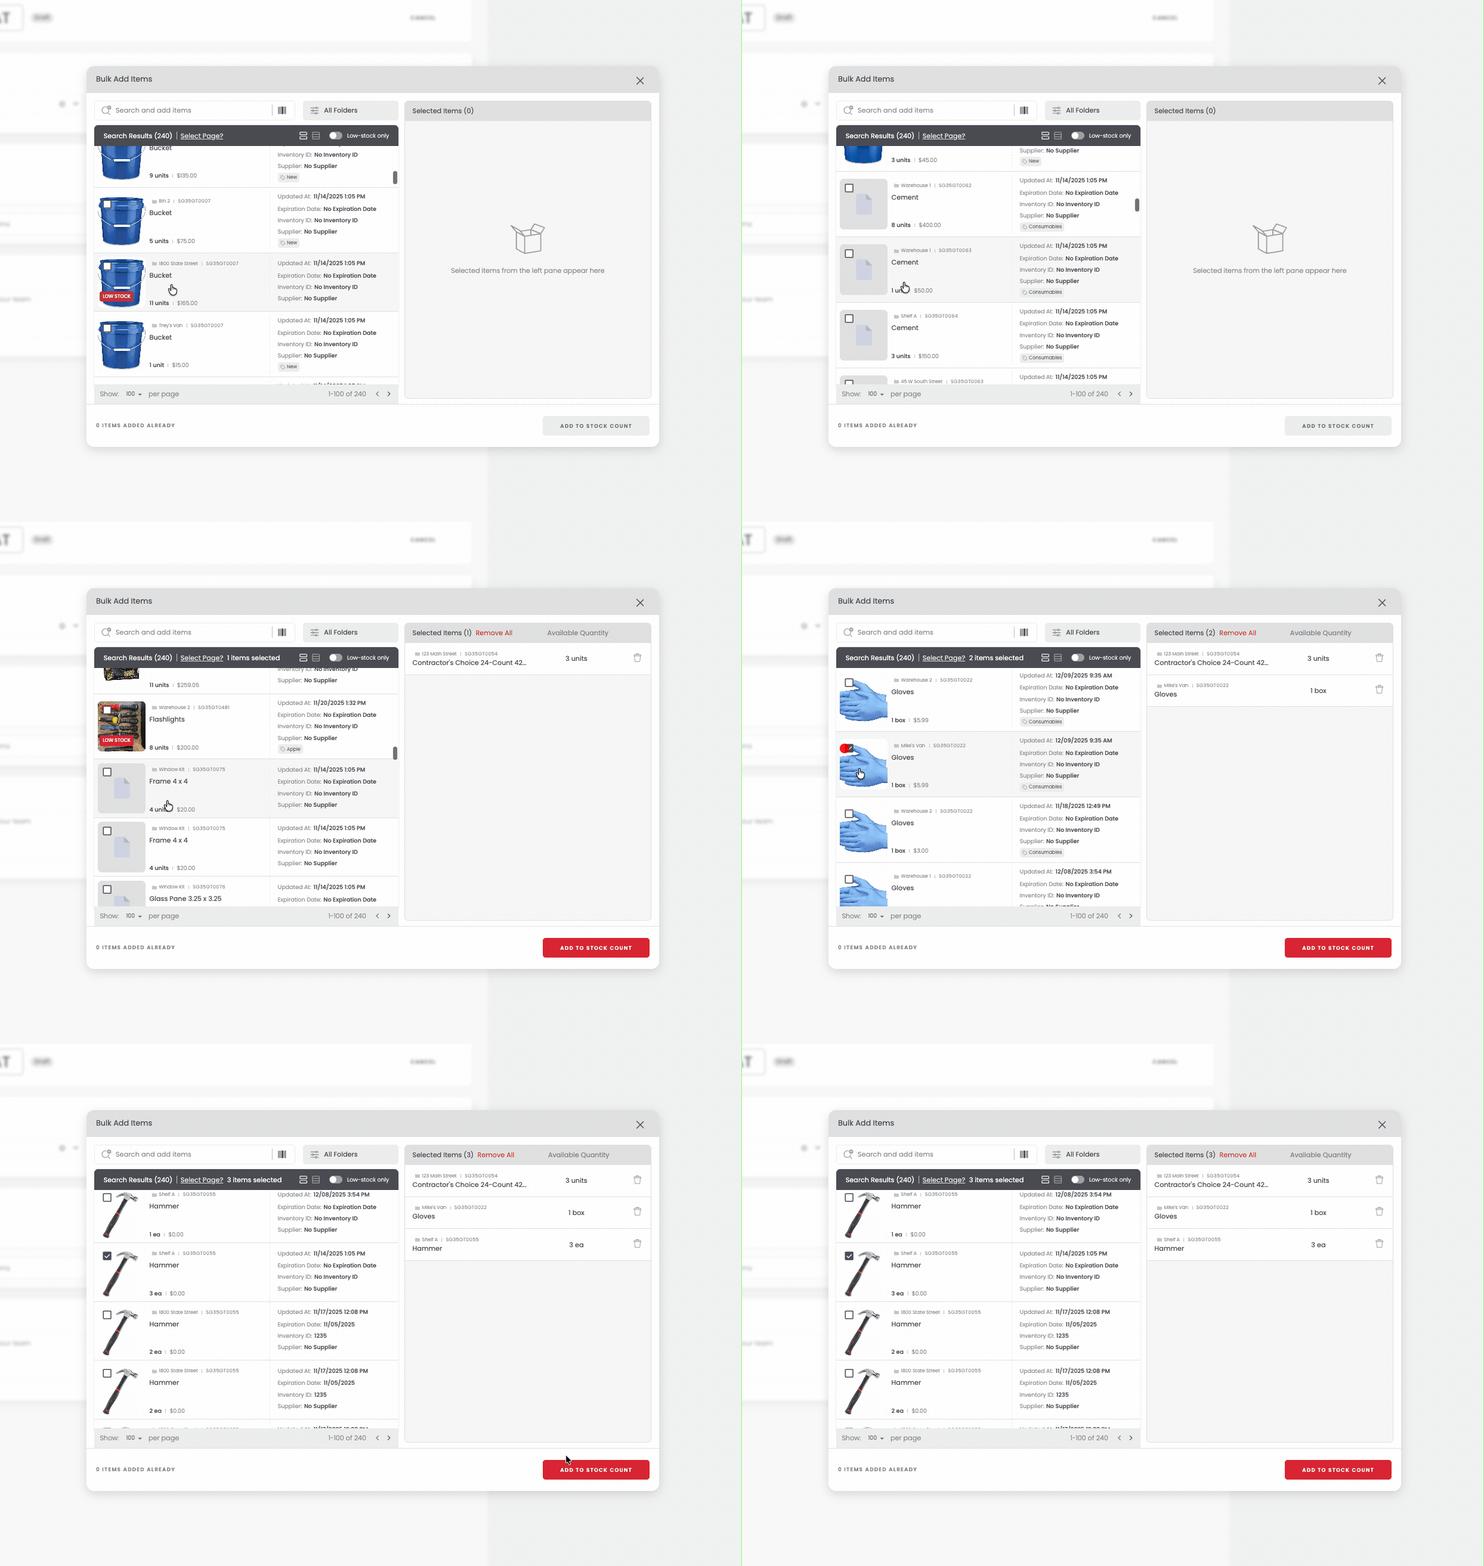
2Select the items you want to add to the Stock Count.
Via Advanced Search
1Navigate to Advanced Search and apply any needed filters to narrow down your items.
2Click Apply Filters.
3Use the bulk-select checkboxes to choose all the items you want to add.
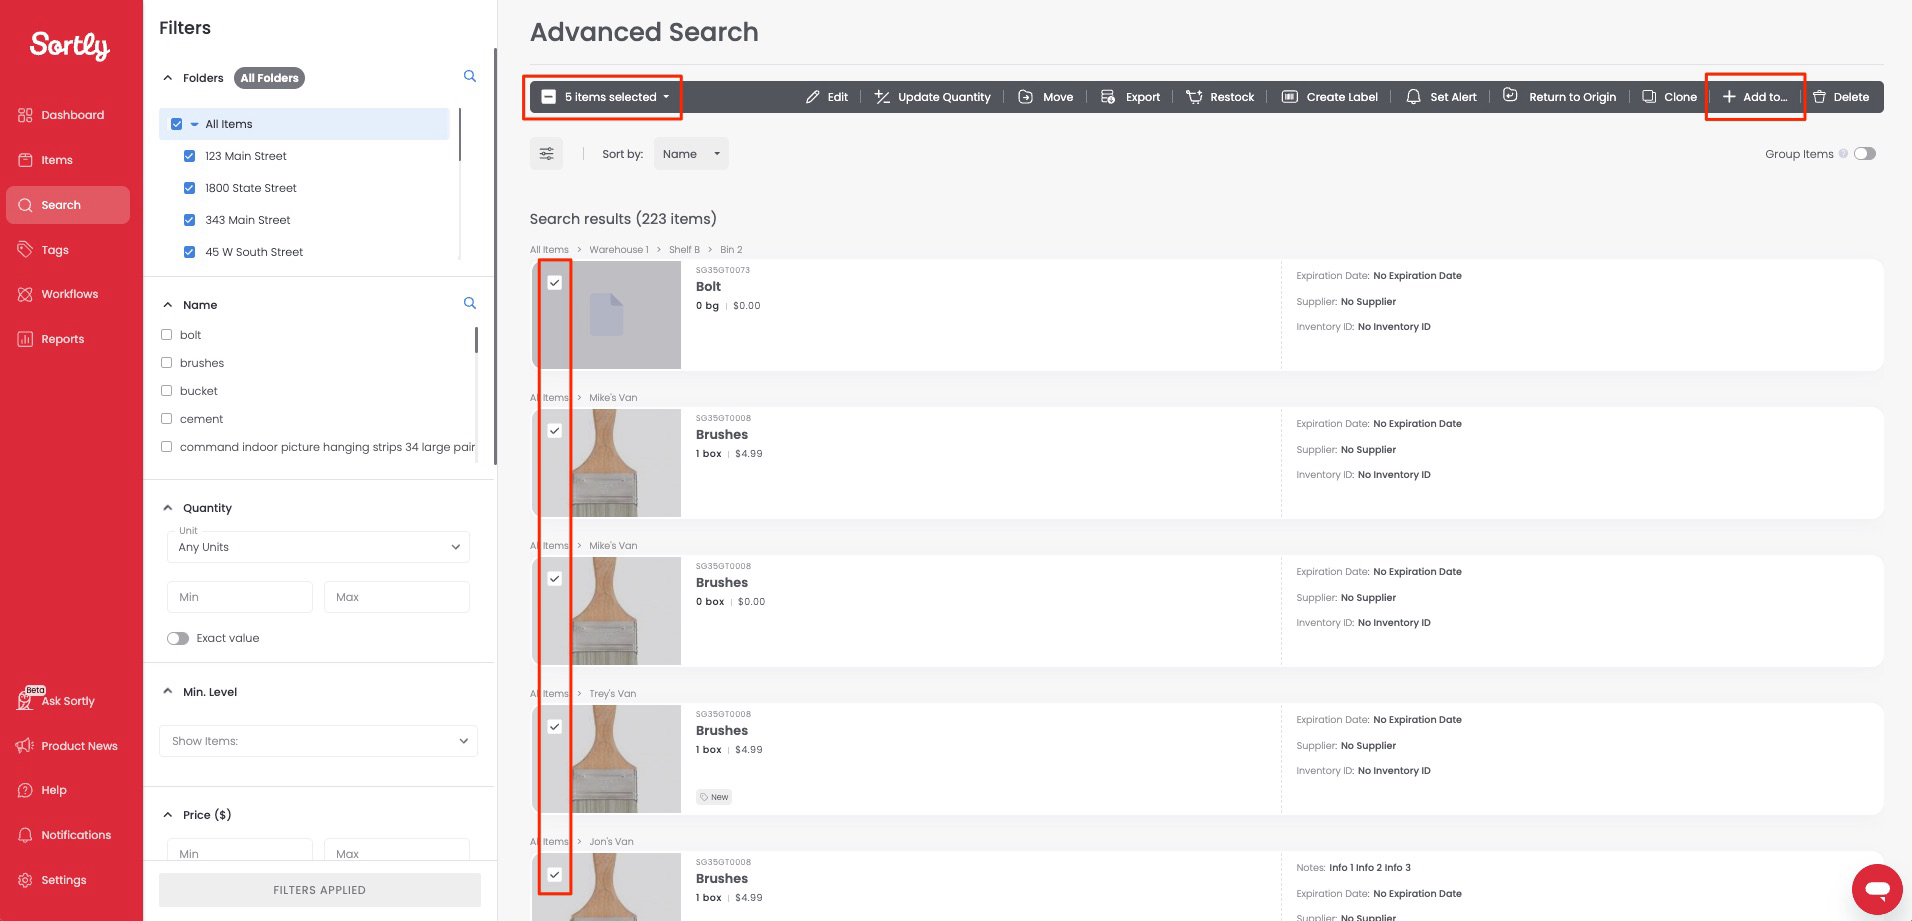
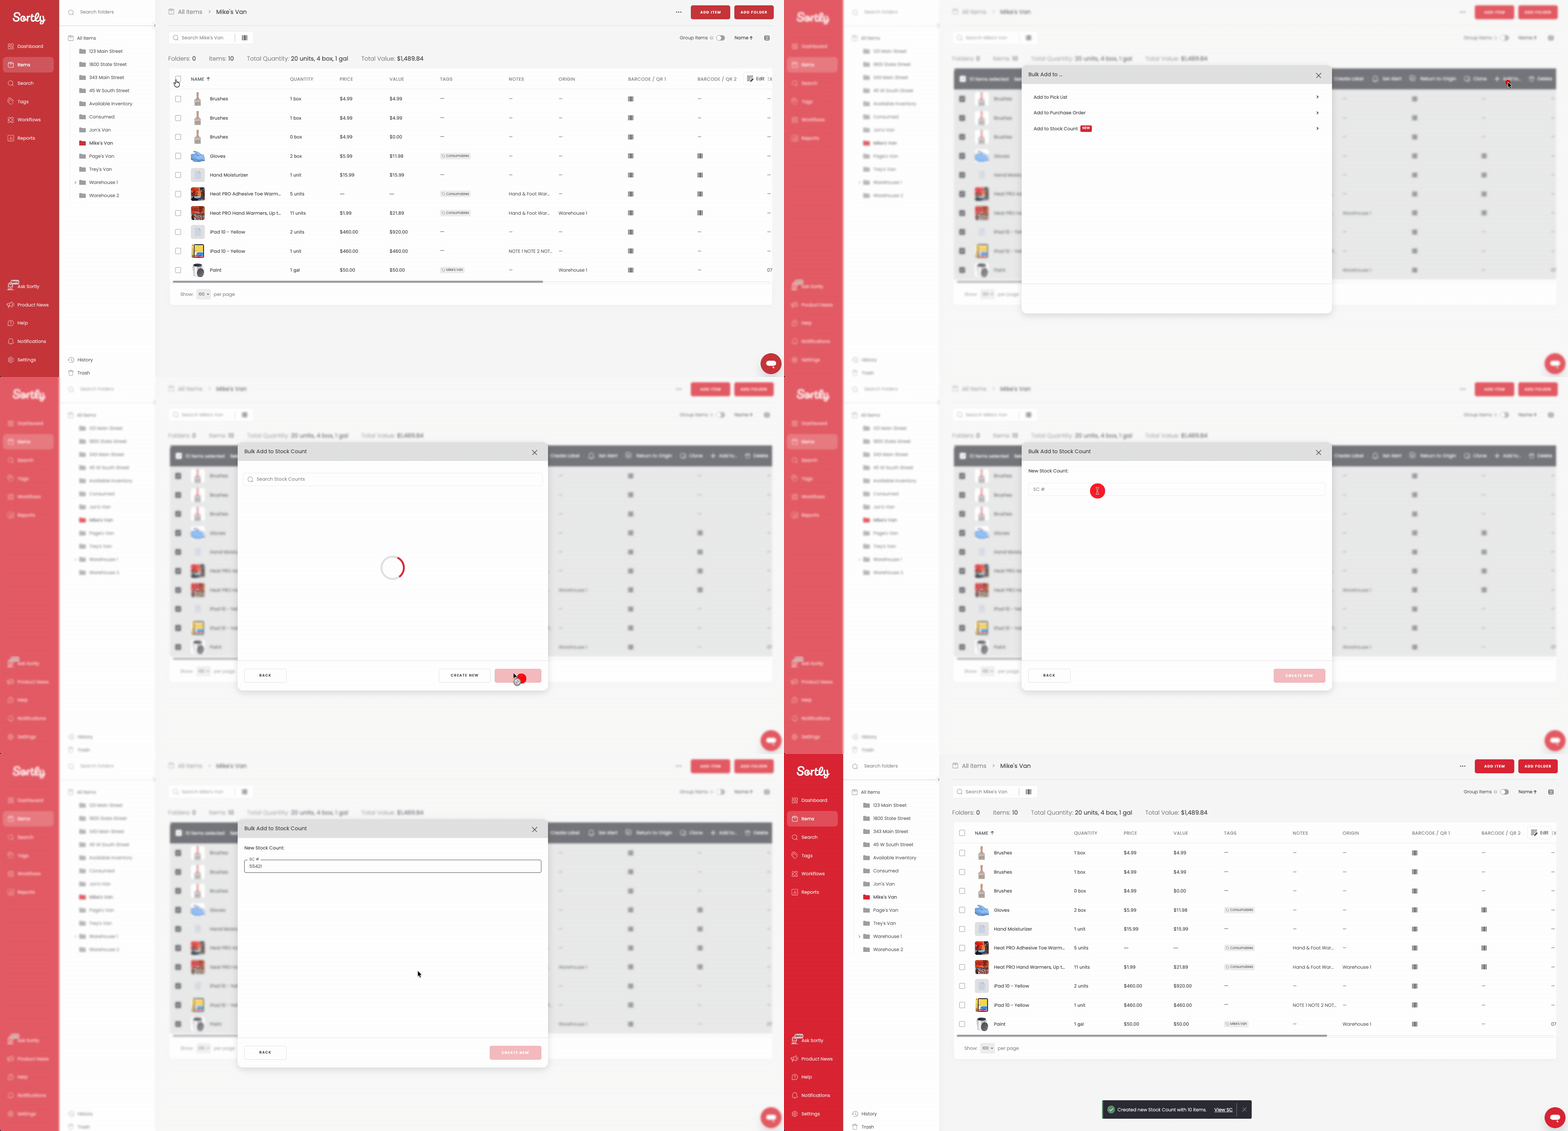
4In the bulk-edit bar, click Add To, then Stock Count.
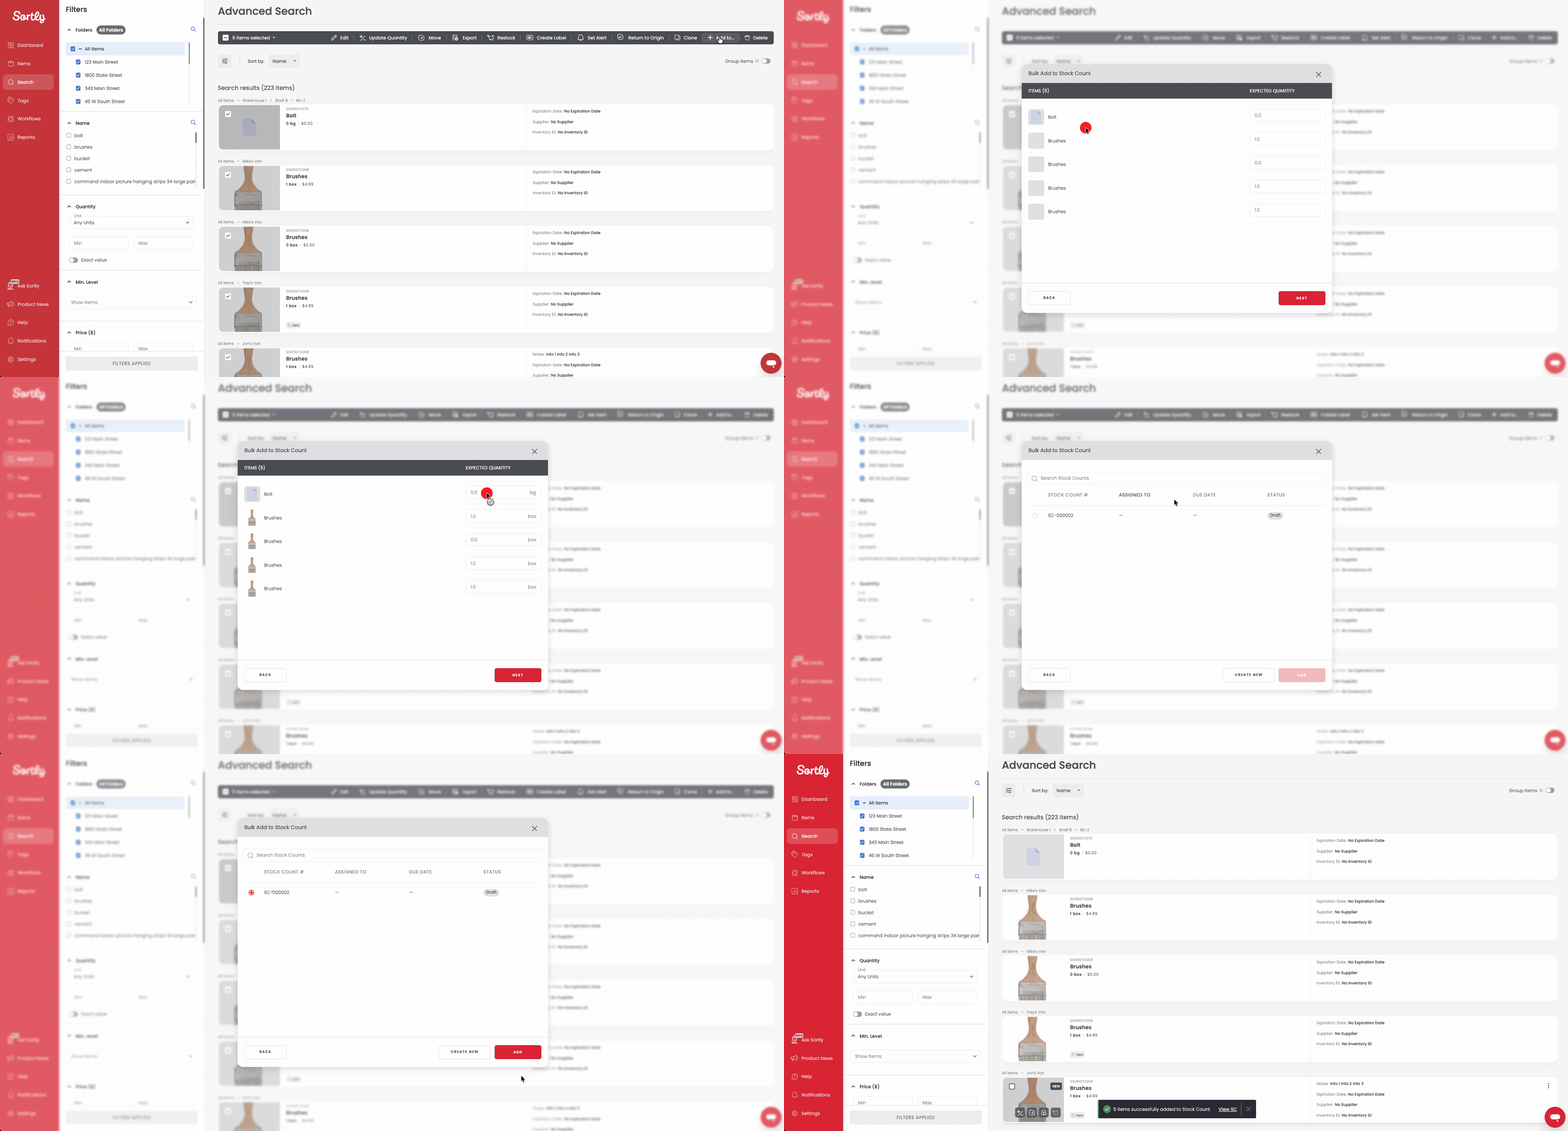
5Choose the quantity you want to add for each item and click Next.
6Select whether to create a New Stock Count or add the items to an Existing Stock Count.
7Confirm your choice, and the items are added.
Via a Folder
1Go to the desired Folder in your inventory.
2Follow the same process as the Advanced Search steps above.
How to perform a Stock Count
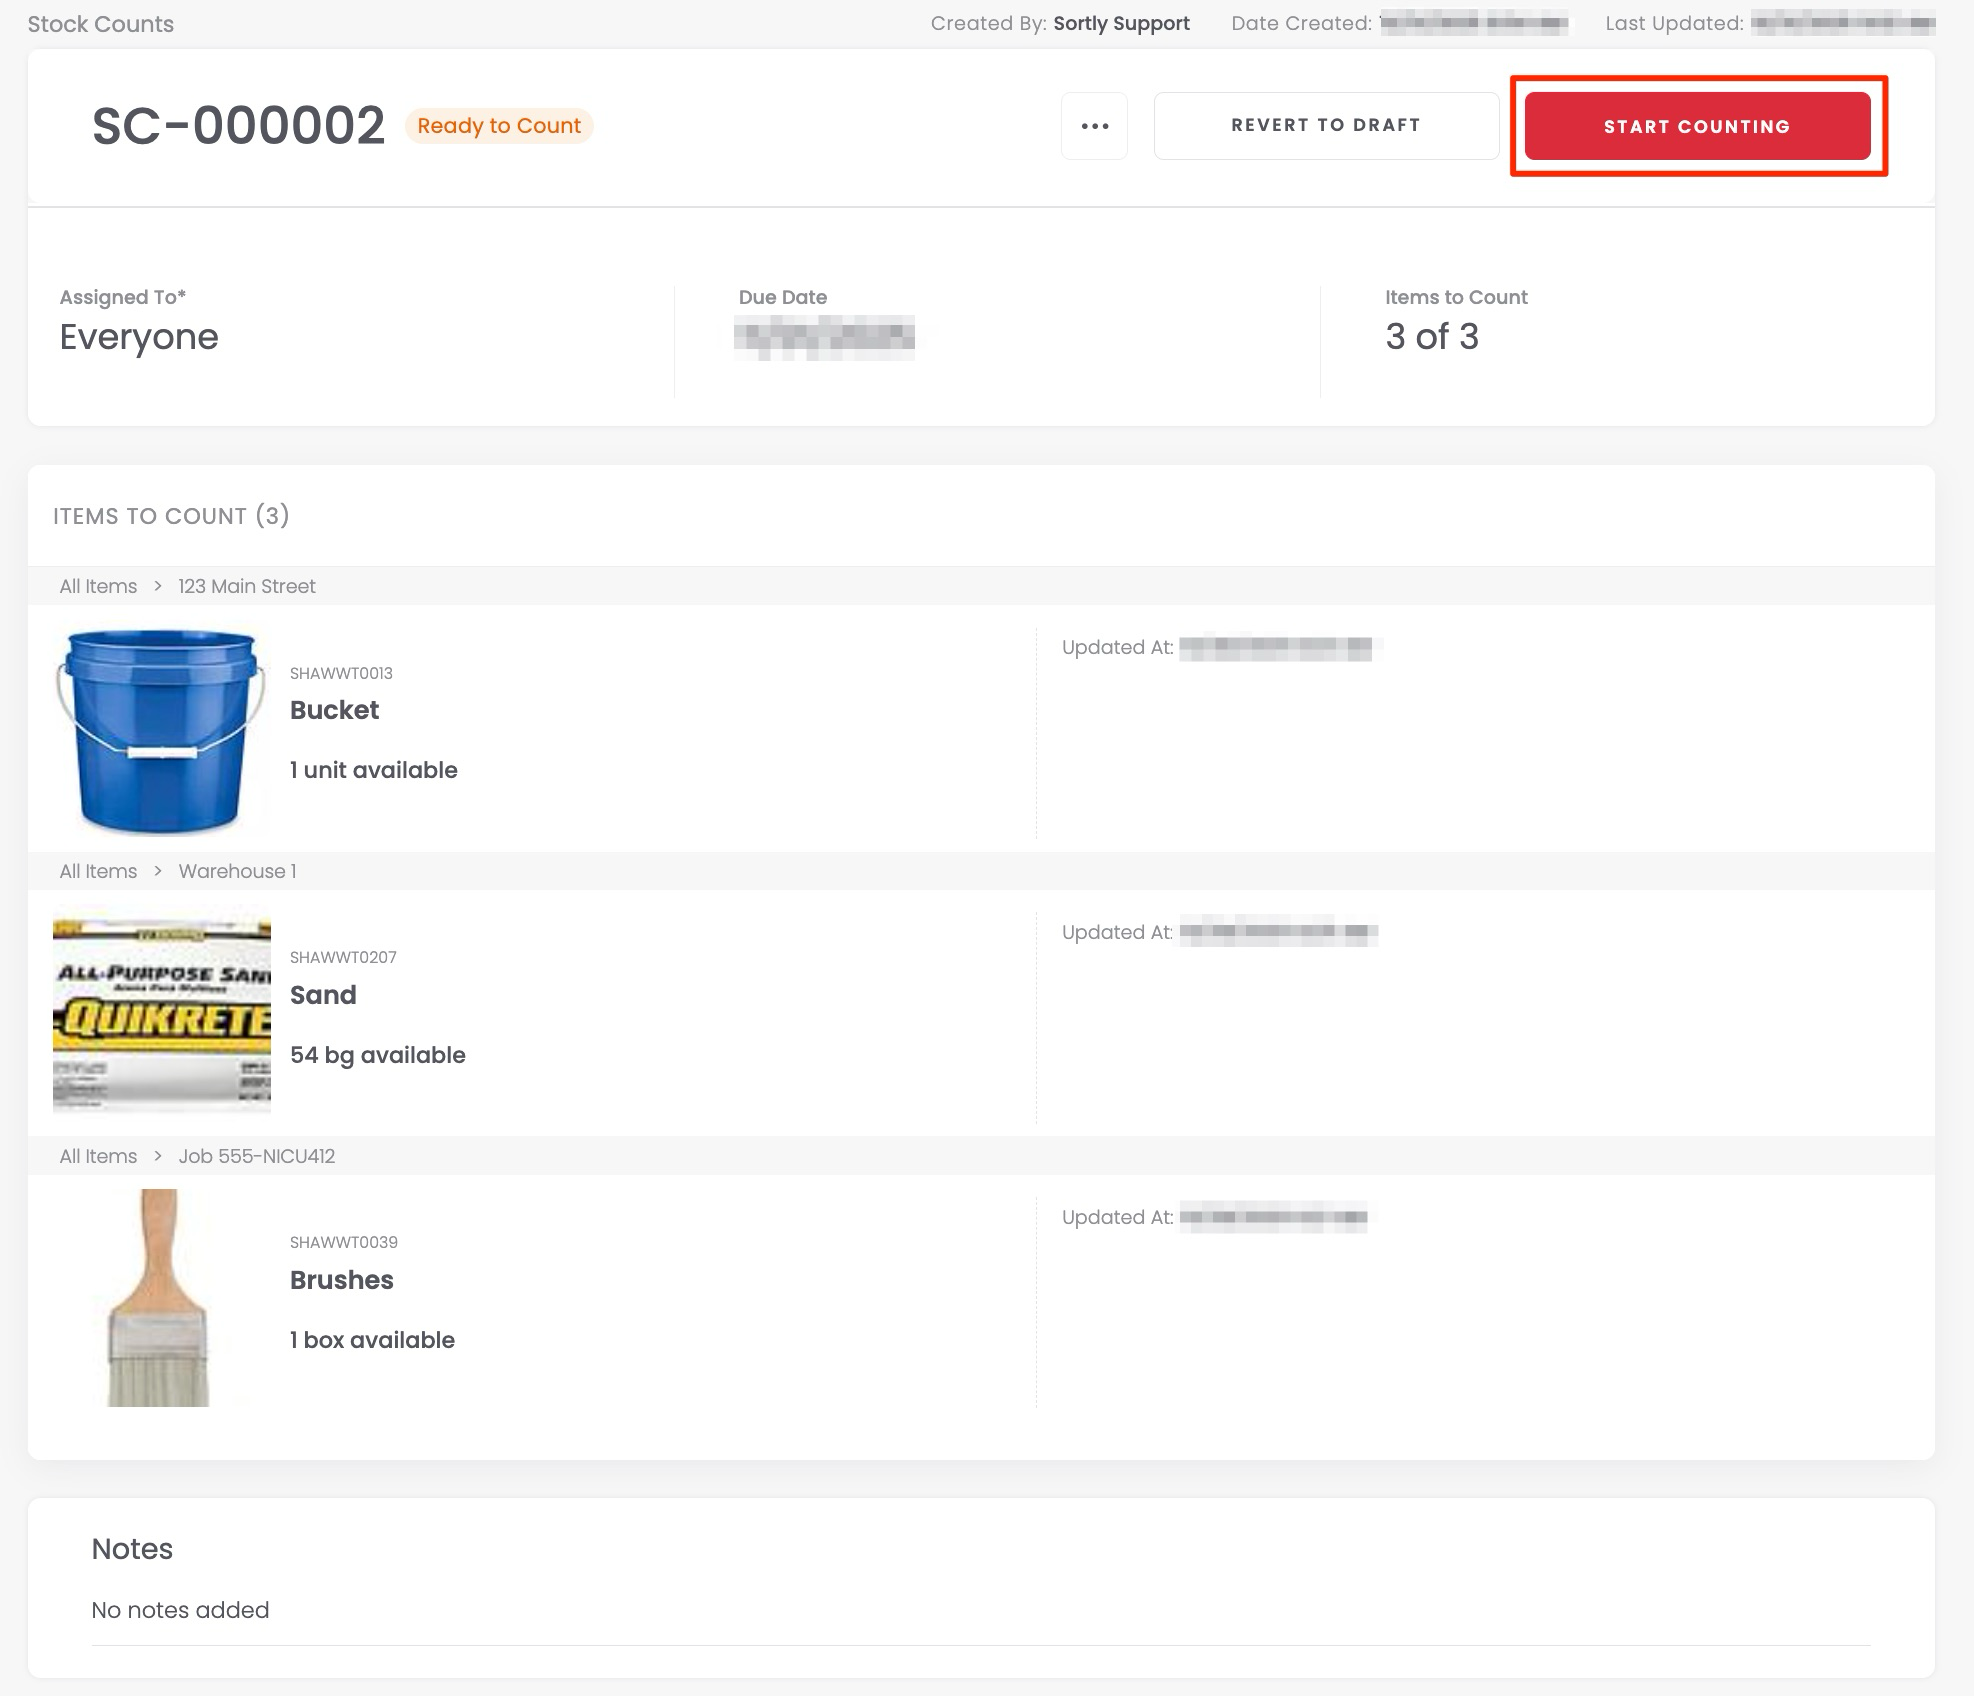
1Open the Stock Count you created.
2Select Ready to Count, then Start Counting.
3Start counting and enter actual quantities.
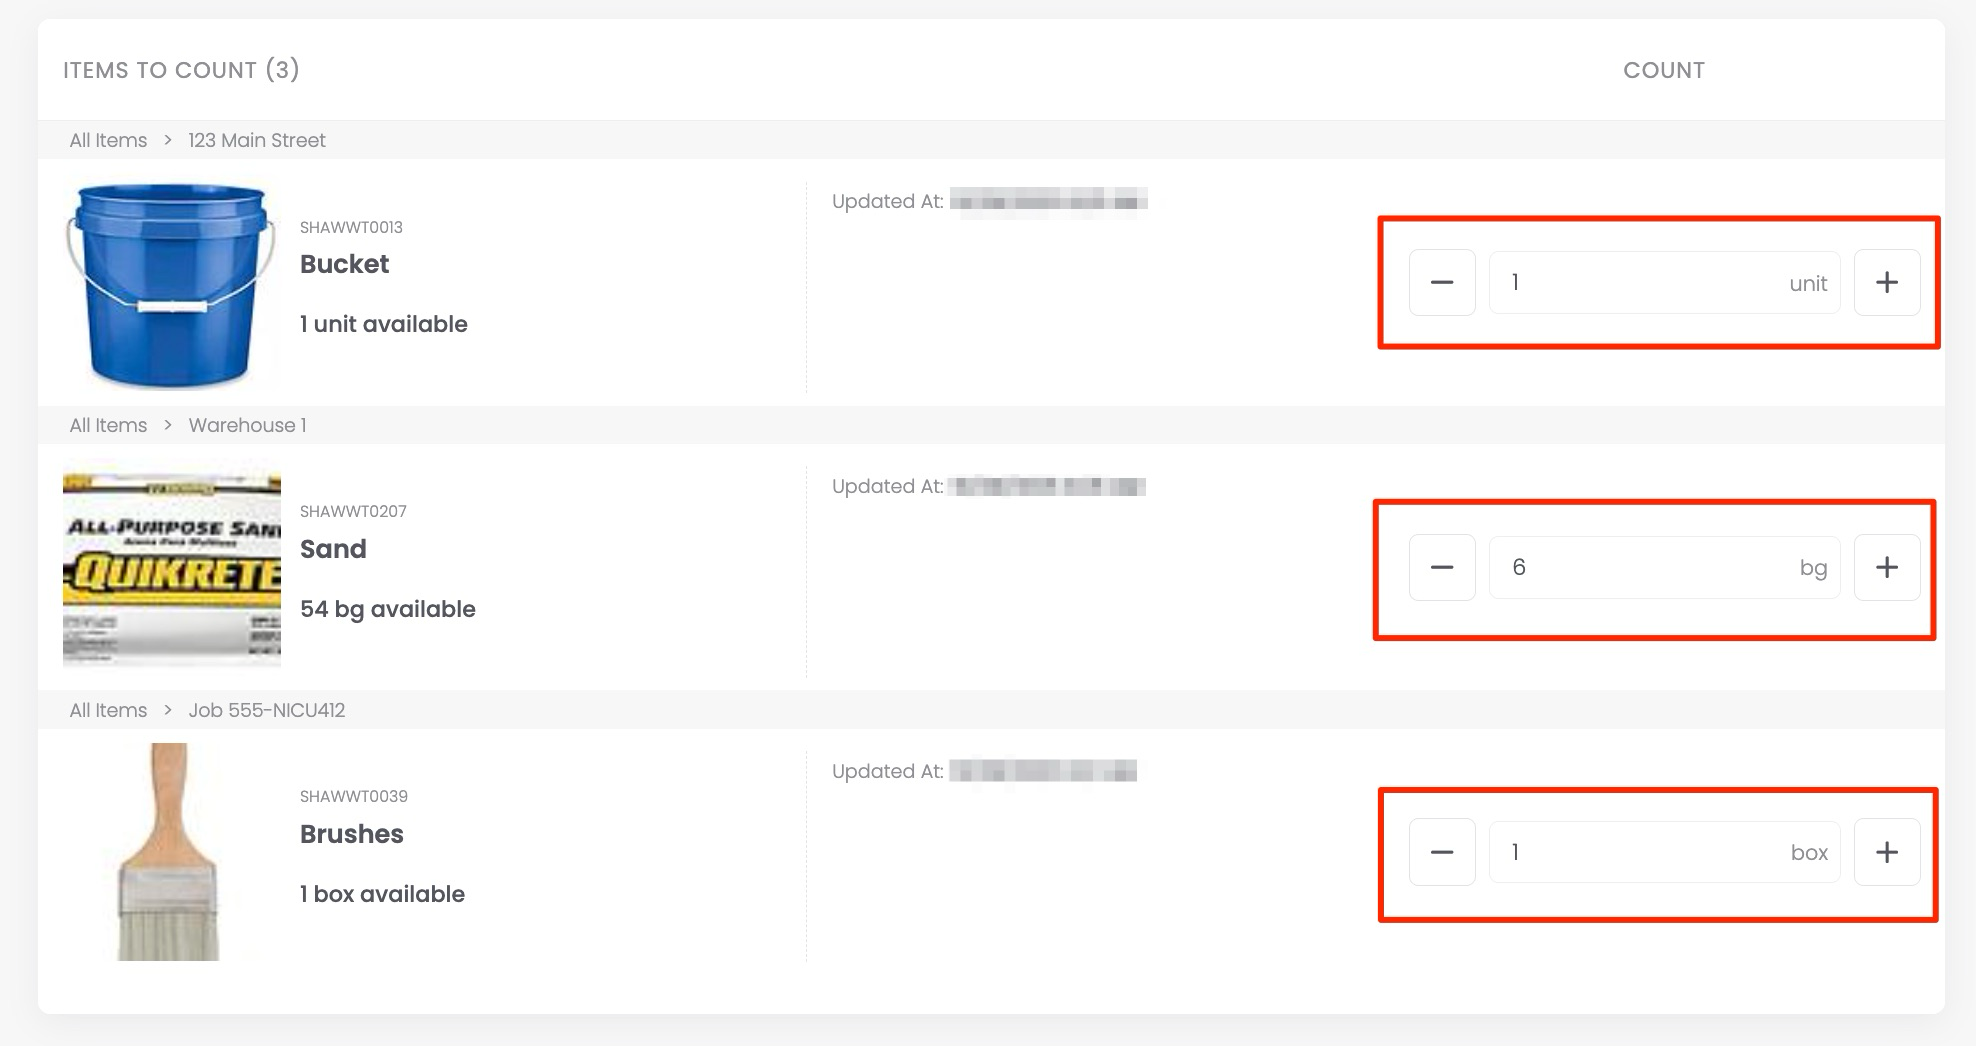
4Sortly automatically compares expected vs. counted quantities. Save progress at any time. Counts sync in real time across web and mobile, and can be done collaboratively if assigned to multiple users.
5Once counted, the stock count will be in the Submit for Review status.
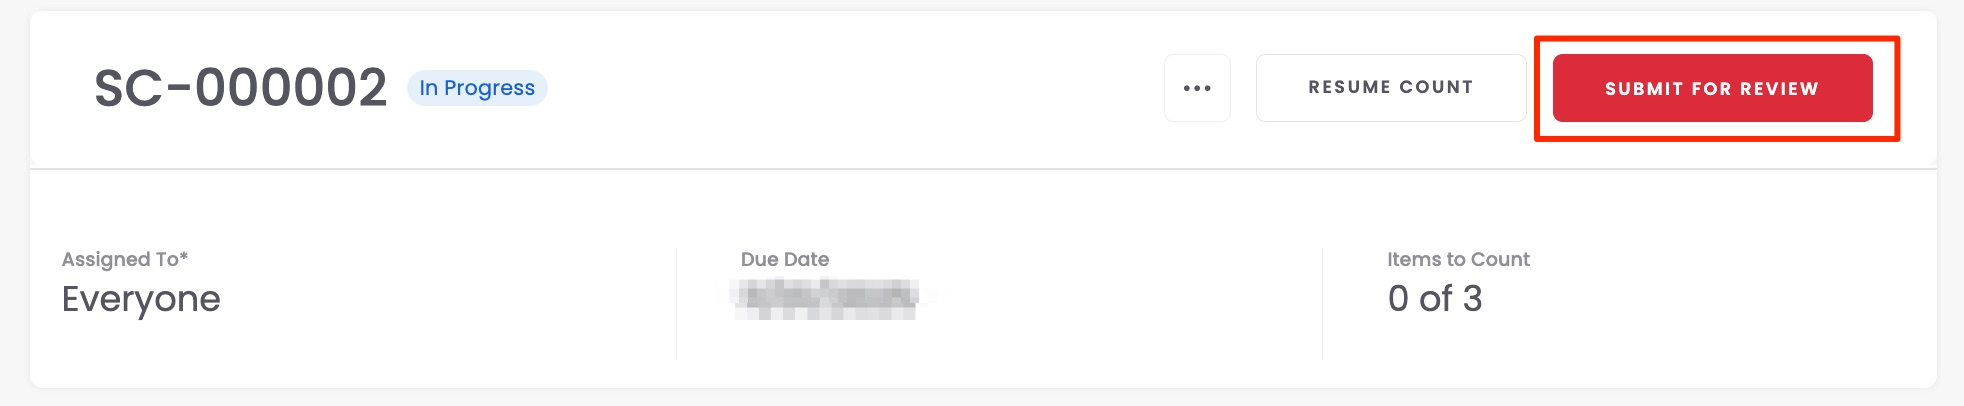
6If you need to resume the count, click Resume Count and continue.
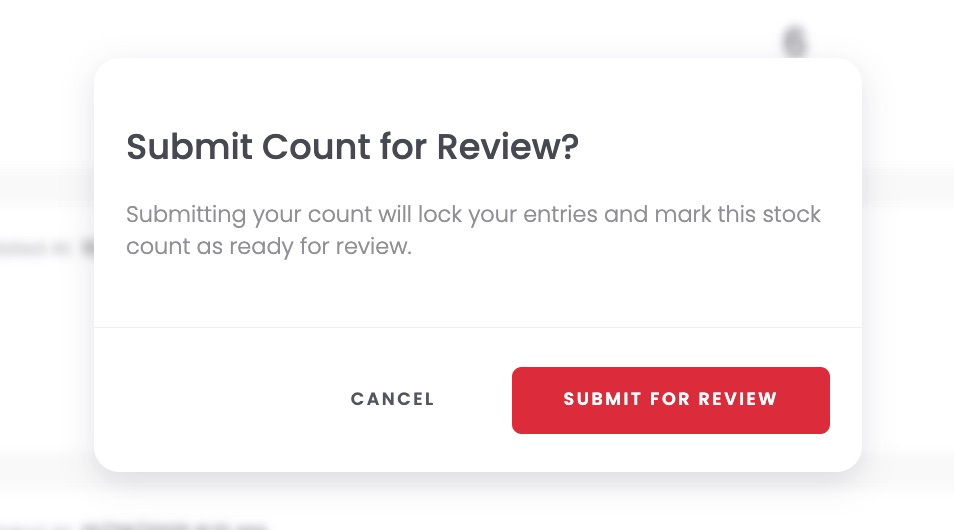
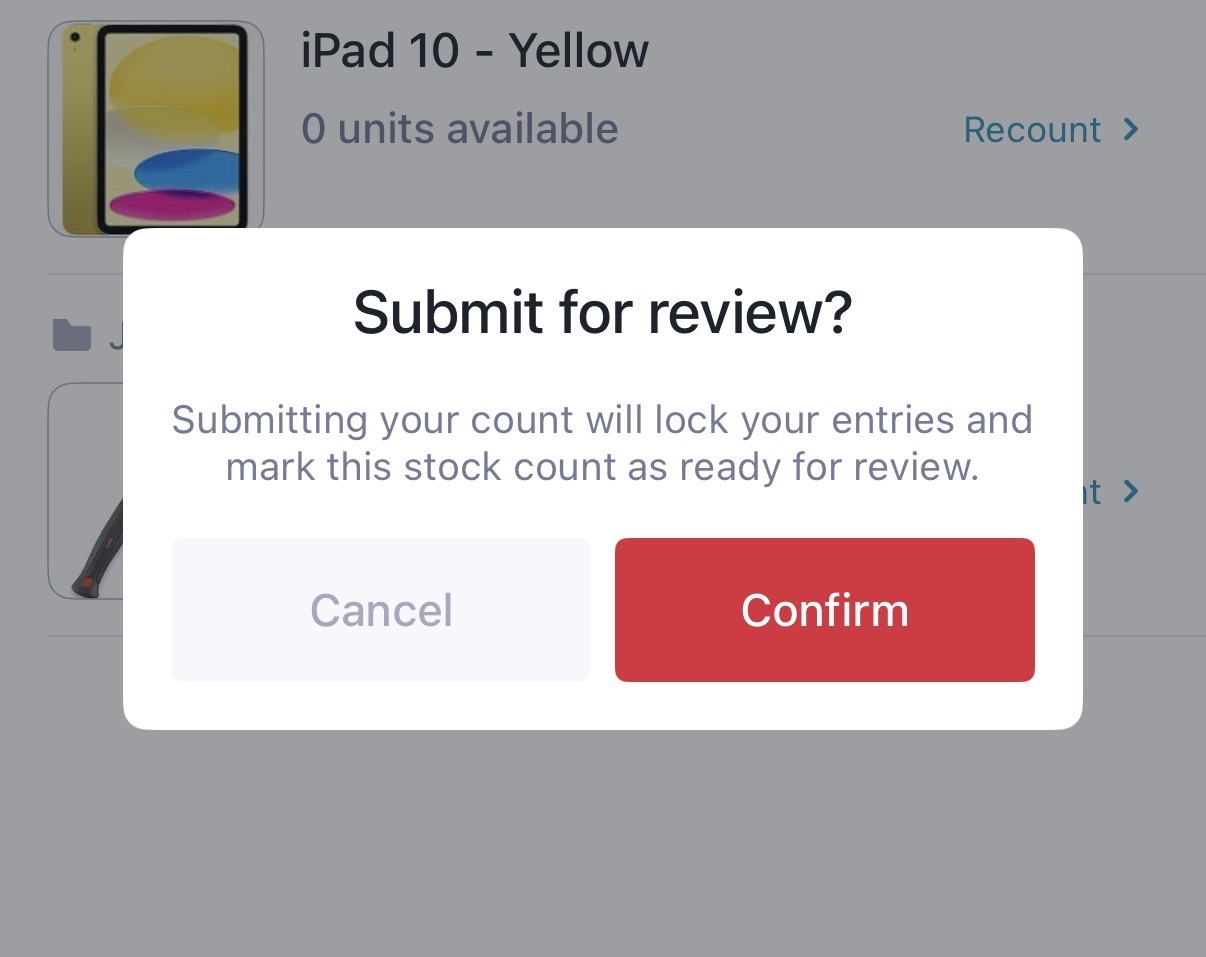
7Once fully counted, click Submit for Review. Doing this will lock your entries and mark this stock count as ready for review.
How to review discrepancies
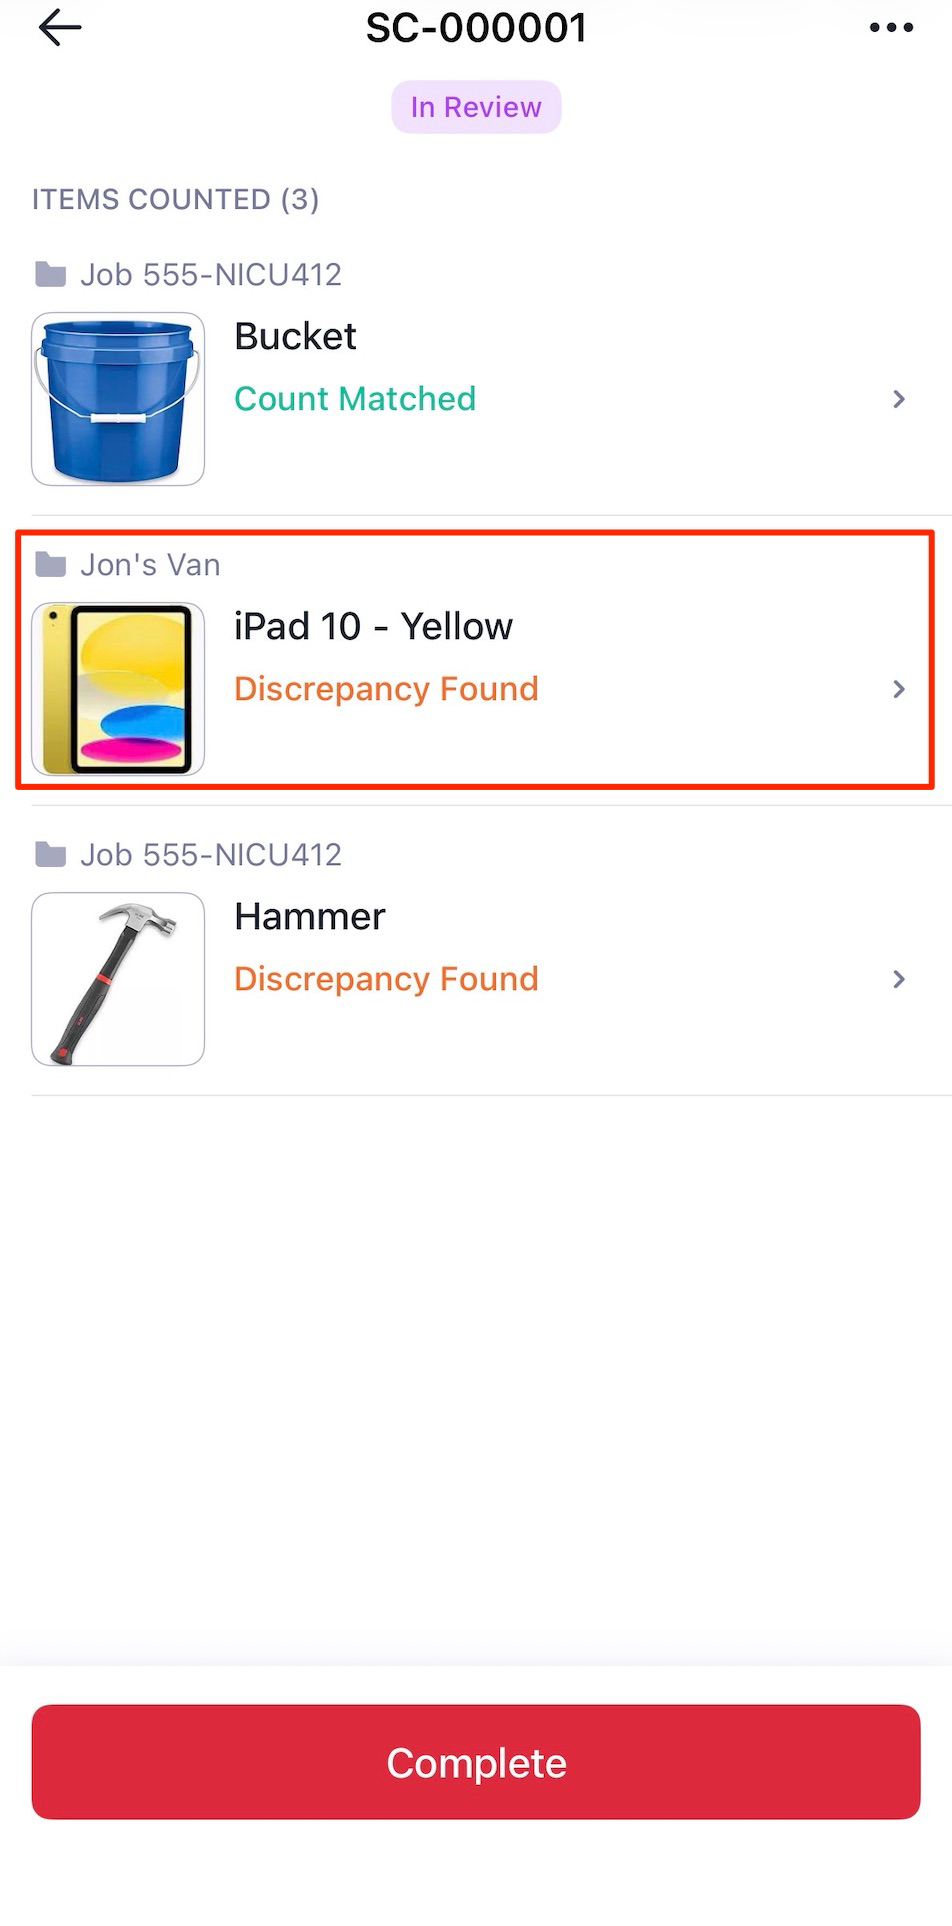
When the count status changes to In Review, Sortly calculates and displays all discrepancies.
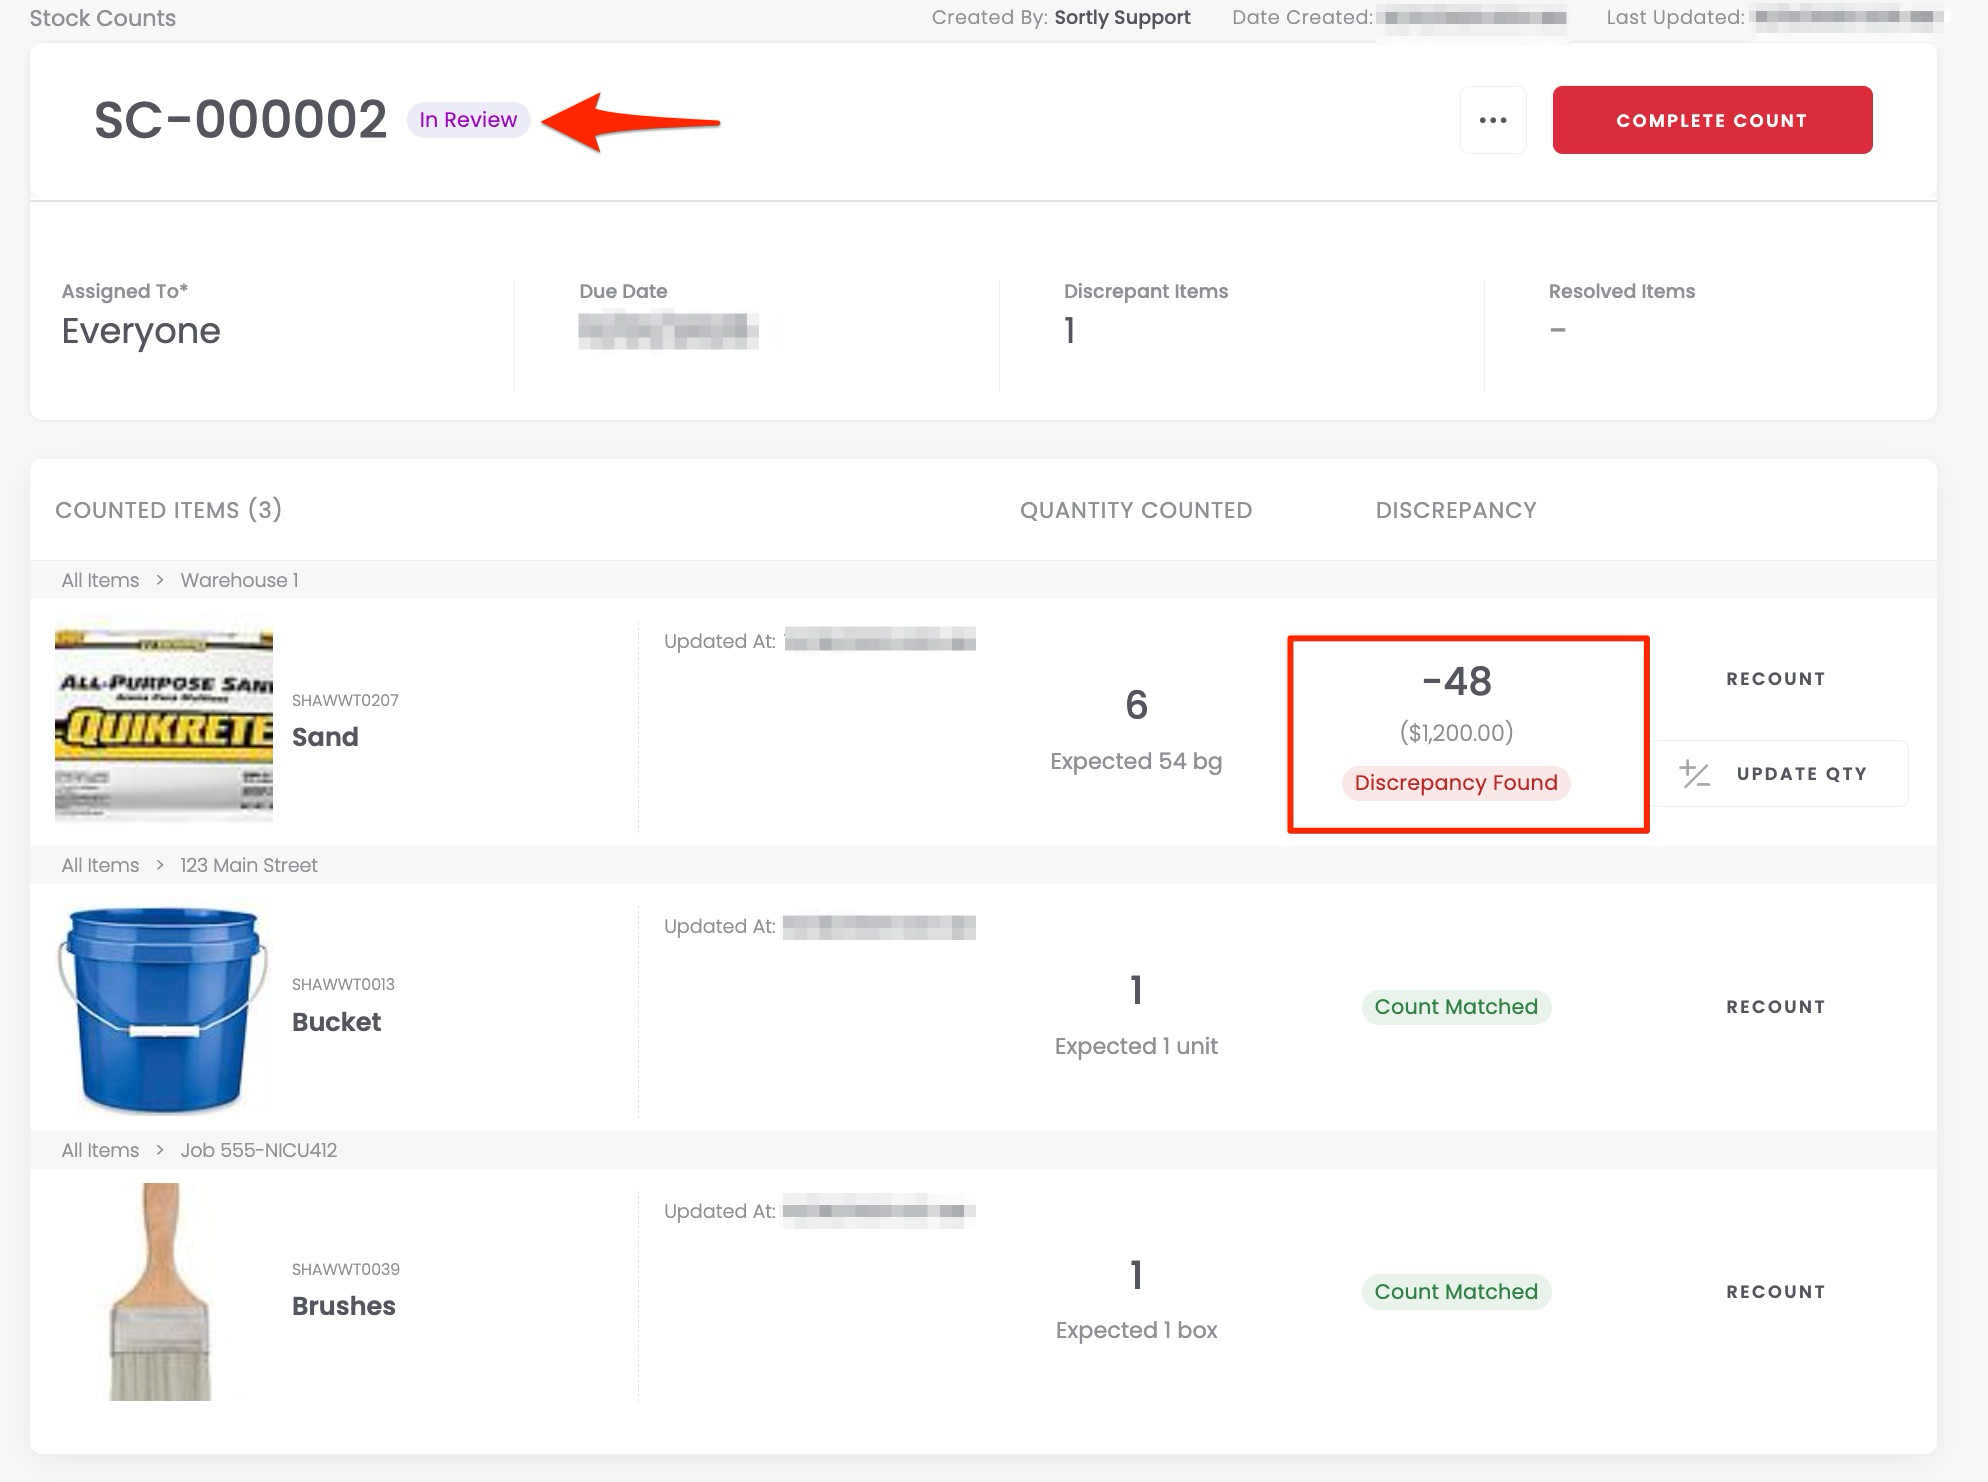
- Net discrepancy shows overall variance (for example, +5 and -3 equals -2).
- Absolute discrepancy totals all variances (for example, 5 + 3 equals 8 units off).
Only Owners, Admins, or Creators can resolve discrepancies or update final quantities. Once reviewed, you can mark the stock count as Complete or Voided.
If your Stock Count contains discrepancies, you'll need to resolve them before completing the count. Any items with unresolved discrepancies will not have their quantities updated.
To resolve discrepancies
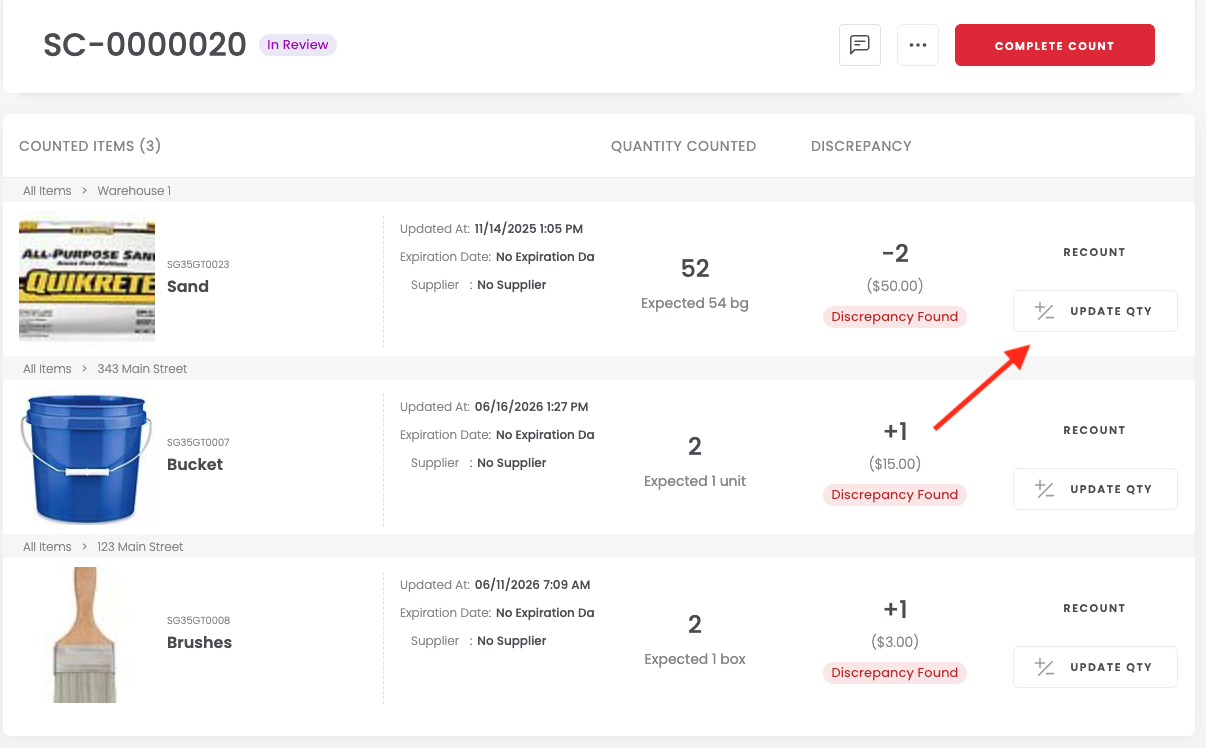
1Click Update Quantity next to the item with the discrepancy found.
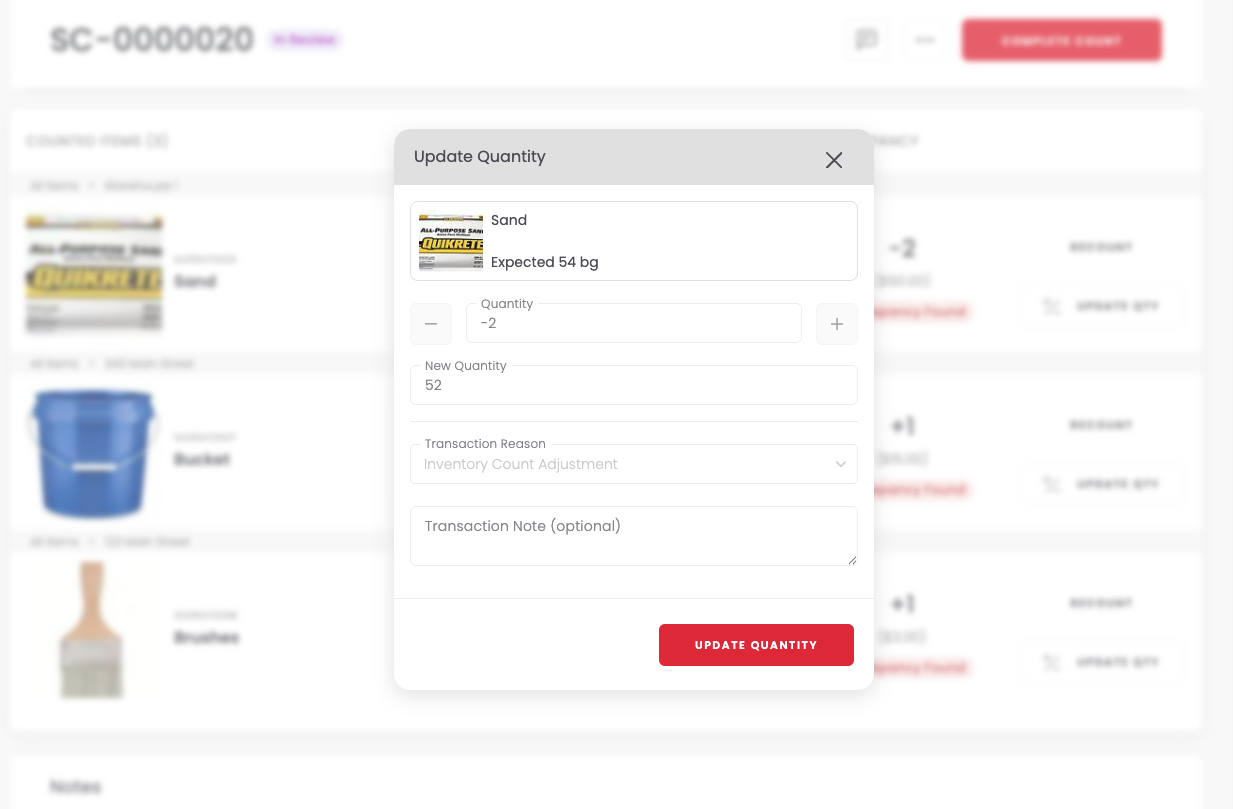
2Review the changes and click Update Quantity.
3Once the discrepancy is resolved, you'll see Resolved next to the line item on the Stock Count.
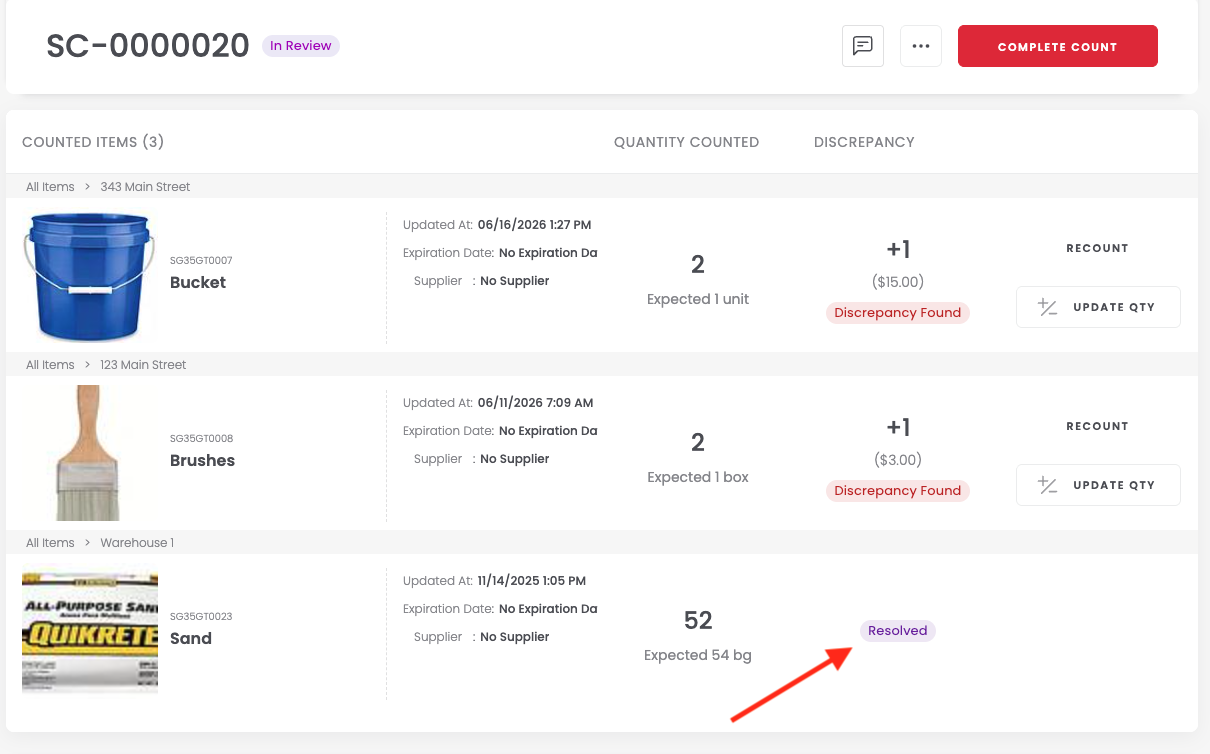
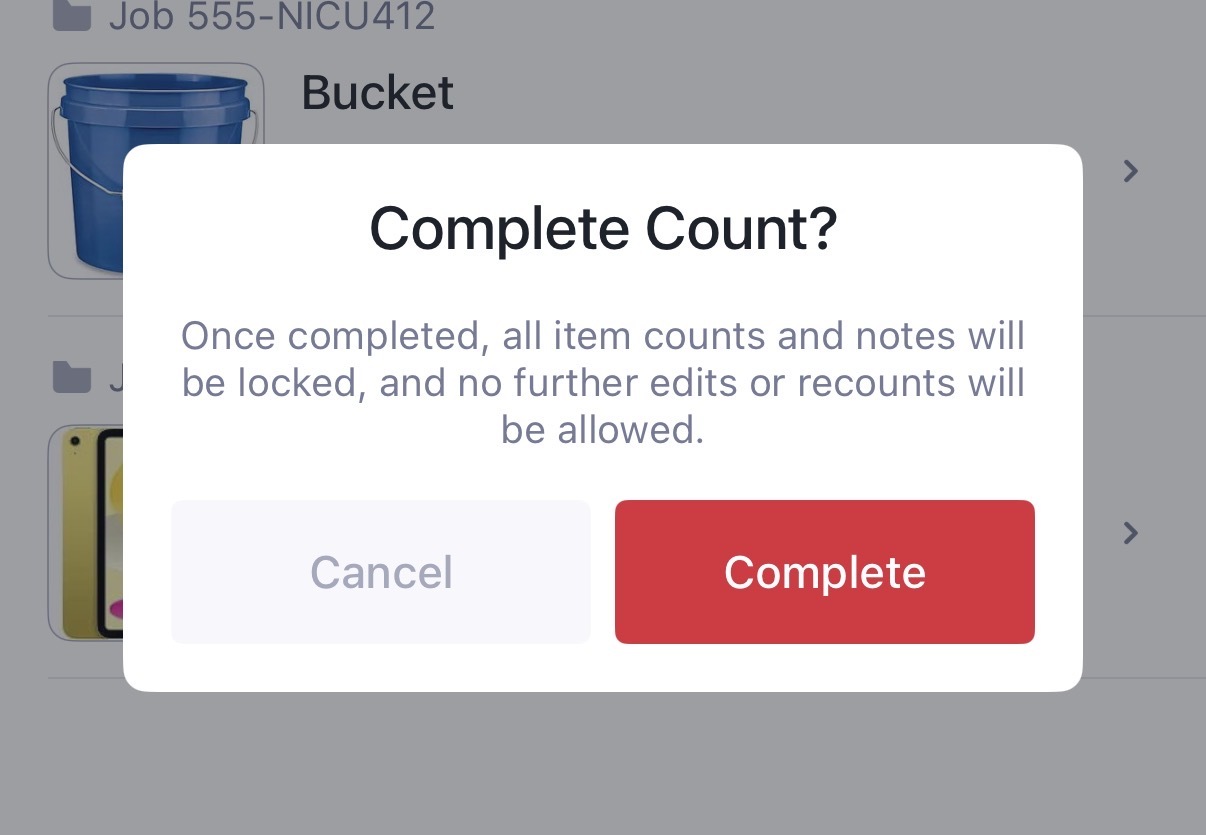
4When all discrepancies are resolved, you can click Complete Count.
How to complete or reuse Stock Counts
When a stock count is marked Complete, it becomes locked for edits. From there, you can:
- Export your stock count as a PDF at any stage (Draft, In Progress, Complete)
- Clone a stock count to reuse for recurring counts
- View or share completed counts for audit purposes
Roles and permissions
Depends means the action is available to Custom Role users only if their role permissions allow it. If assigned means a Team Member can perform the action only on counts they are assigned to.
Stock Counts on mobile
Follow these steps to create and complete a Stock Count from the Sortly mobile app.
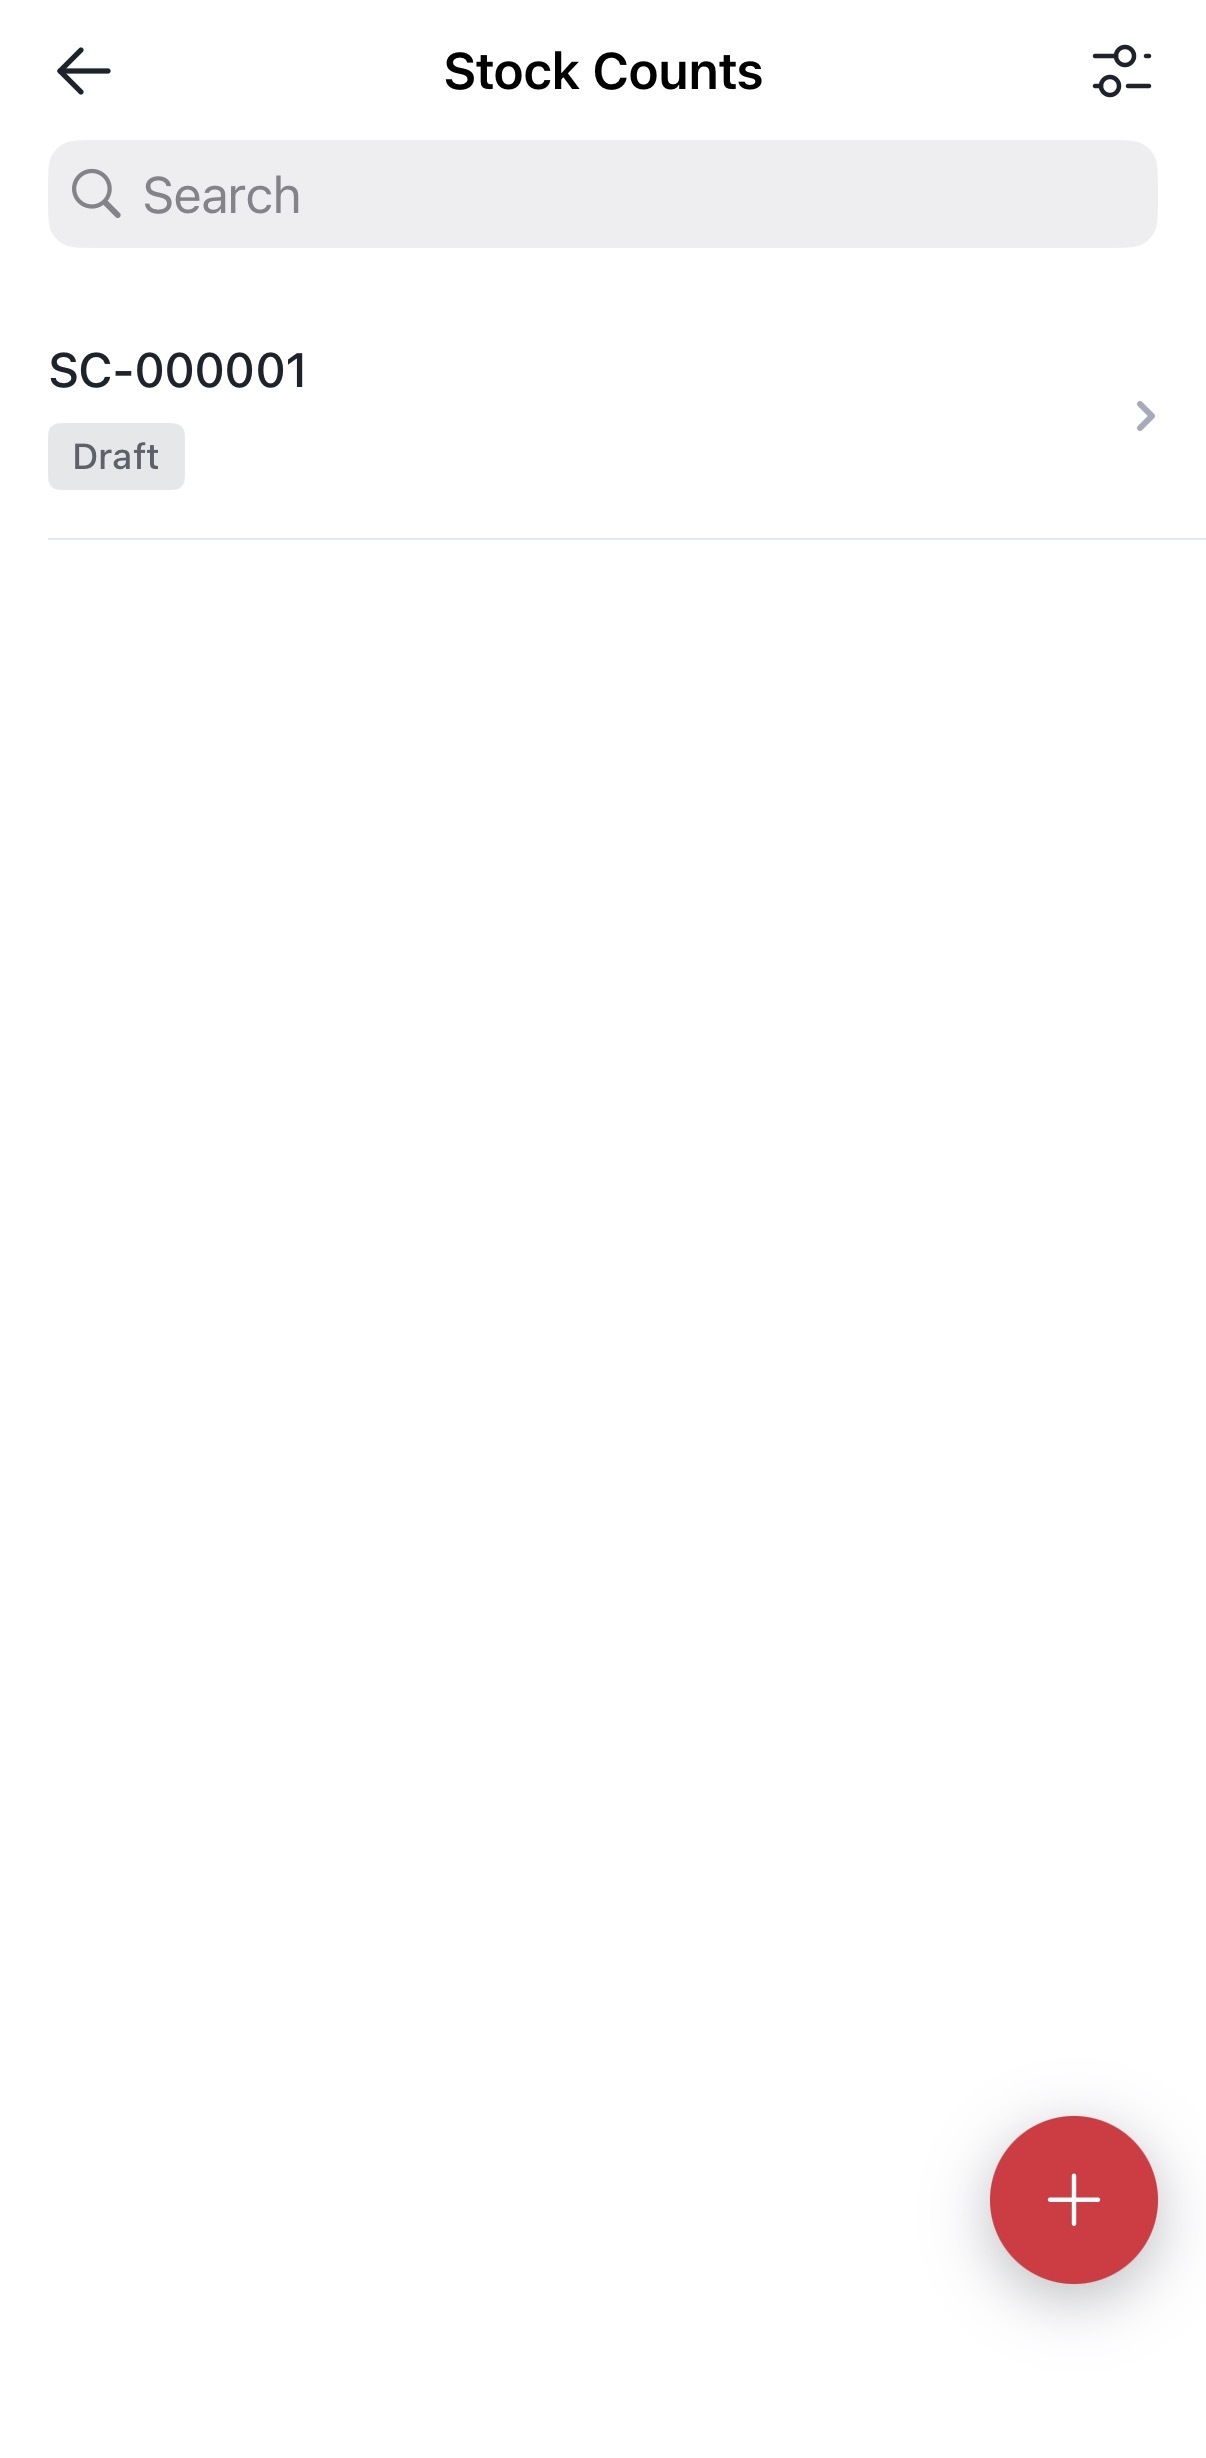
How to create a new Stock Count
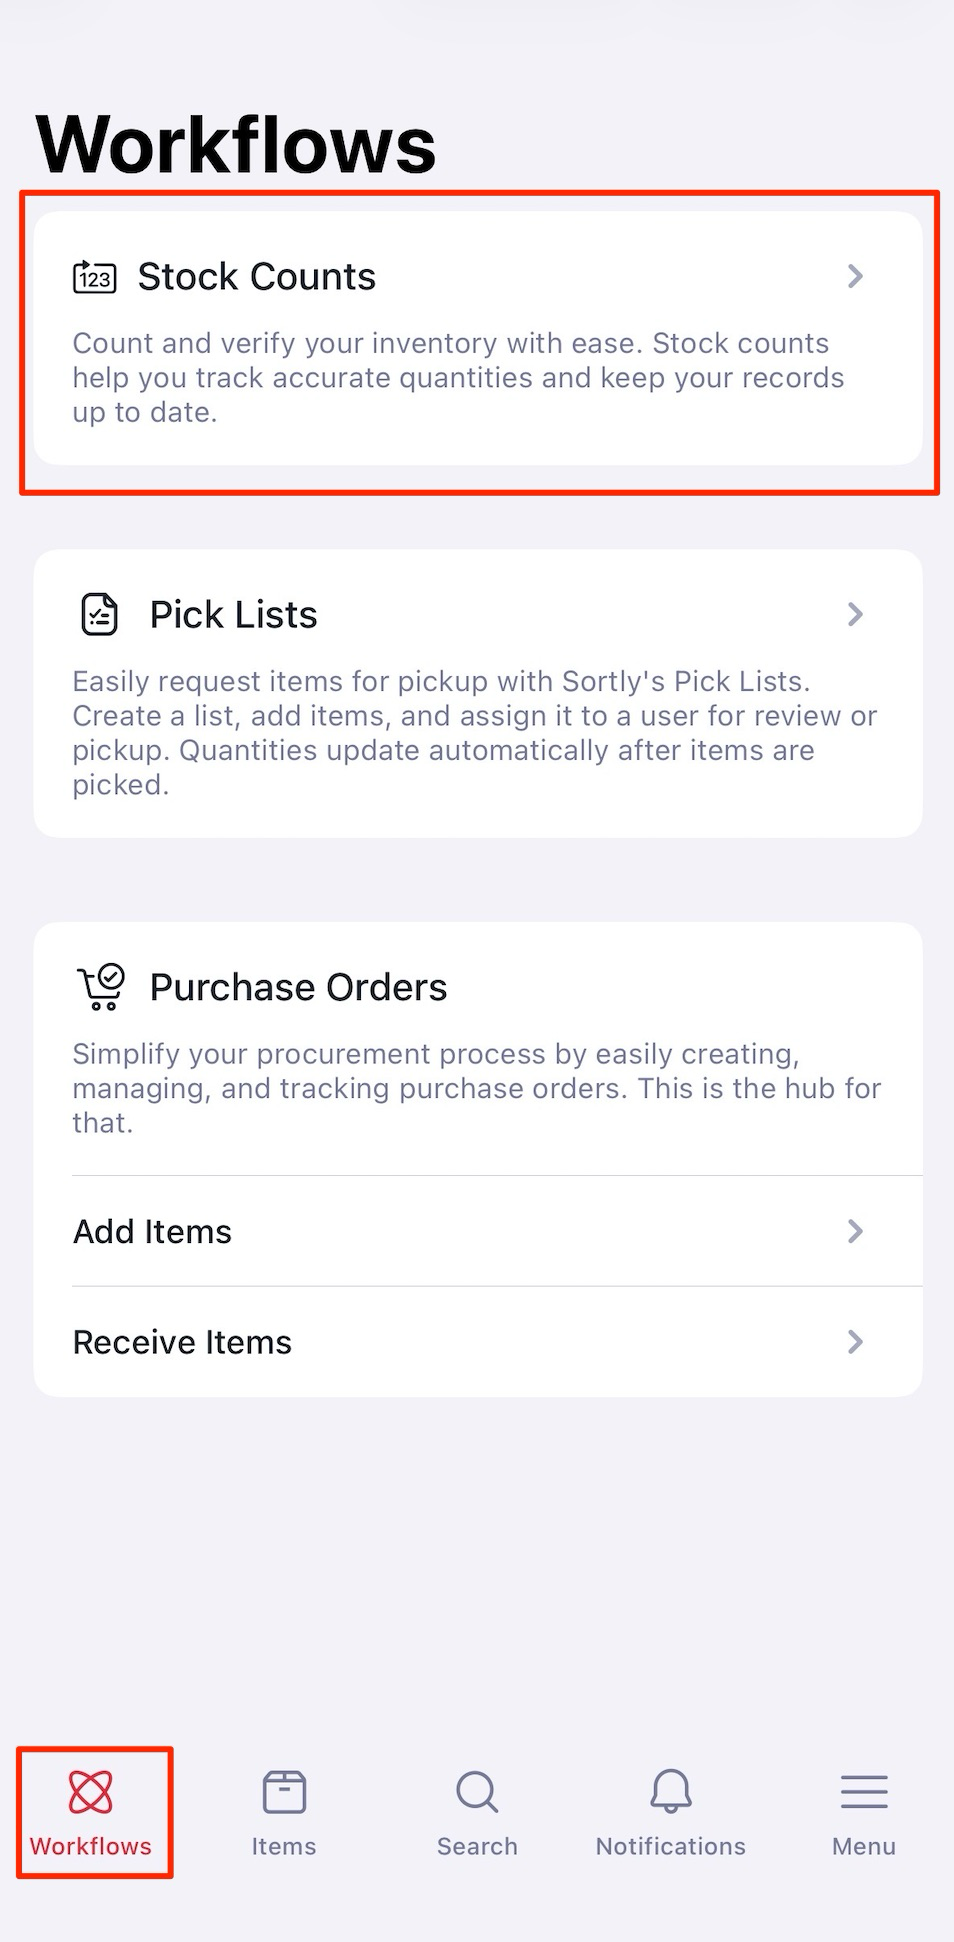
1In the mobile app, go to Workflows, then Stock Counts. Tap New Stock Count.
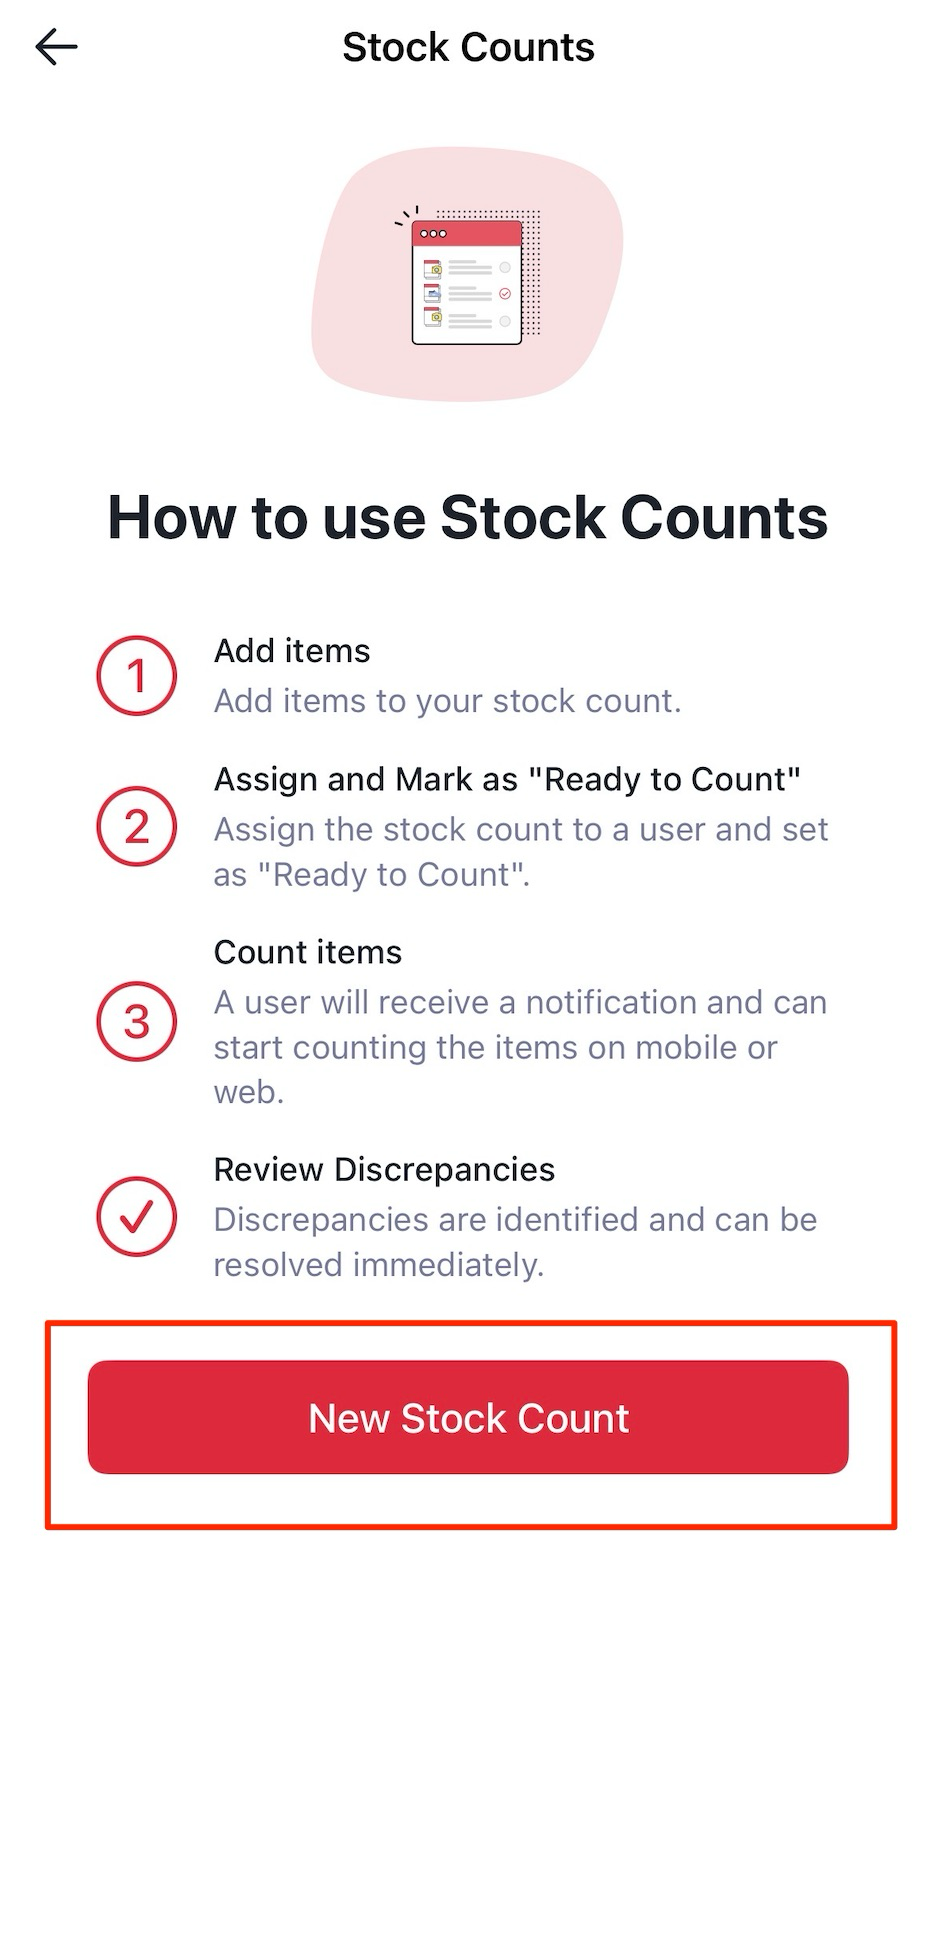
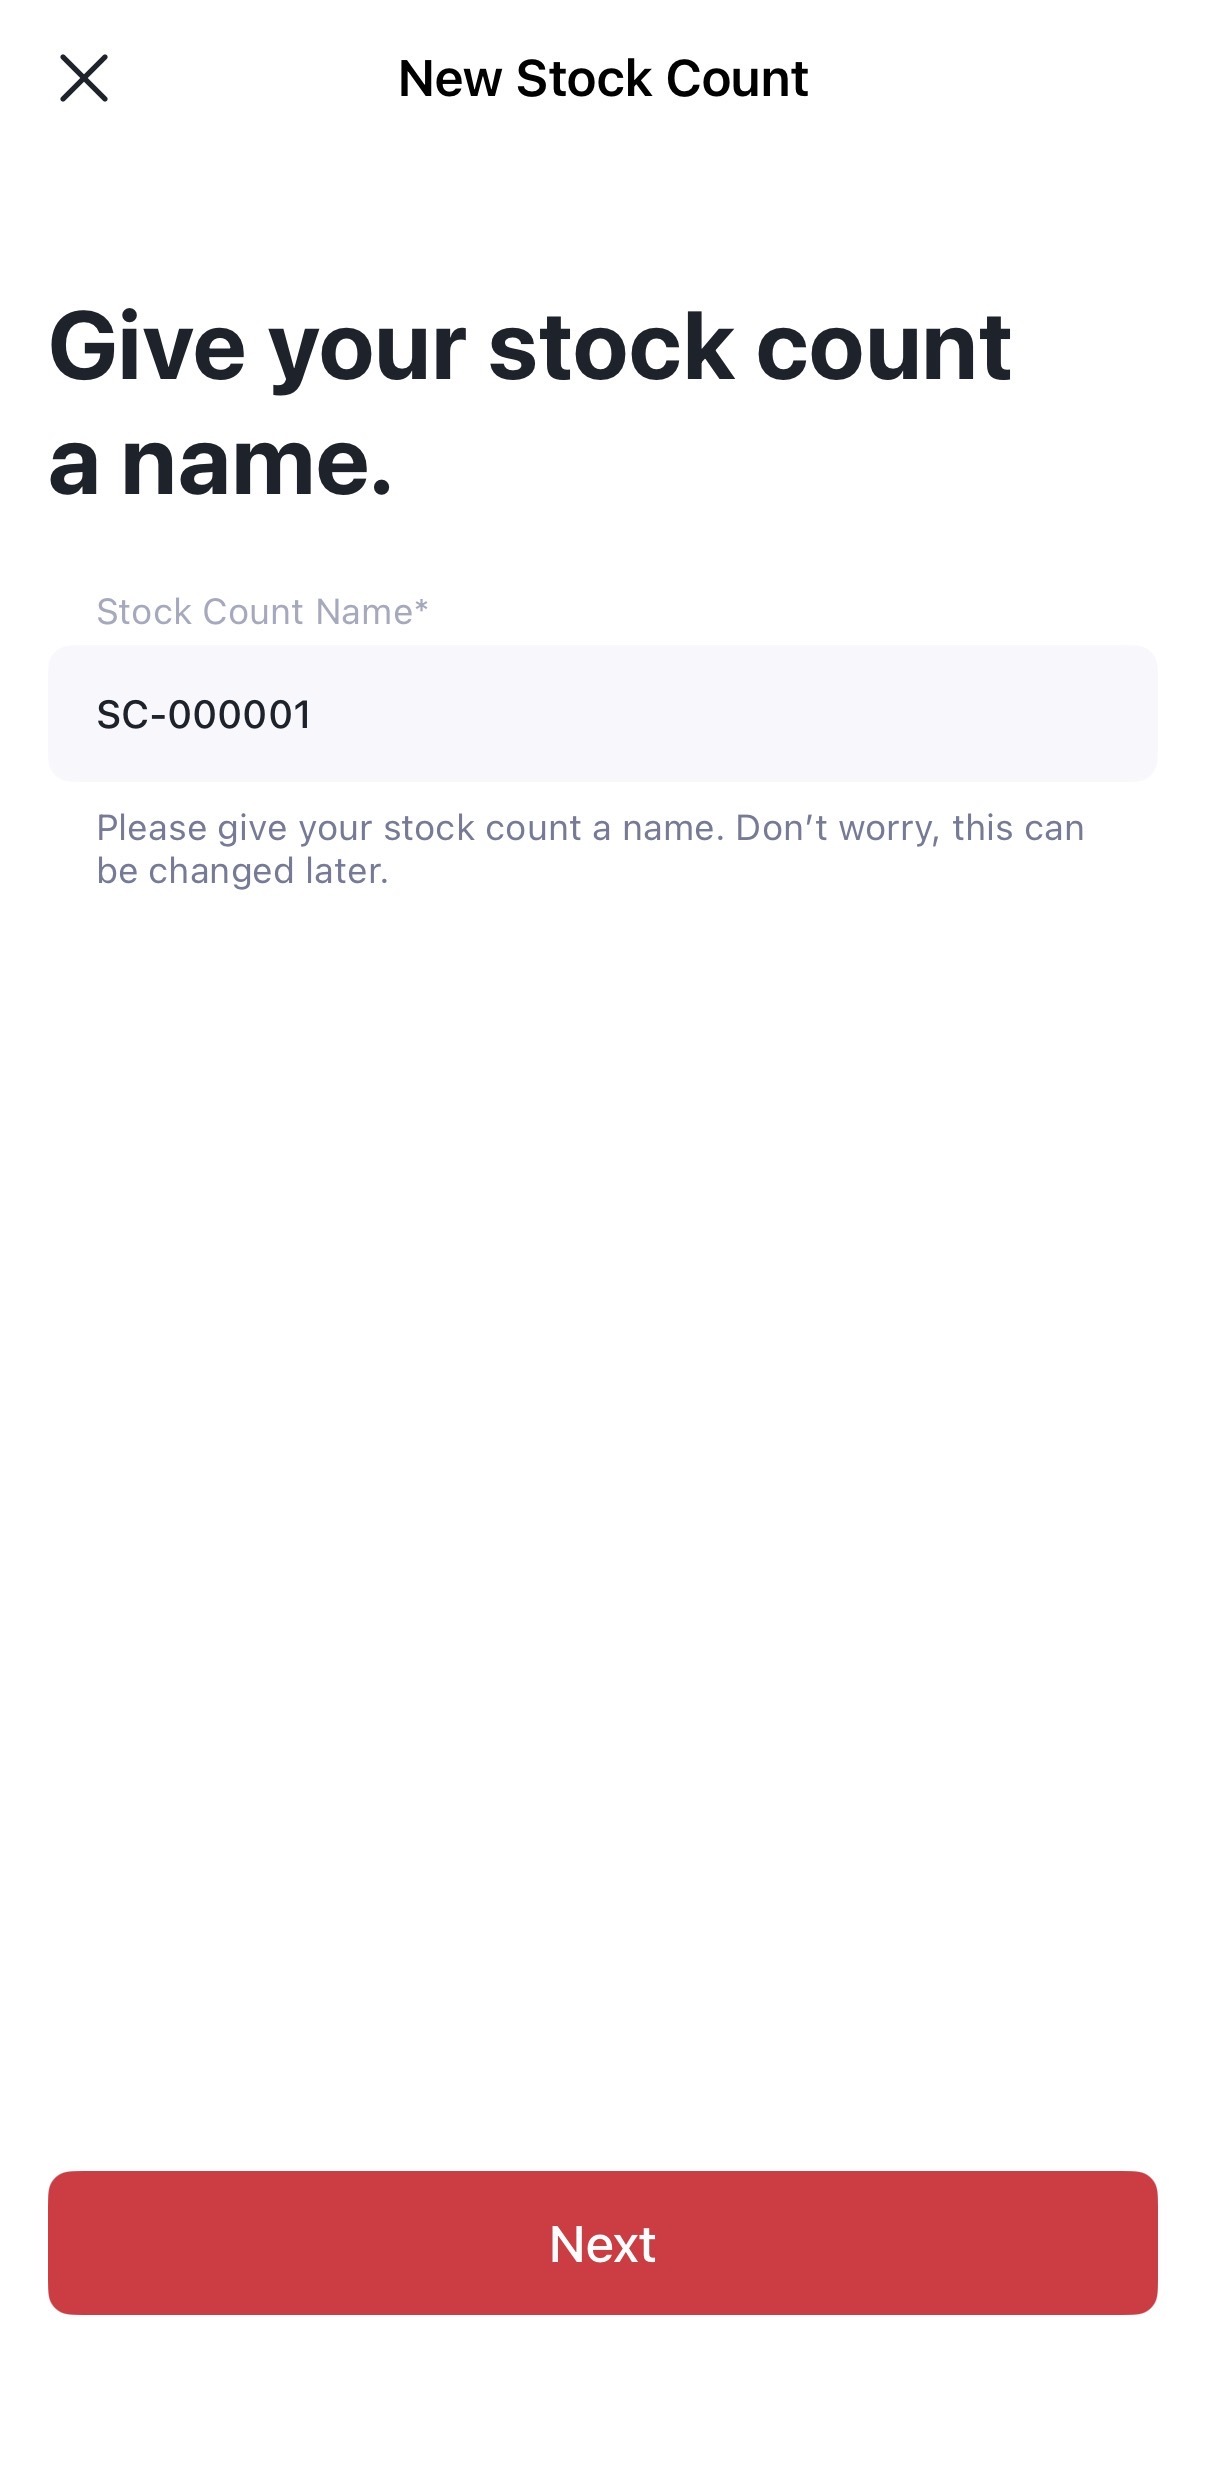
2Enter a name for your Stock Count. Tap Next.
How to add and manage items
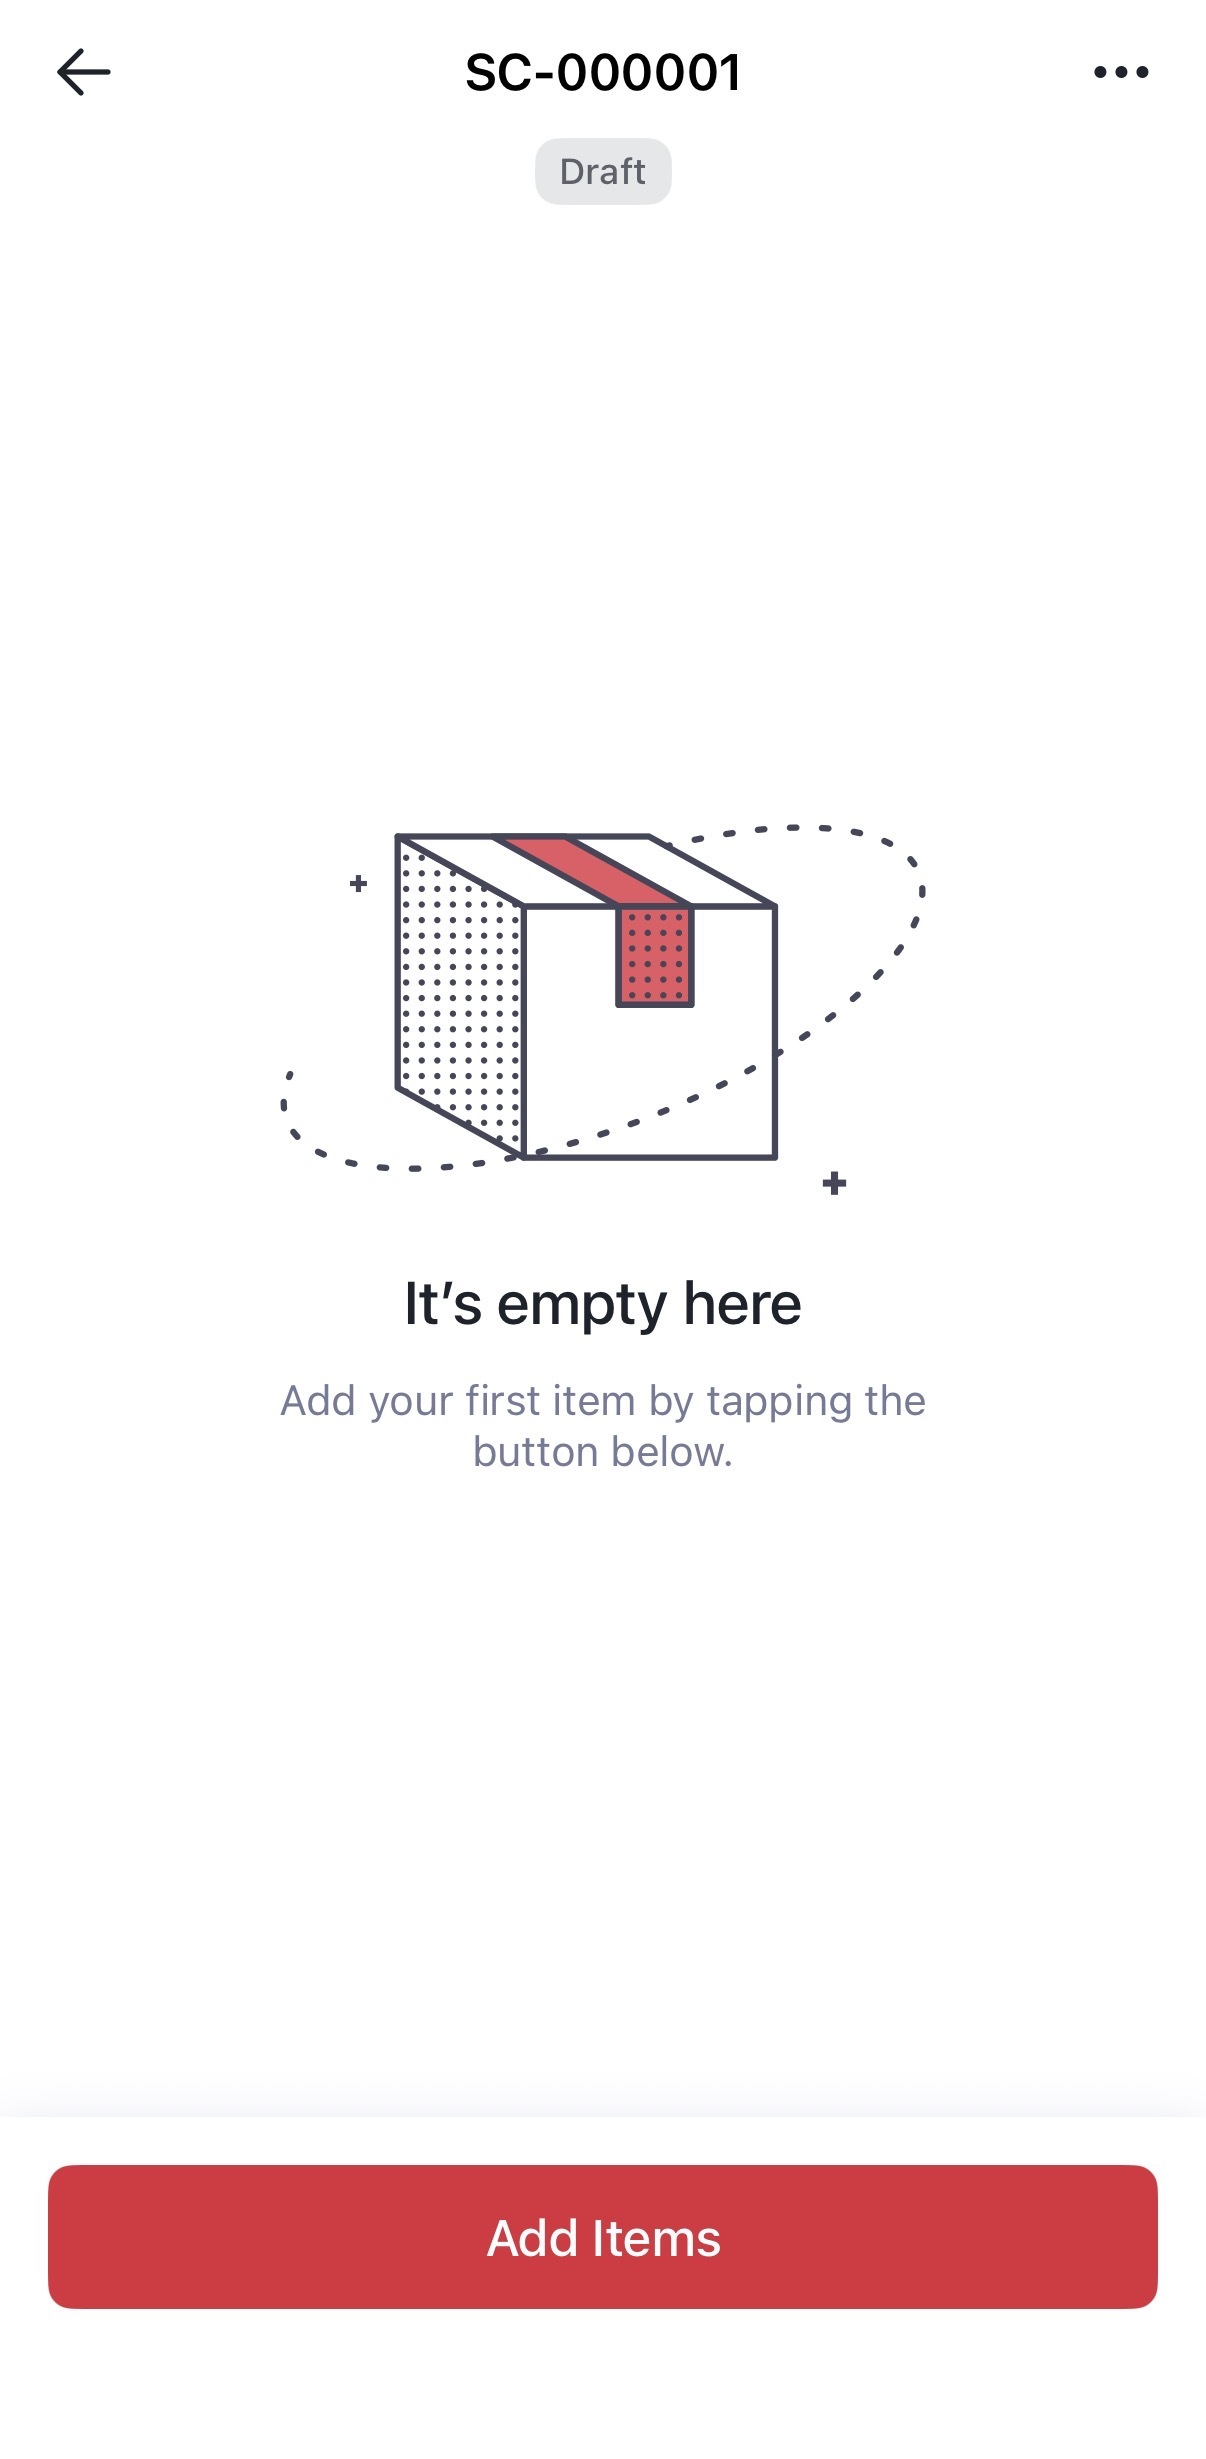
1Tap Add Items.
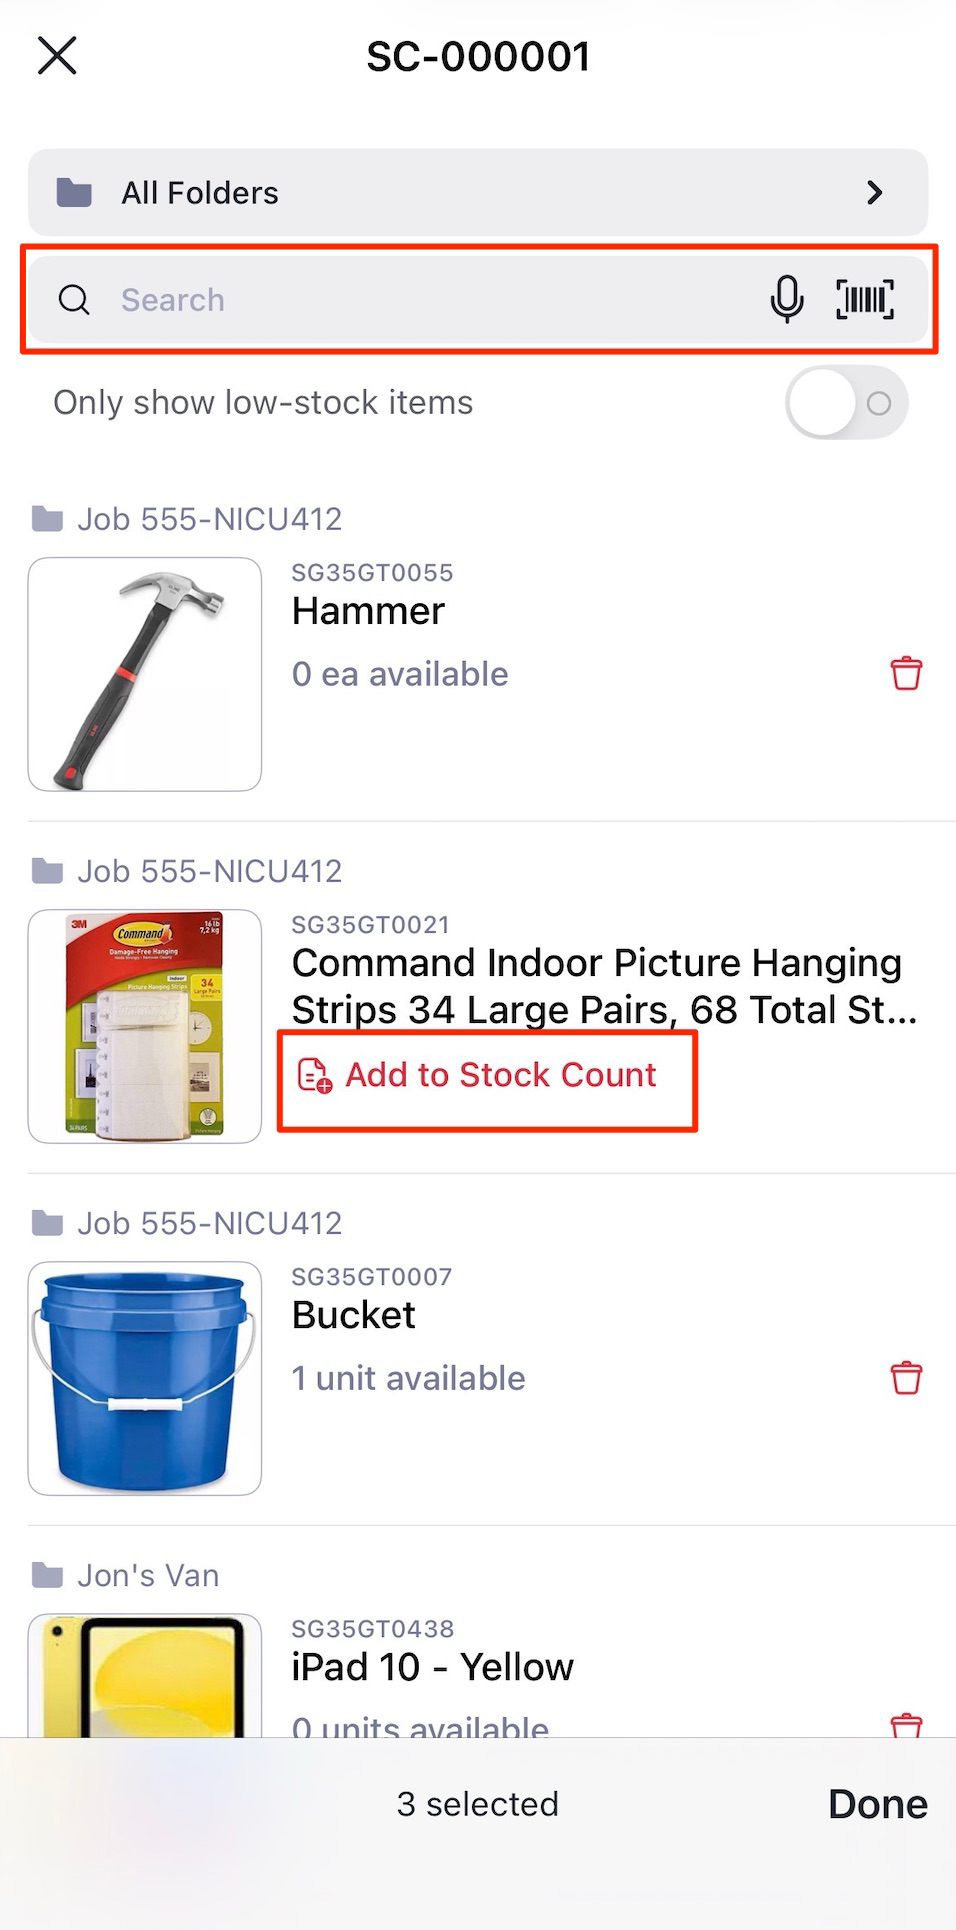
2Add items by Searching, Scanning, or using Add to Stock Count. After adding items, tap Done. You can remove or add items by going into Manage Items, as long as the count is in Draft, Ready to Count, or In Progress. Items already counted or locked in review cannot be removed.
Scan to Count
With Scan to Count, you can scan an item and directly enter or confirm its count by scanning a linked QR code or barcode, without needing to navigate the list manually.
To enable Scan to Count
1Navigate to your Stock Count.
2Tap the gear icon in the top left corner.
3Tap Scan to Count.
4Toggle ON and tap Save.
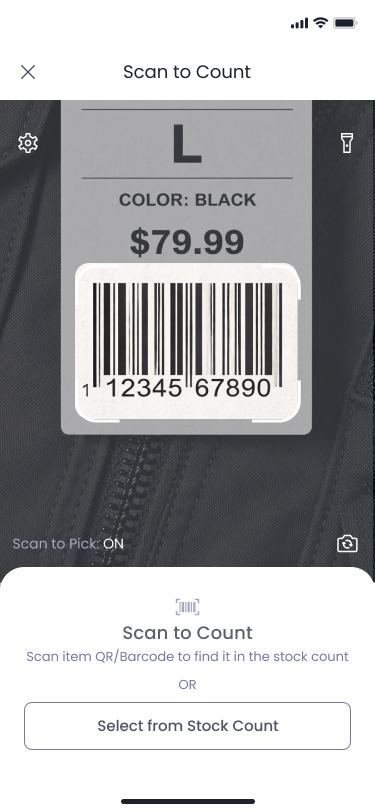
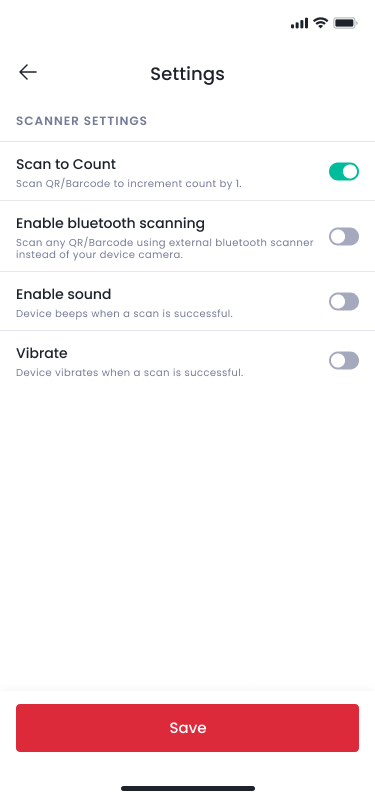
Once enabled, you can scan repeatedly to increase the count quantity.
Start counting items
1In the mobile app, tap Workflows, then Stock Counts.
2Select the Stock Count you're ready to count.
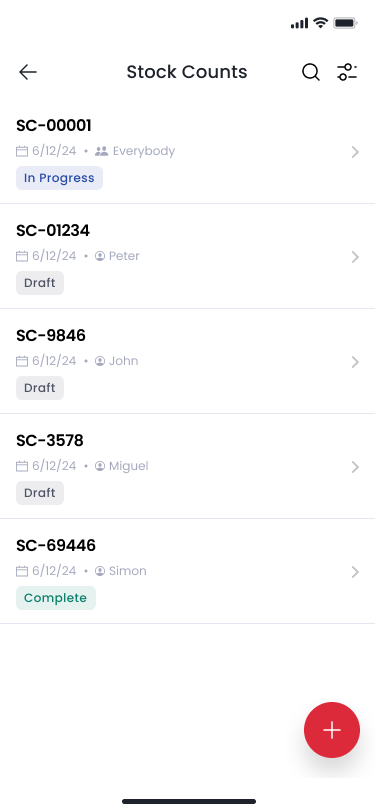
3Tap Ready to Count to begin.
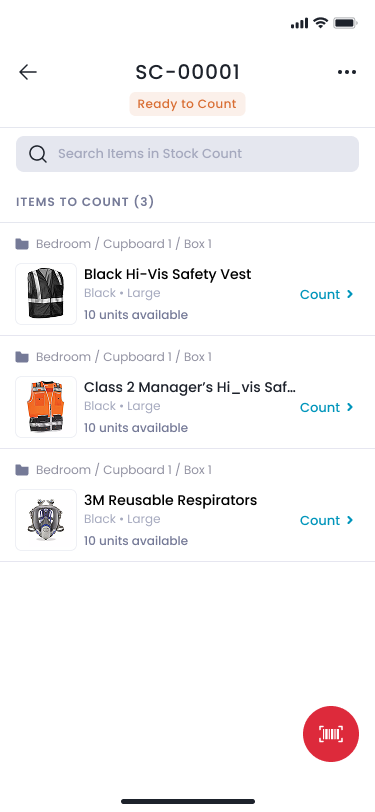
4Tap the red Barcode icon on the bottom right of the screen.
5Scan the item barcode you would like to start counting.
6After scanning, the item appears at the bottom of the screen, where you can either count quantities manually or continue scanning to increment the count quantity automatically.
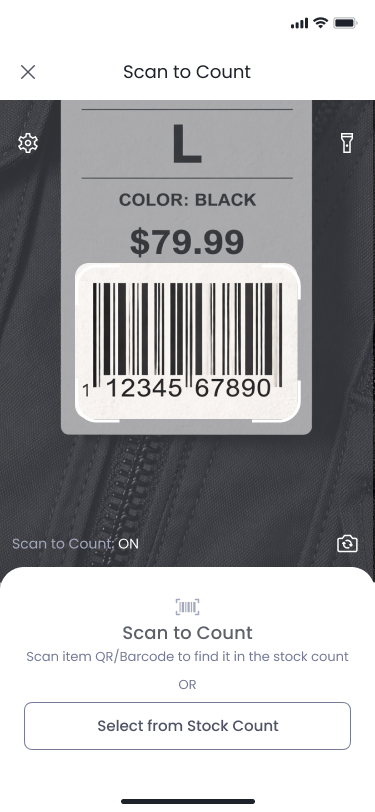
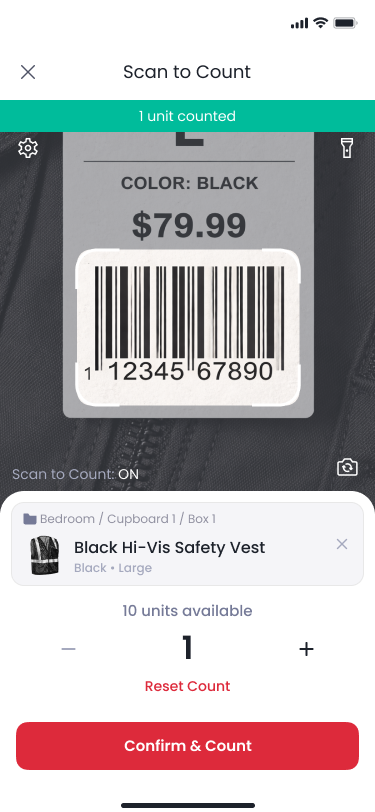
7Once scanning is complete, tap Confirm & Count.
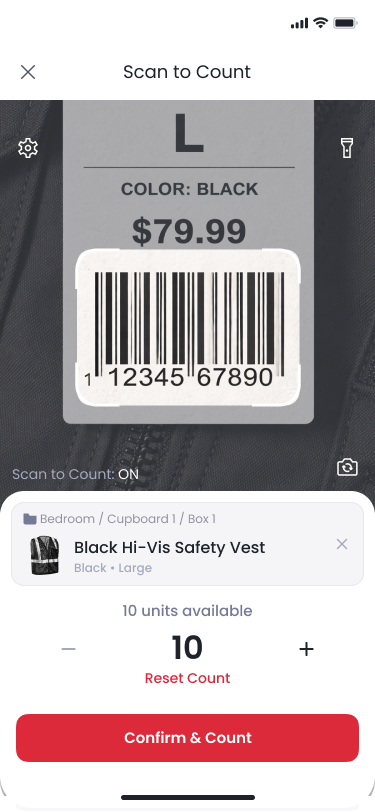
8Continue the above process until all items have been counted.
9When all items have been counted, tap Complete.
Manually count items
1From the Stock Count screen, tap Ready to Count. Assign the count to a team member (or "Everyone") and optionally set a Due Date. Tap Ready to Count again to begin the count.
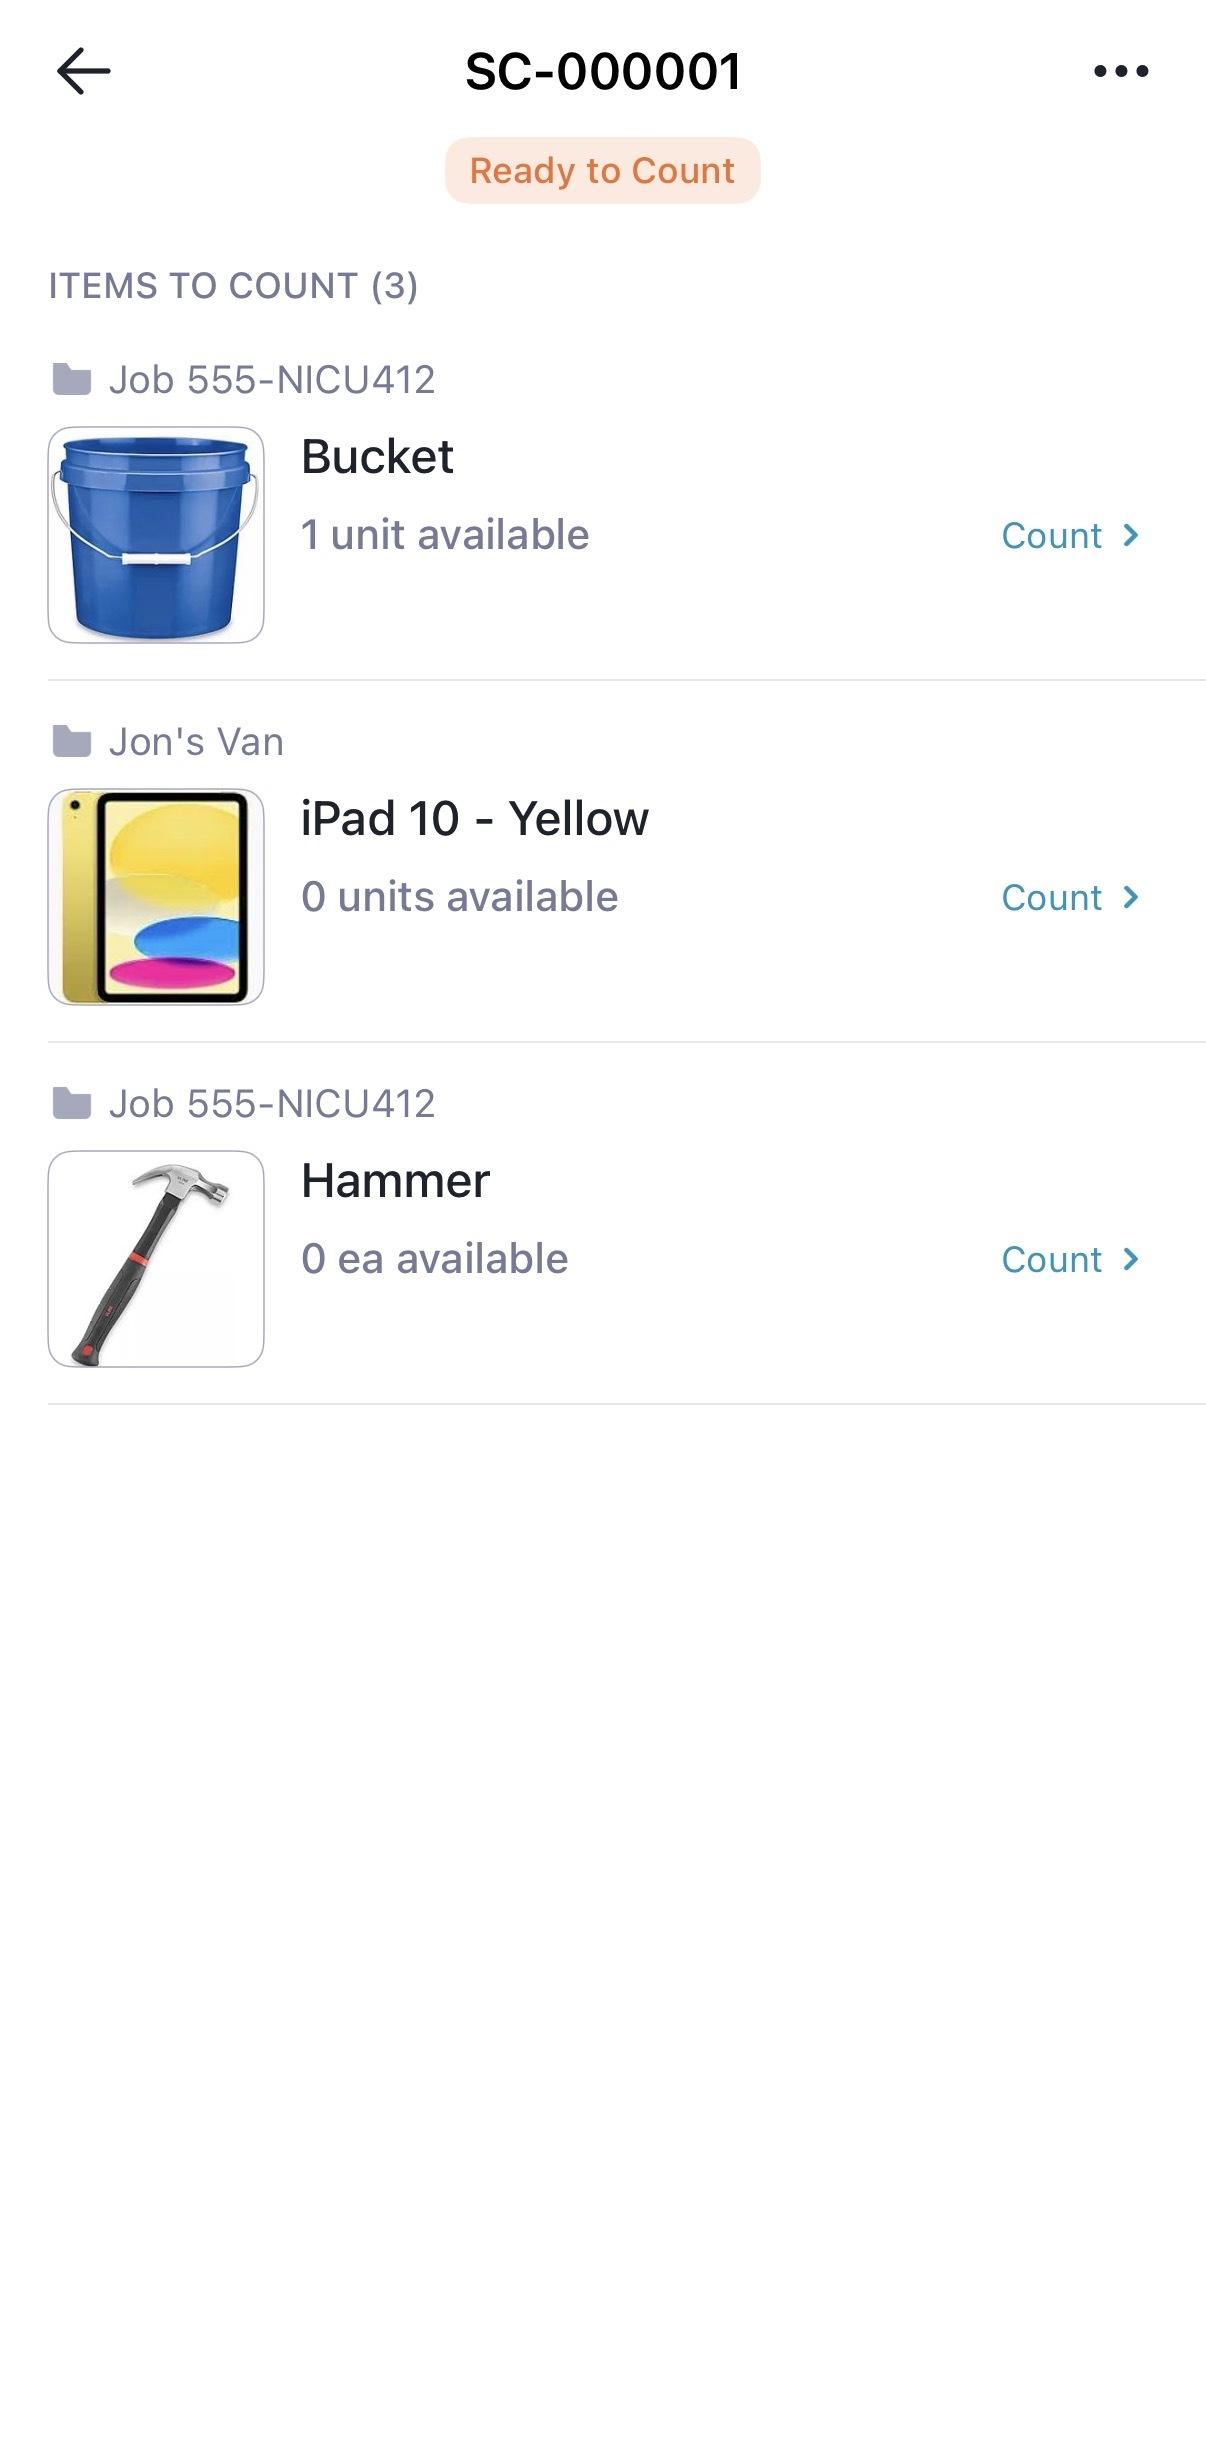
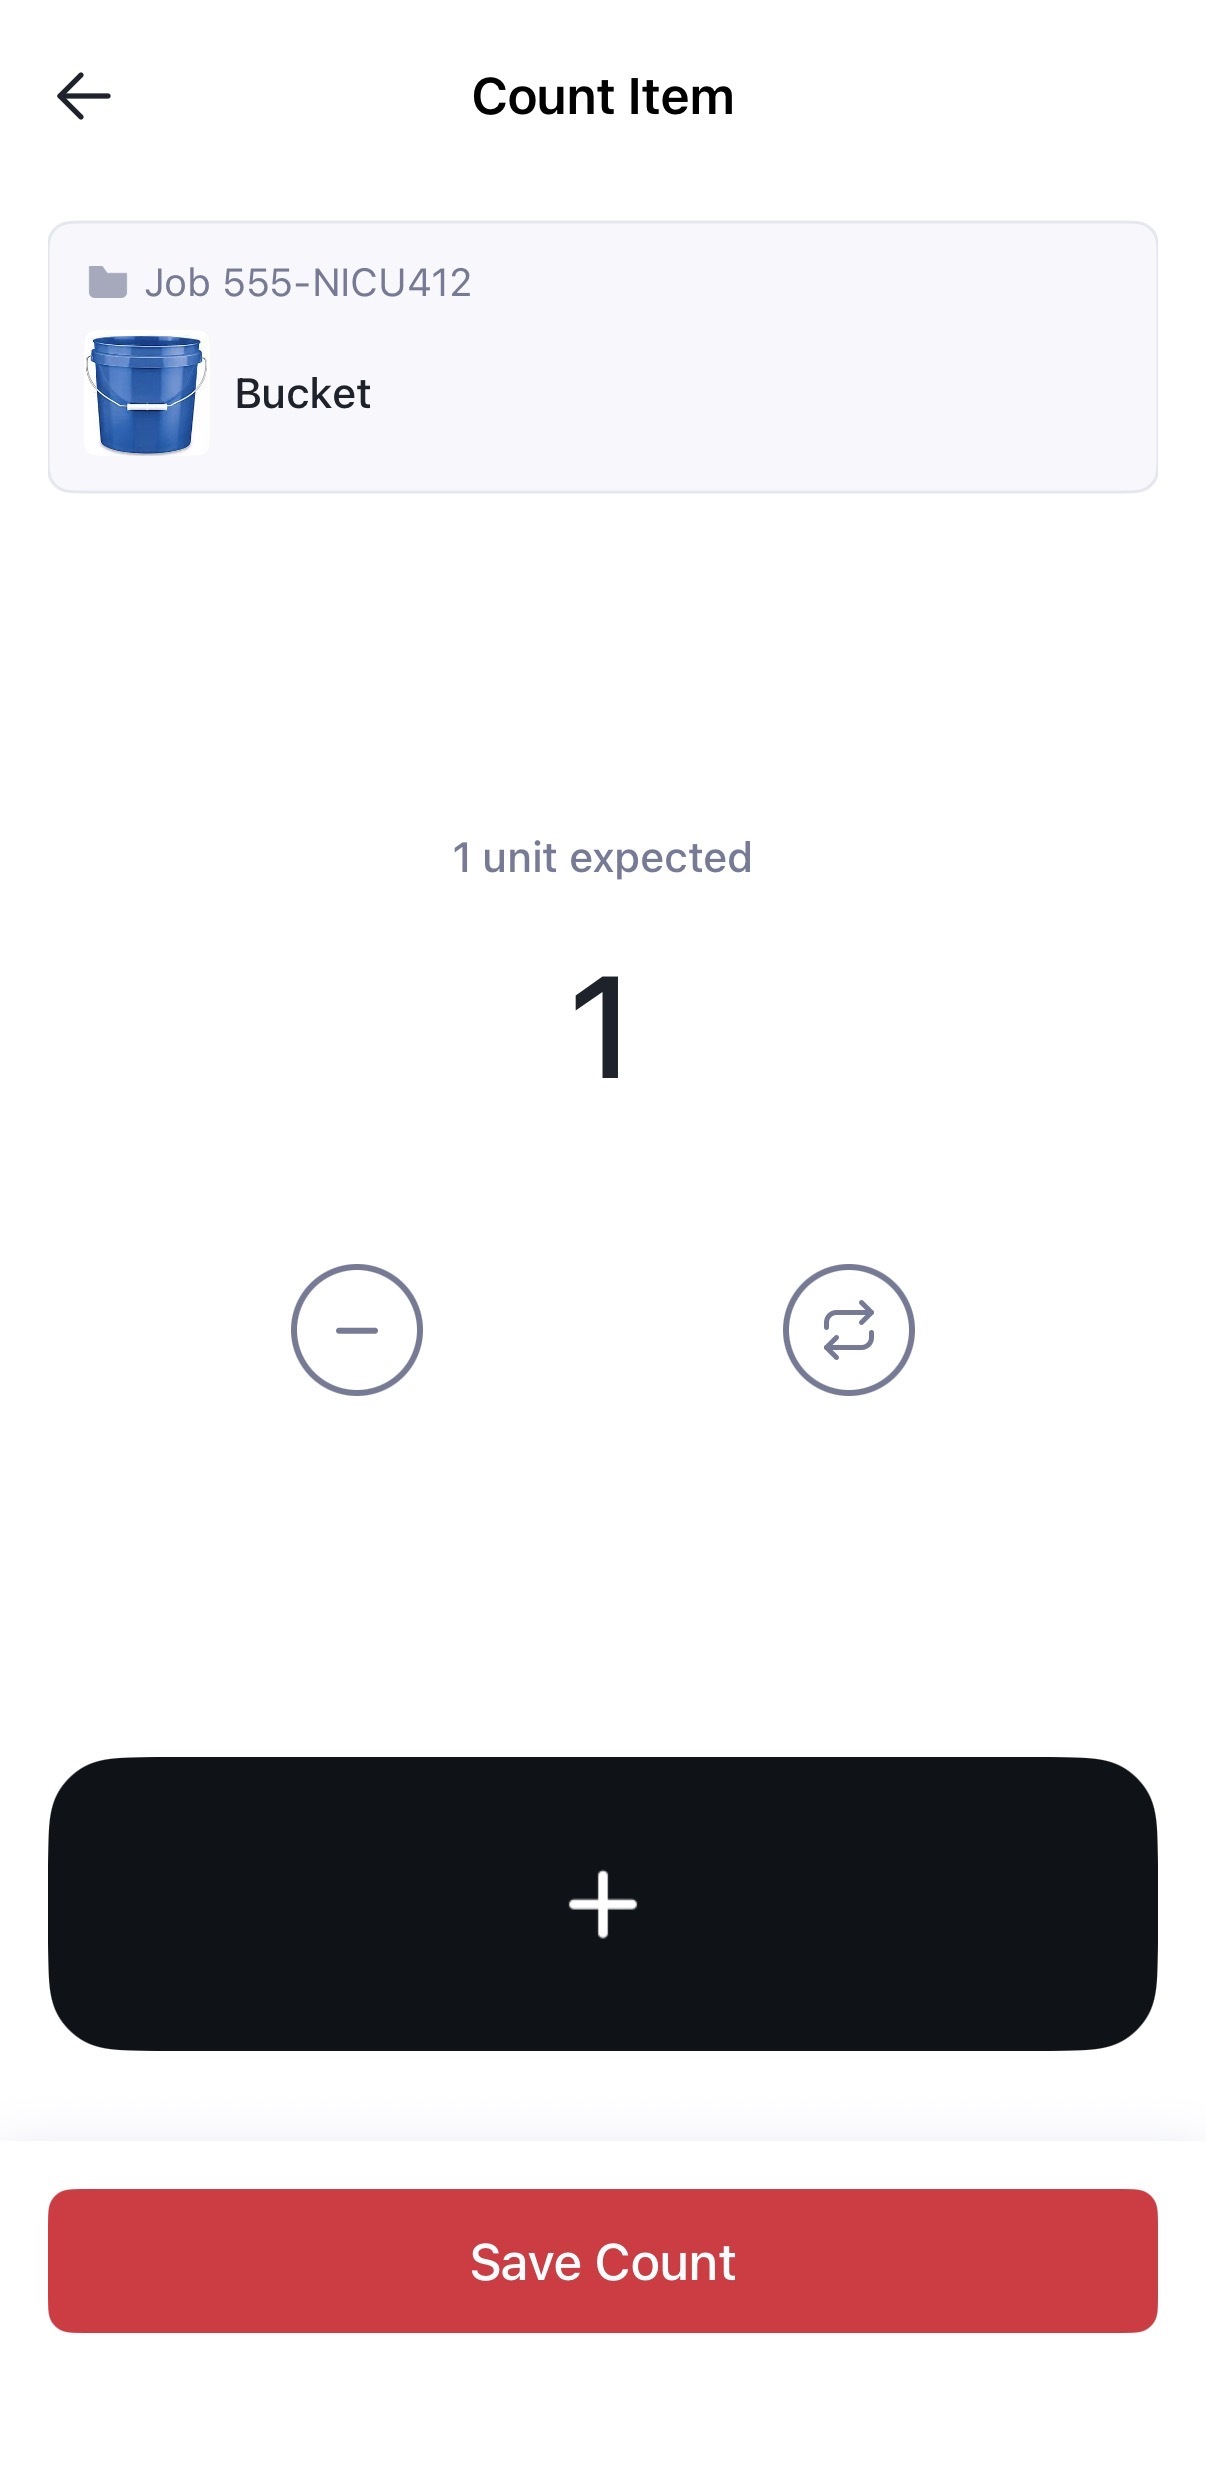
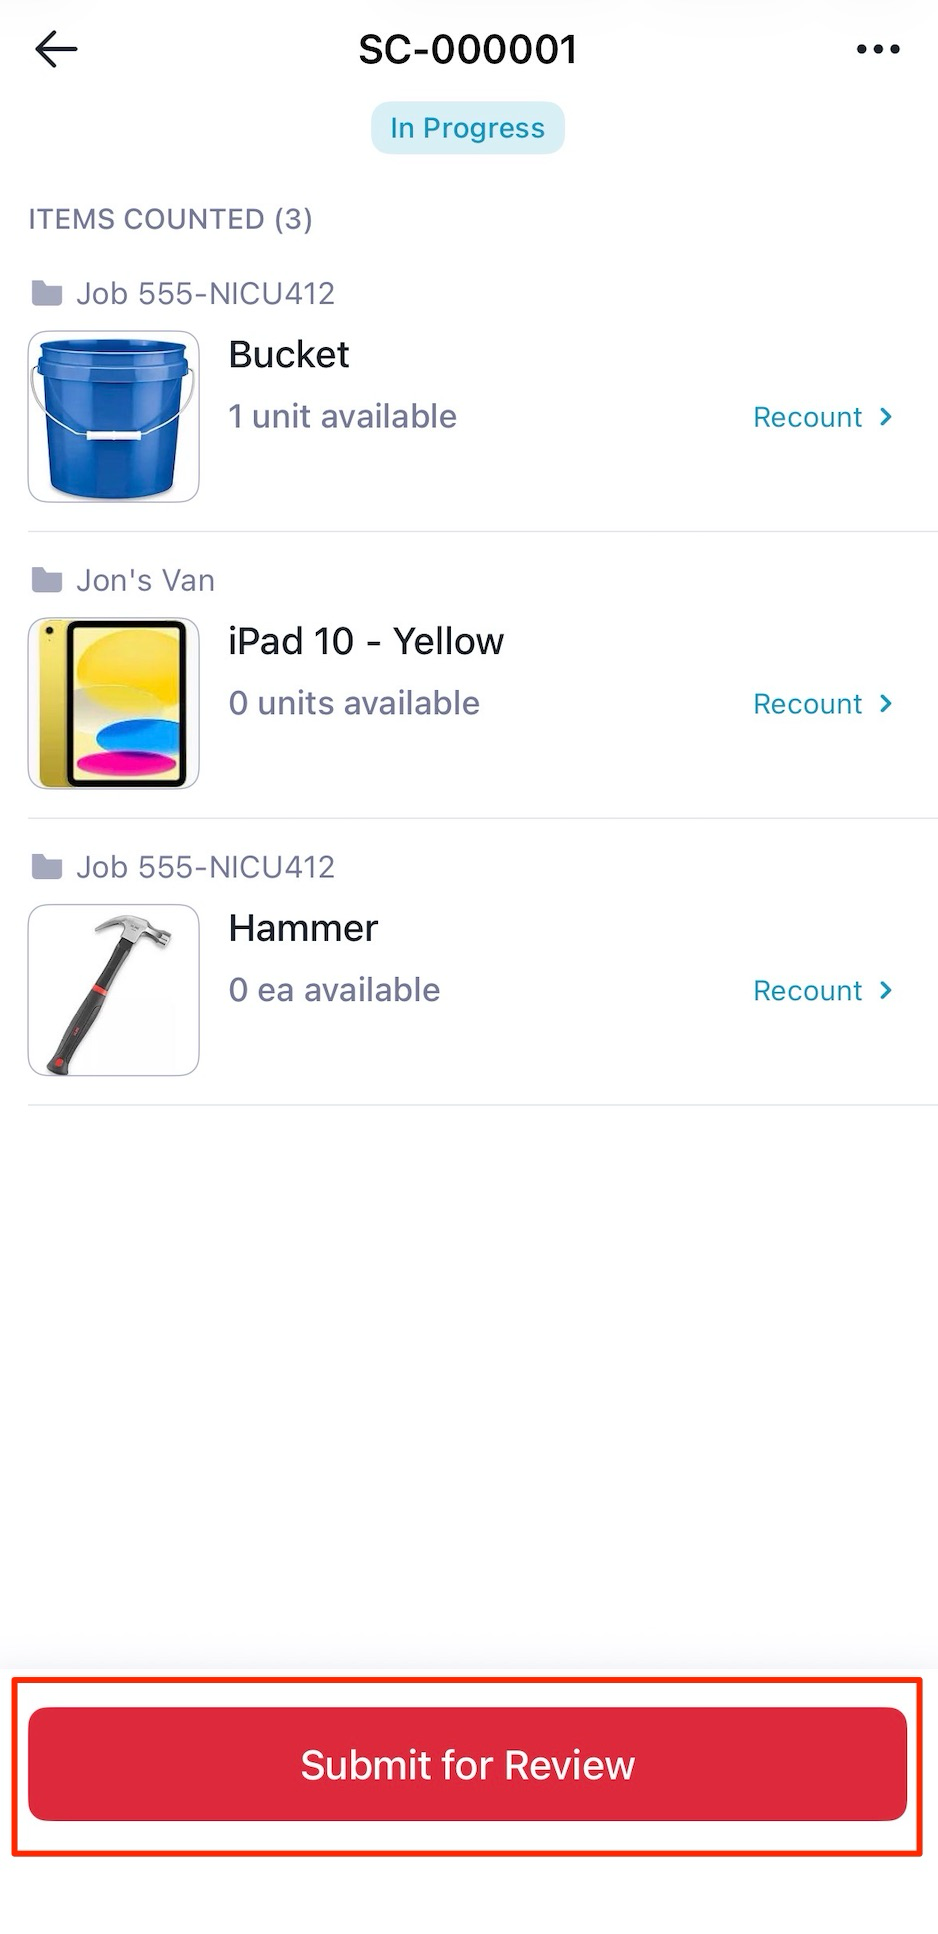
2Once all items are counted, tap Submit for Review. This locks the entries and moves the count into review status.
How to resolve discrepancies
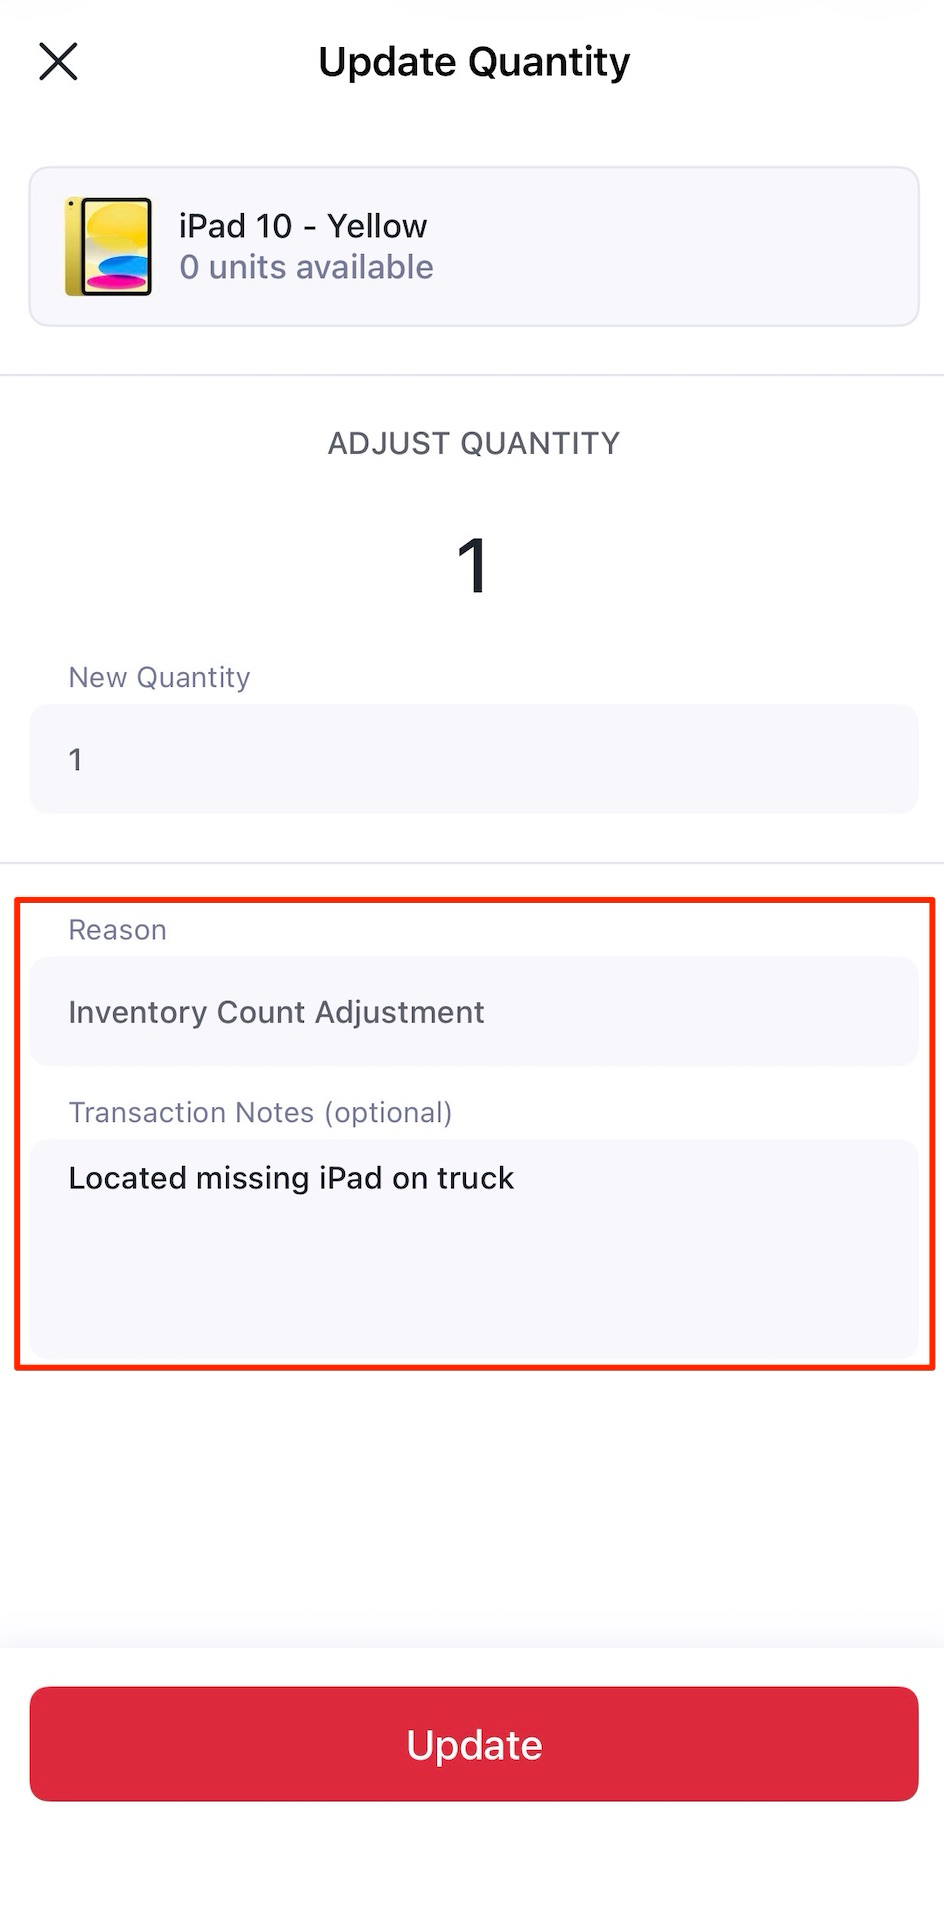
1If you notice any discrepancies, you can tap an item to either Recount or Update Quantity.
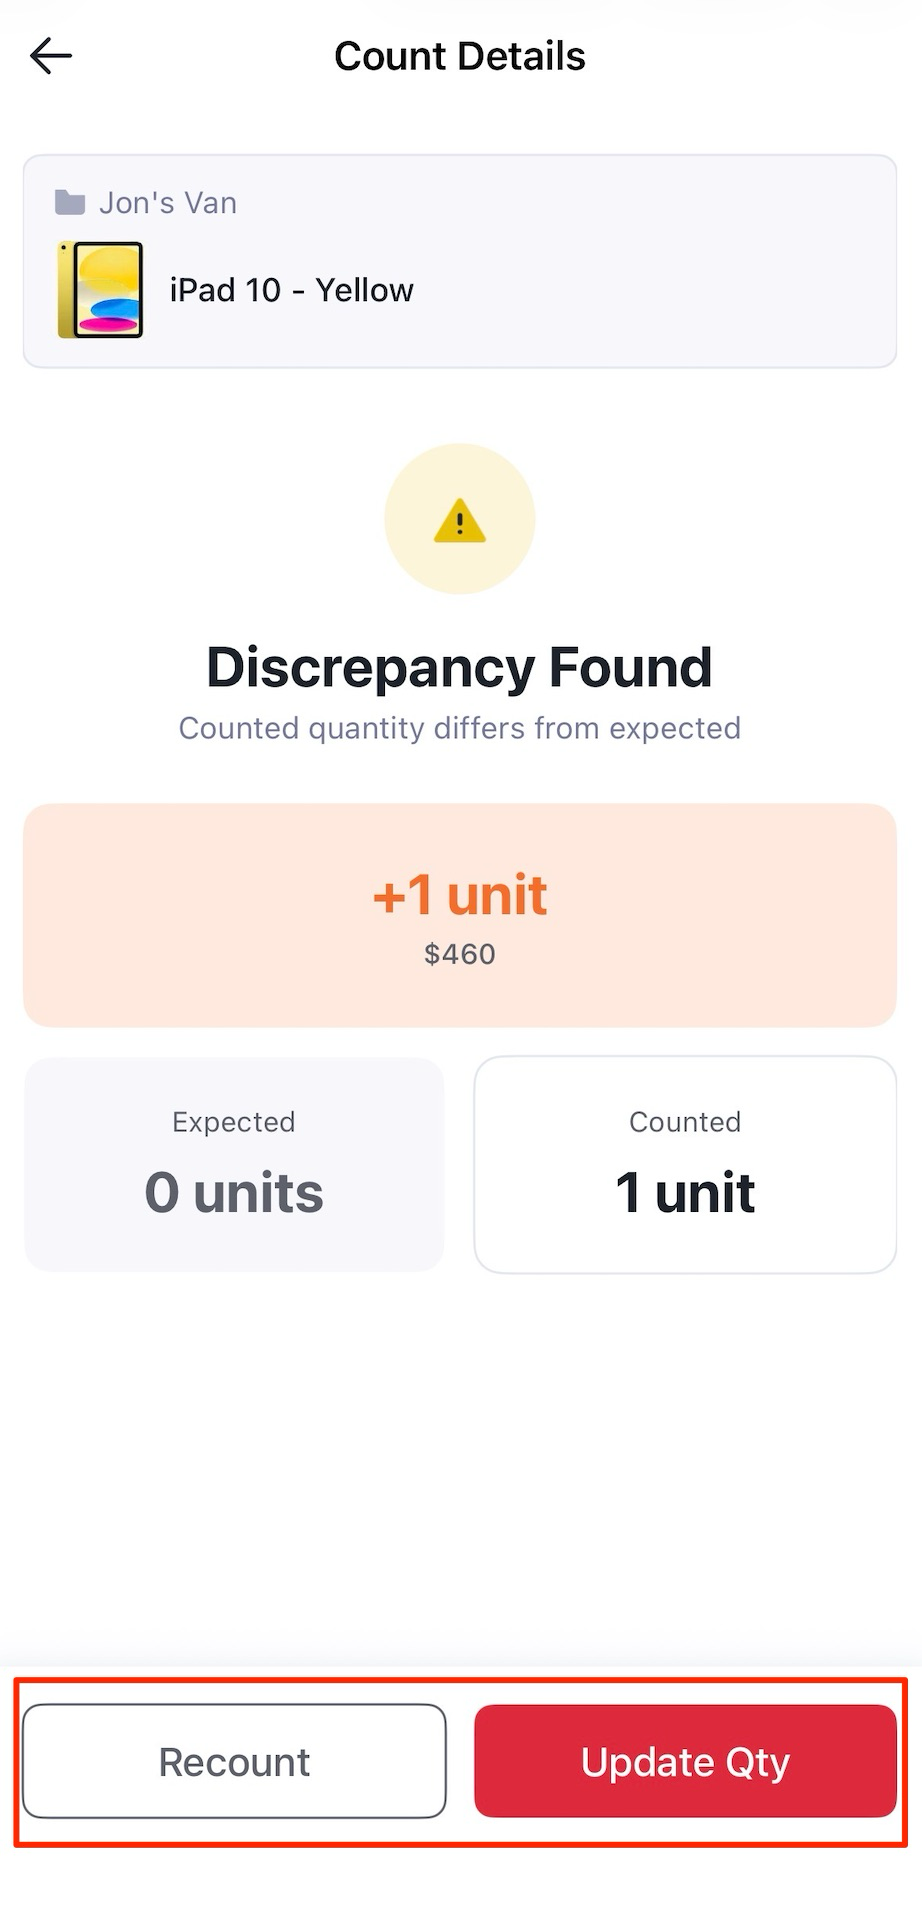
2If you're sure the posted count was correct but it doesn't match the system, perform an Inventory Count Adjustment and optionally add Transaction Notes to explain why the count was adjusted.
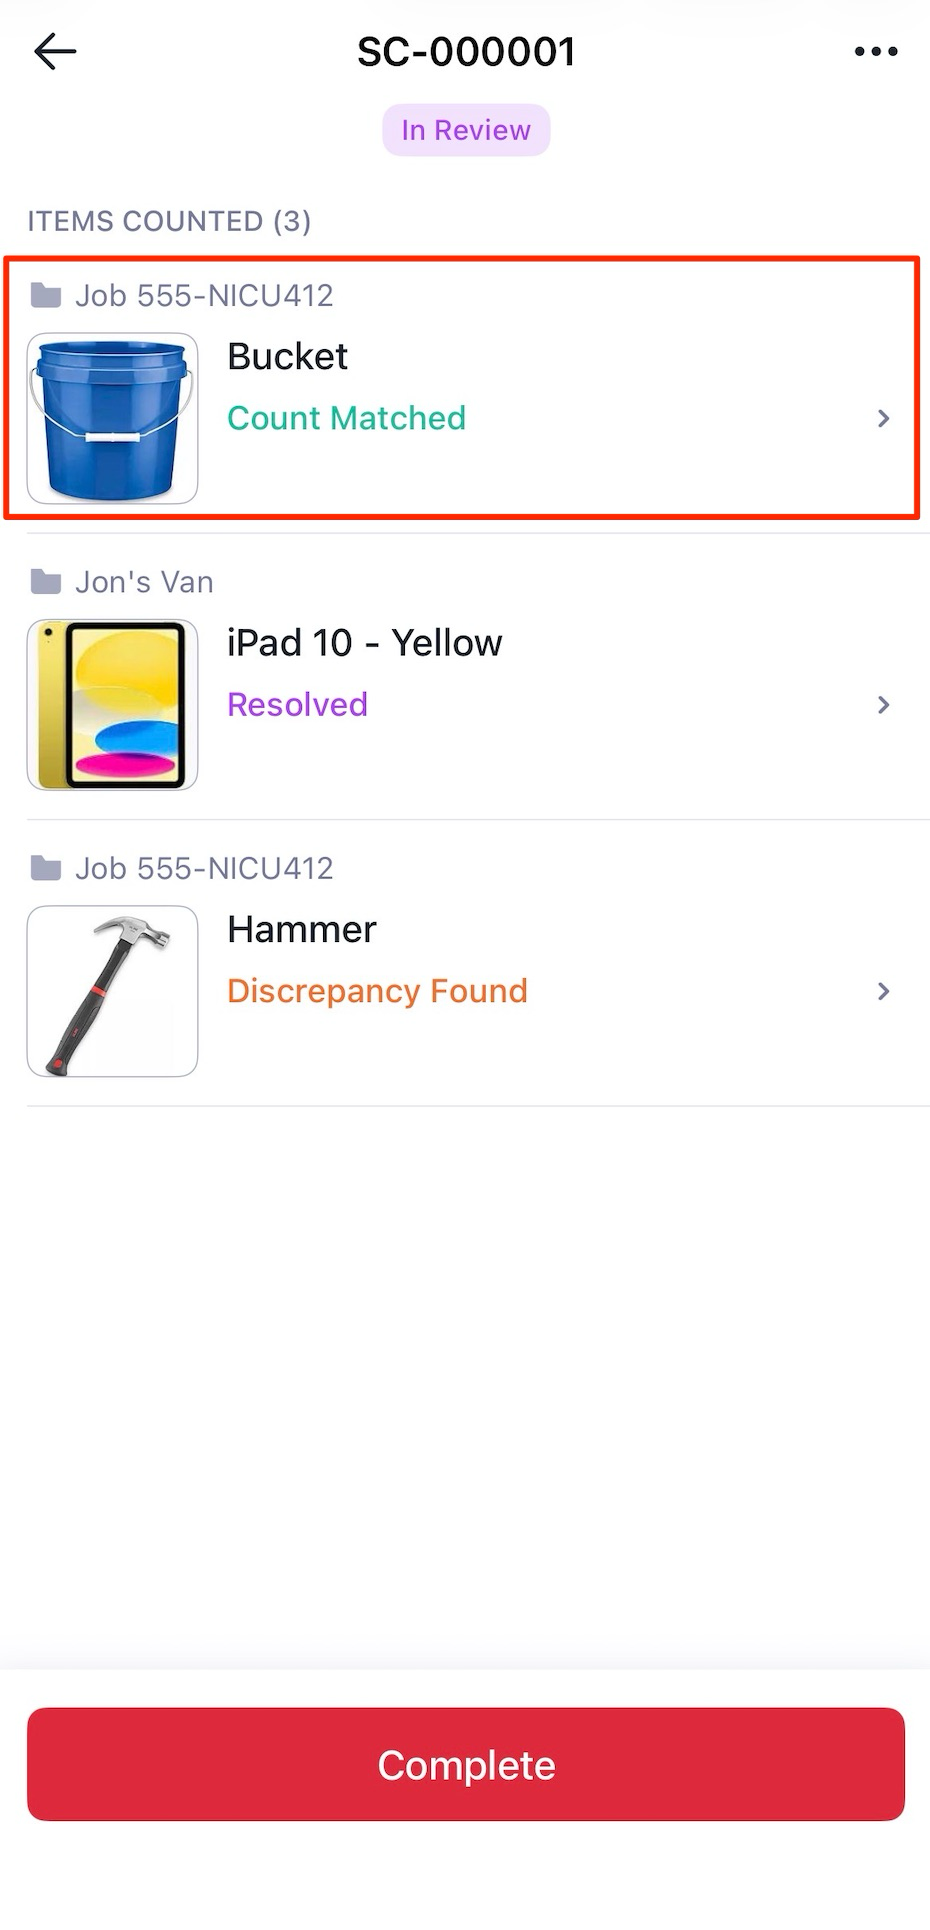
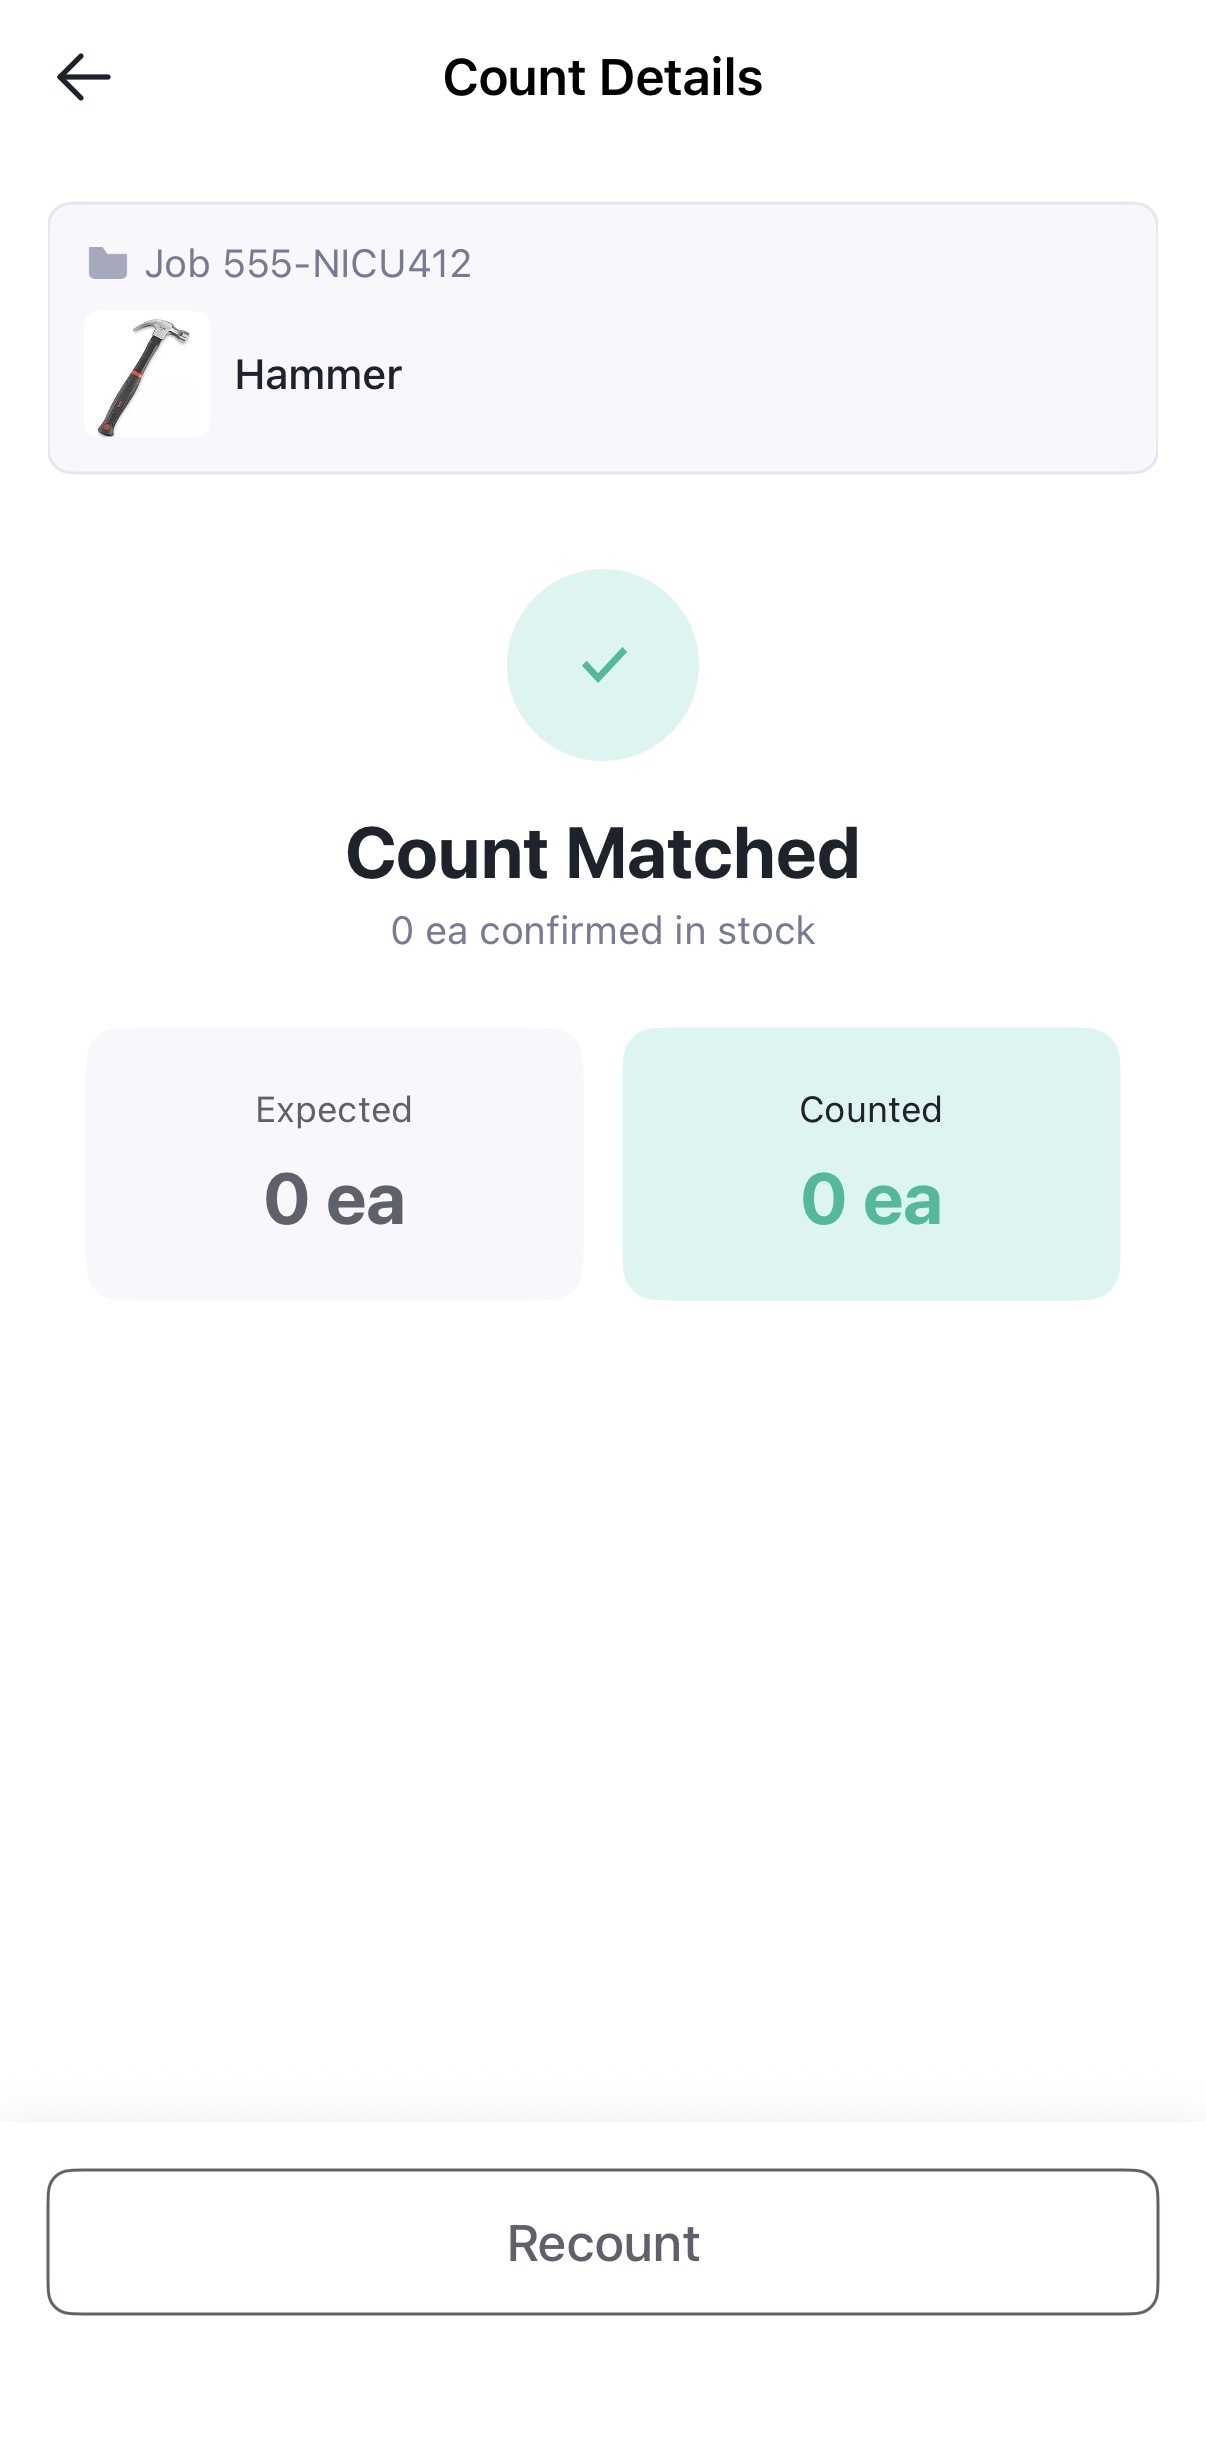
3If counted quantity matches the system quantity, the item displays Count Matched status.
How to complete the Stock Count
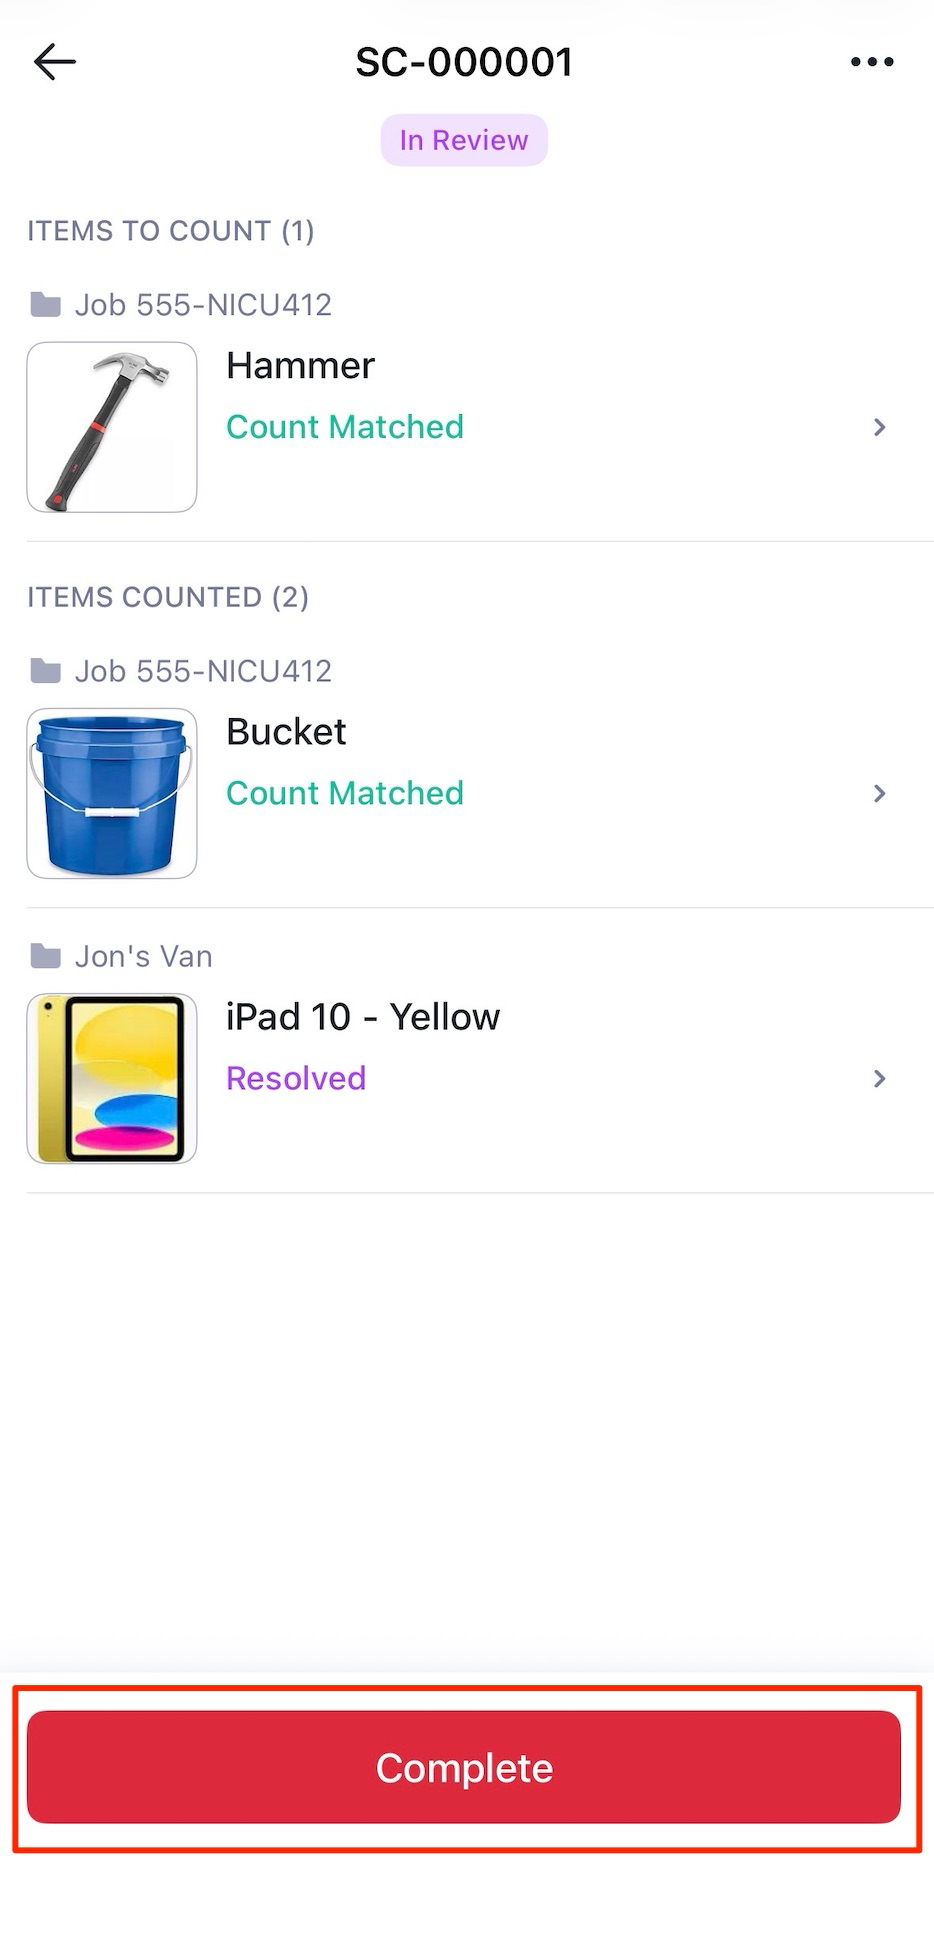
Once all discrepancies are resolved, mark the Stock Count as Complete.
FAQs
Setup & access
Managing items
Yes. You'll receive an email notification in real time when the status changes, if you're assigned to the Stock Count or are an Owner on the account.
Discrepancy handling & review
Completion & reuse
Need help? Contact our Support Team.