
Stay on top of important dates, like expiry dates, return dates, and maintenance, by setting a reminder on any date-based custom field. Sortly sends the alert to you, your team, or both, so nothing slips by. This article walks you through setting up a date-based alert on the web app and on mobile, and choosing who gets notified.
In this article
Before you start
You need a date-based custom field on your items. You can add one here, or learn more in How to Create Custom Fields.
Every alert you set shows in the Alerts section of the web app.
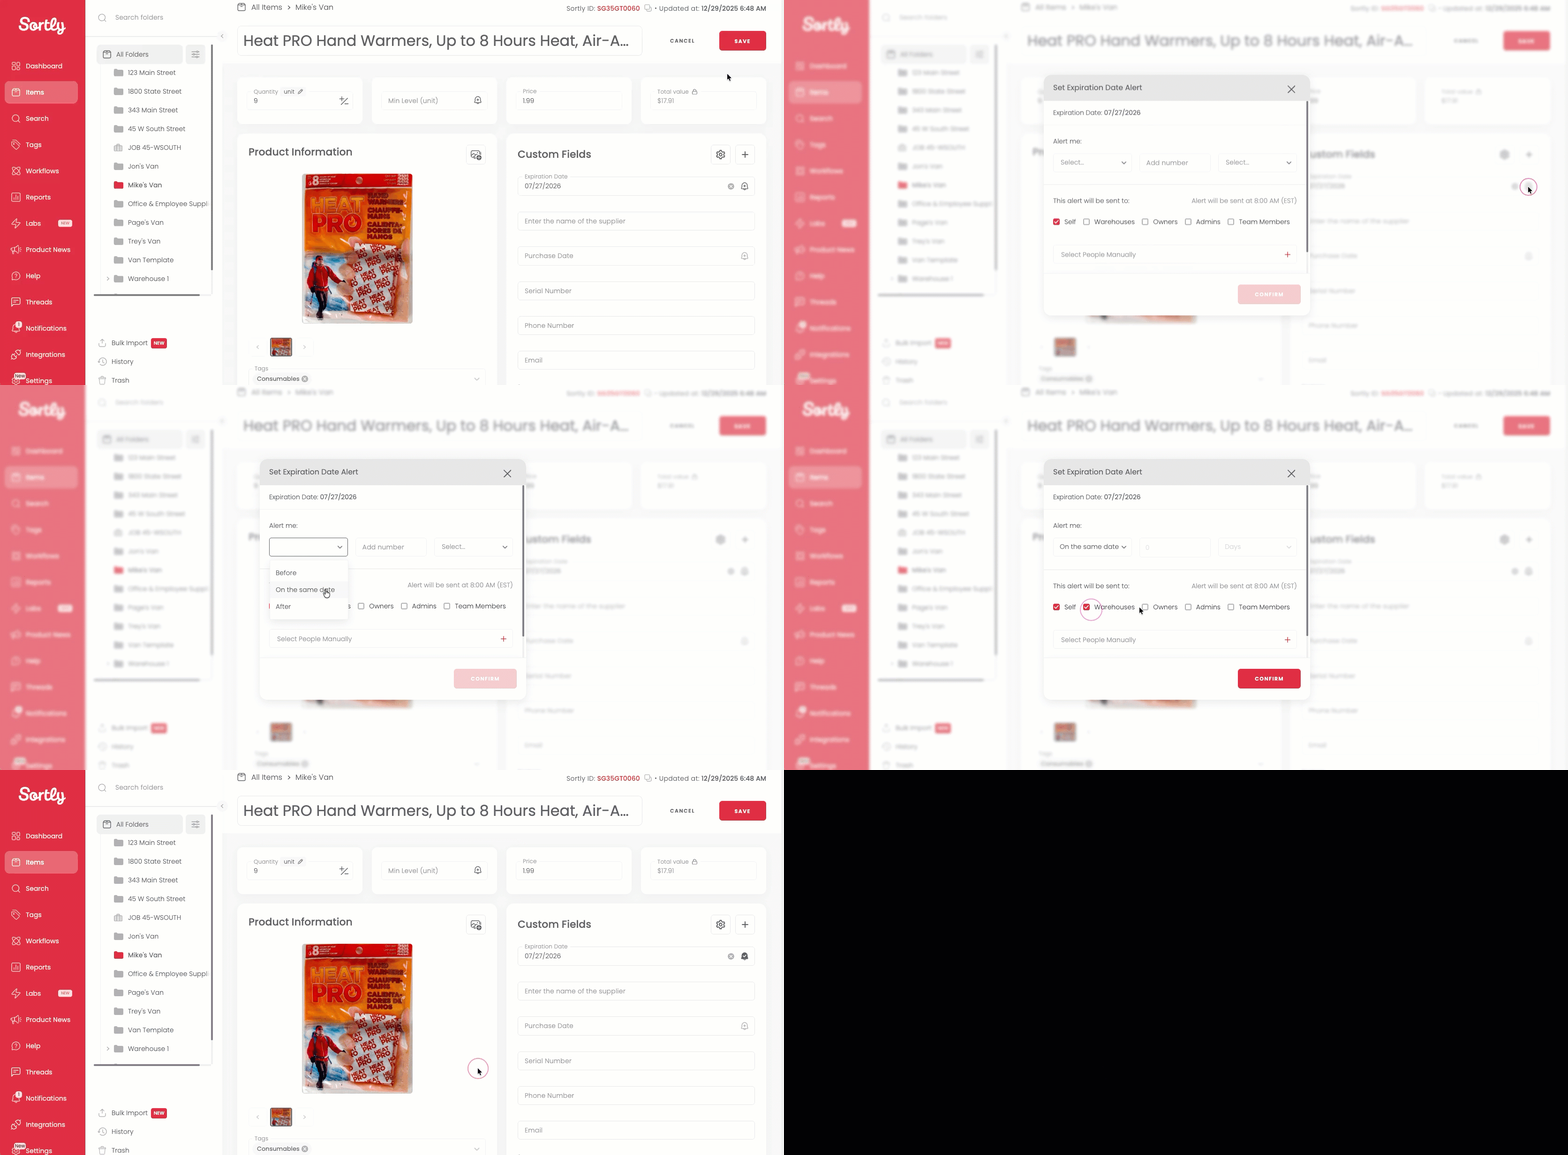
Set up a date-based alert on web
Working on a computer? Here is how to add an alert to a date field from the item's details page.
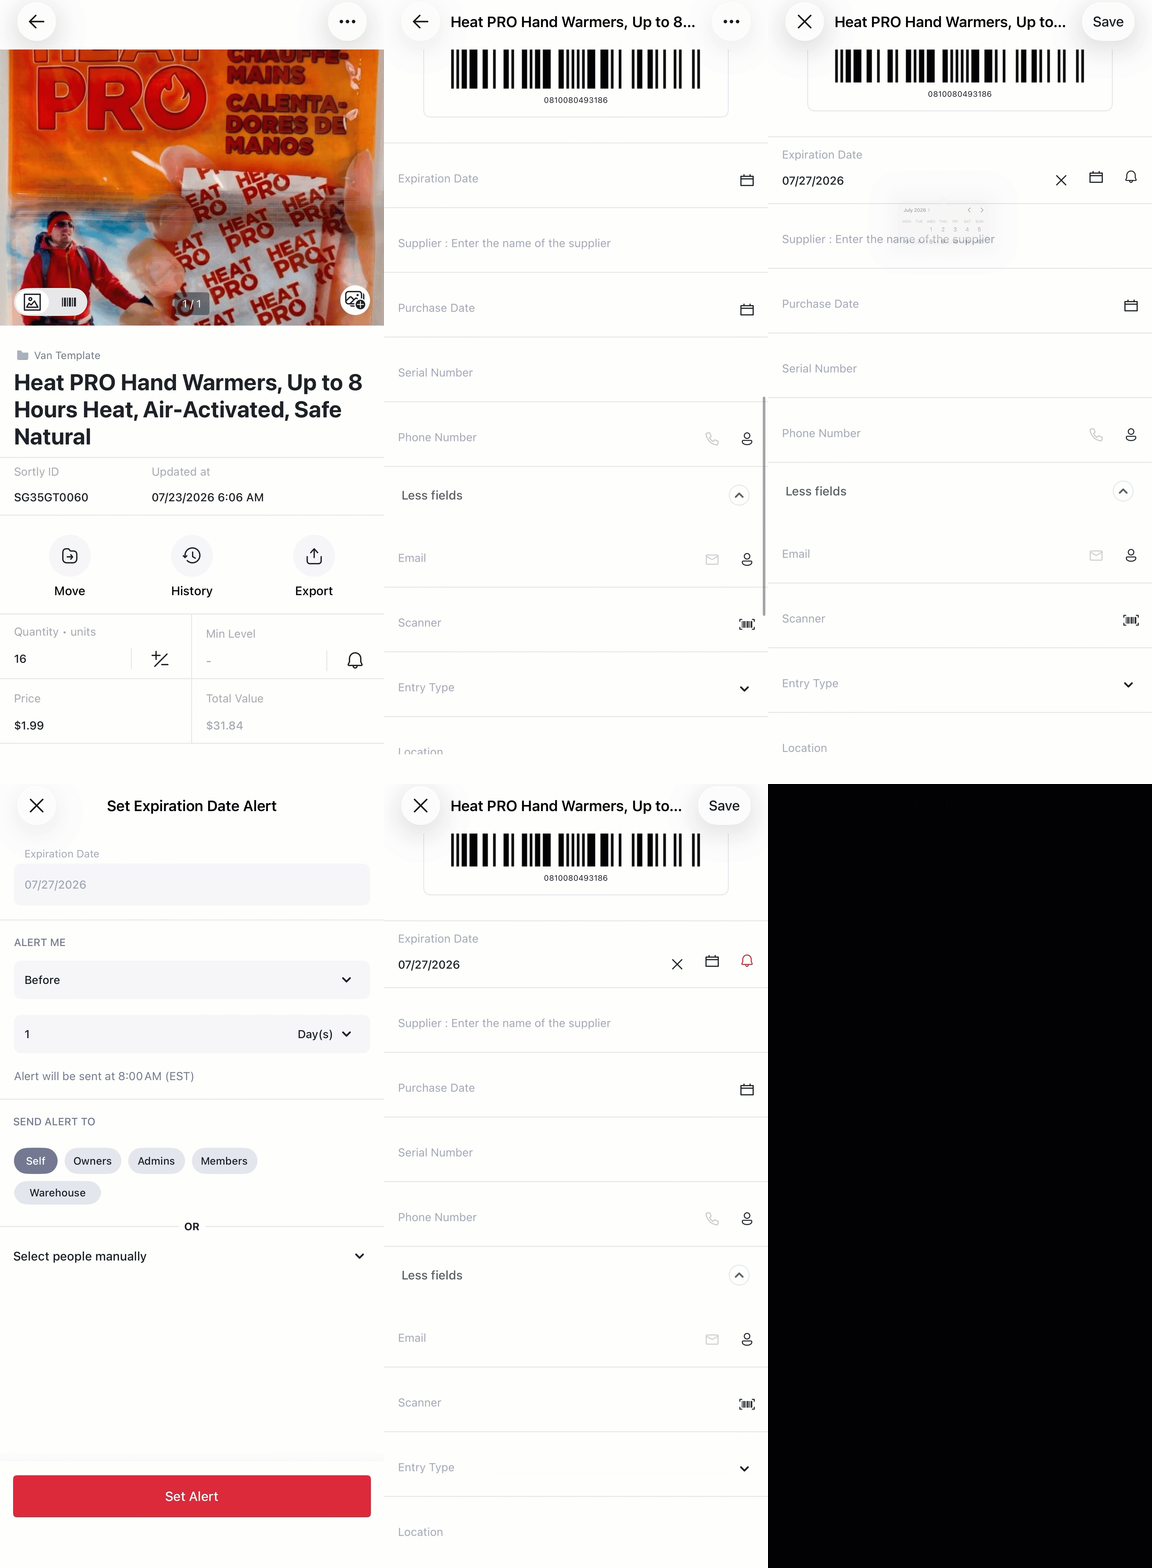
Set up a date-based alert on mobile
Prefer to set it up on the go? You can do the same in the Sortly mobile app.
Who gets notified
You can send an alert to yourself, all owners, all admins, or all members, or select specific people with the select people manually option. On the web app you can also select warehouses. You can't send alerts to someone who isn't a user in your Sortly account.