
Set up your folders in Sortly so they match the way you work, whether you track items by location, category, or job. If you use Sortly to track assets or consumption instead, you can record why a quantity changed and review it later. This article walks you through setting up folders for tracking inventory and recording quantity changes for assets or consumption.
In this article
Setup for tracking inventory
You can organize folders (and subfolders) by location, category, or any other classification that suits your needs.
Set up your folders to match how your items move. For job-based work, create a main Available Inventory folder plus a folder for each job. If items move between locations, stores, or warehouses, create one folder for each.
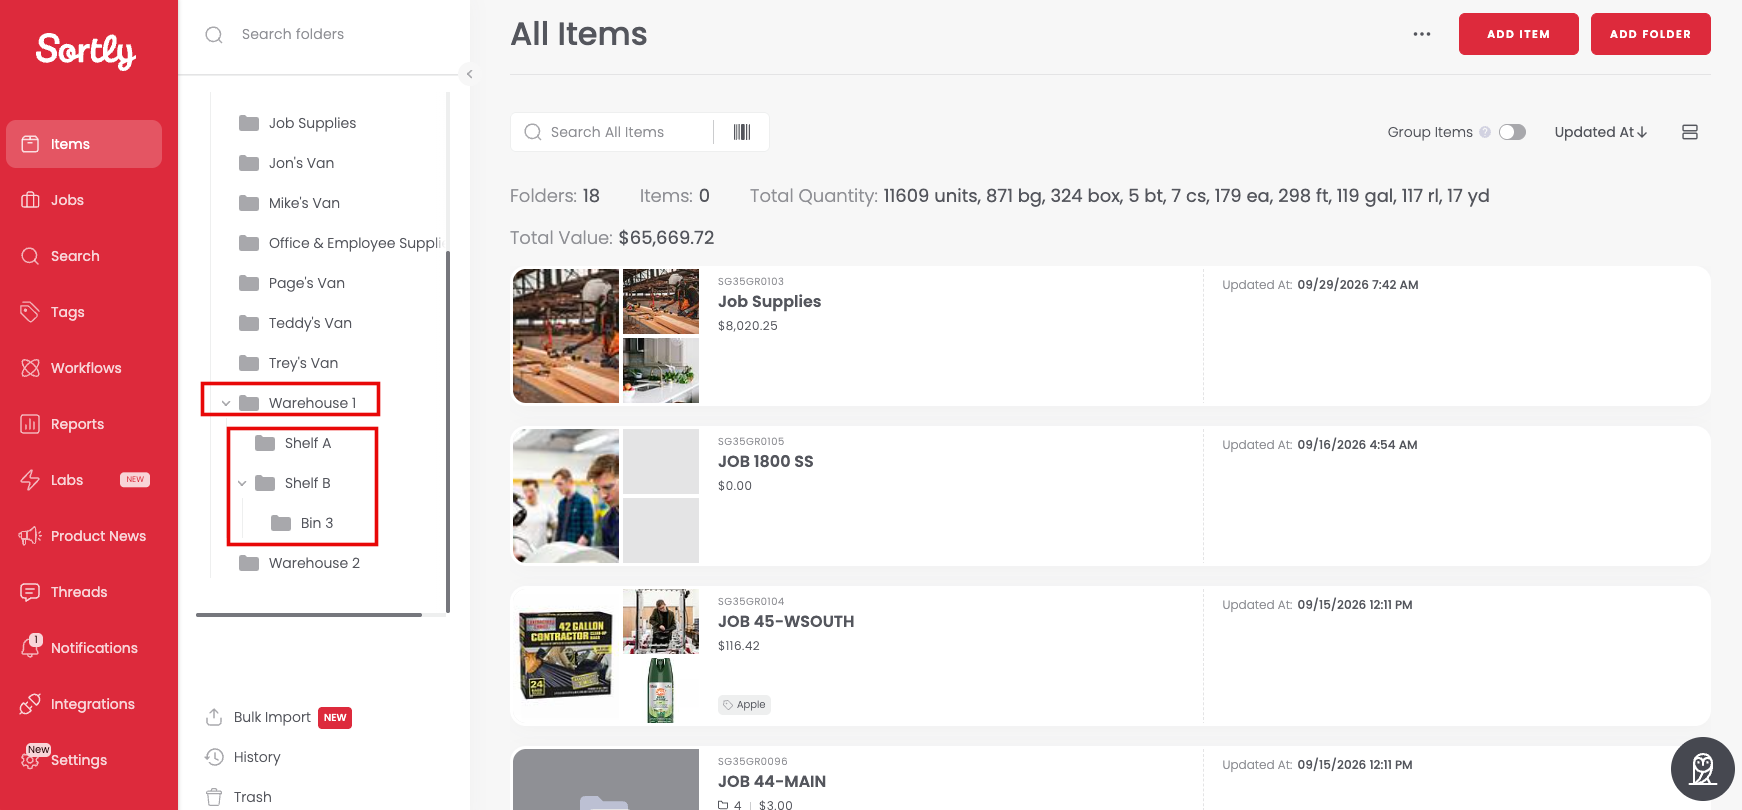
To build your structure, select Add Folder on the Items page. For step-by-step instructions, see How to Add Folders, How to Add Items, and Bulk Importing New Items and Folders.
Setup for tracking assets or consumption
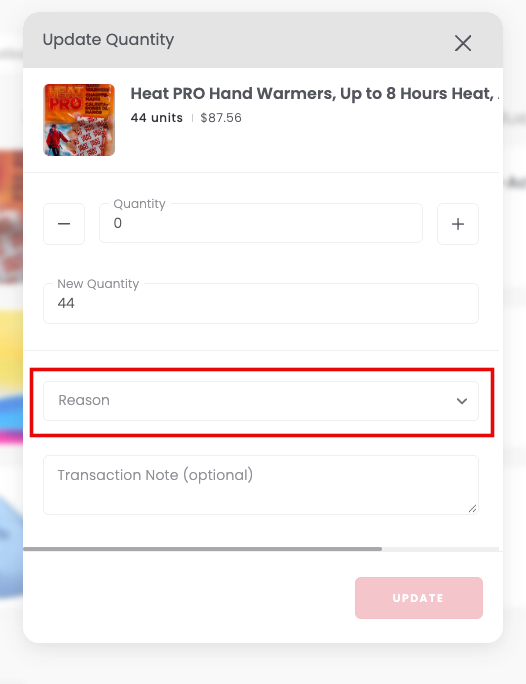
If you are using Sortly for consumption or asset tracking, rather than moving items between folders, update the quantities and give a reason for each change, such as consumed, sold, or restocked. You can also add custom reasons to fit your workflow. See Custom Transaction Reasons to learn more.
In the Update Quantity window, choose a Reason. You can also add a Transaction Note (optional) to capture further details about the quantity change.
You can then review your transactions by selecting Reports in the left menu, then Transactions.